Post by armchair general on Apr 27, 2017 20:21:17 GMT
Thanks! I will be adding even more scenarios that go all the way back to the Avalon Hill Forum, but never made it to the original Forumini. Der Leiter, in my opinion, was one of the best scenario writers on that Forum, but a lot of his work never migrated over.
Also, and most importantly, THANK YOU for your service!
Post by armchair general on Apr 27, 2017 20:14:00 GMT
[NOTE: This is part of the continuing project of migrating as many of the scenarios from the original Forumini to the NEW one.]
[originally posted by Snippersly in December 2009....another great scenario from Snips!]
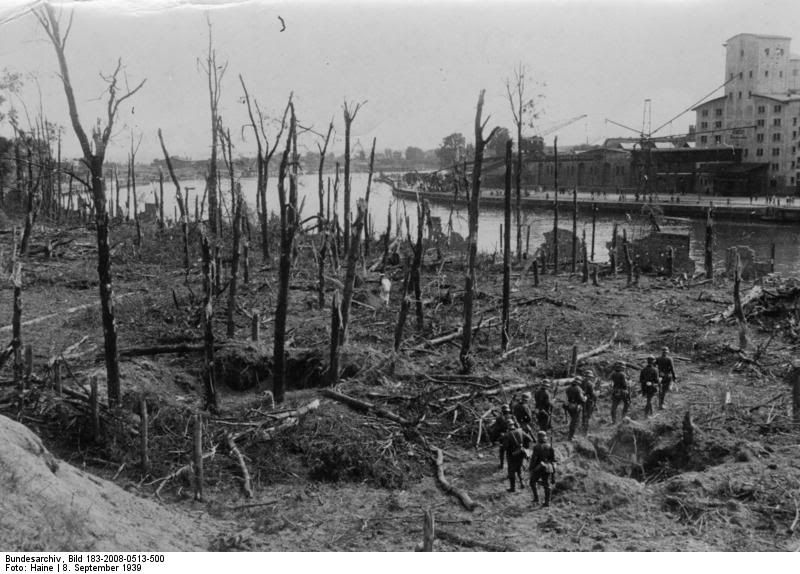
Battle of Westerplatte September 1-7, 1939
The war in Europe begins...
The Battle of Westerplatte was the very first battle that took place after Germany invaded Poland. During the first week of September 1939, a completely surrounded Military Transit Depot (Wojskowy Sklad Transportowy) on the peninsula of Westerplatte, manned by less than 200 Polish soldiers, held out for 7 days. Their original orders were to delay the Germans for 12 hours. Facing an overwhelming force of 1000 German invaders who attacked from the air, land & sea, the heroic defenders stood their ground in 5 concrete bunkers.
The Heroic defense of Westerplatte served as an inspiration for the entire nation. In Poland it is still regarded as a symbol of the invasion and national pride. Several schools and ships have been named, "Defenders of Westerplatte," and "Heroes of Westerplatte." The battle also inspired Polish poet Konstanty IIdefons Galczynski to write "A Song of the Soldiers of Westerplatte." The site is now a museum, the doors of which are held open by a pair of 280mm shells fired from the German BB Schleswig-Holstein.
7 Turns
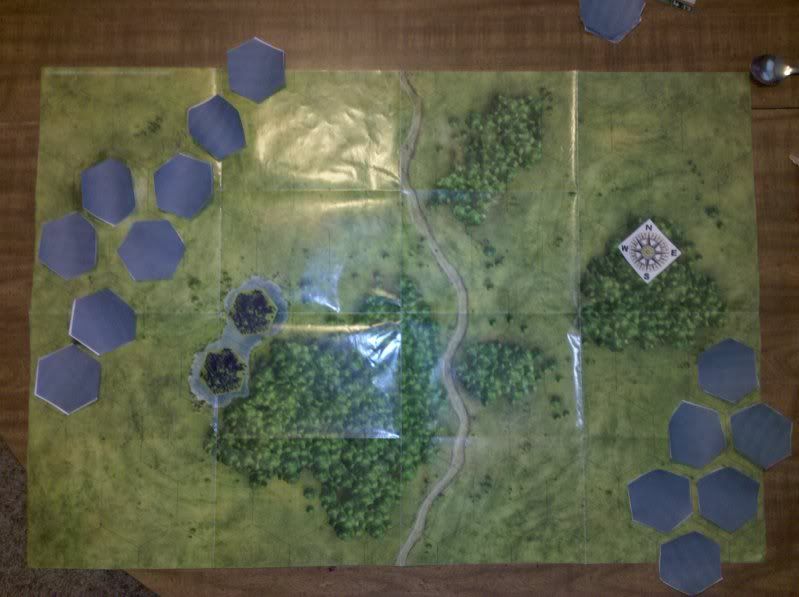
Maps: Map 3 with the #3 is the lower right corner. The #3 is the South East corner of the map.
Replace hexes with water tiles as pictured below.
Replace the pond hexes with forest tiles.
Setup: Polish defenders place 5 pill boxes in any forest hex and place barbed wire defense anywhere on the map except the road hexes. Polish forces then deploy in or adjacent to the pillboxes in any forest hex.
German forces enter on the south ege of the map, at the start of Turn 1. German Marine Stormtroopers begin on the Schleswig-Holstein and deploy from there at the start of the movement phase on Turn 1.
For those with a model of the Schleswig-Holstein, place it in the full water tile hex north and west above the #3 on the map. If you do not have a model, any marker will do to represent the battleship. The battleship cannot be attacked by Polish Units.
Polish Forces:
Henryk Sucharski & Franciszek Dabrowski Polish Officer X2 Determined Infantry X4 Polish Mauser X4 wz.36 37mm ATG X2
Light MG Proxy- France- Hotchkiss MG X2
Heavy MG Proxy- Sandbagged MG Team X2 4/4 Defense Only!!
Medium Mortar Proxy- Germany- medium Mortar X2 - Add range of 8
75mm AT Gun Proxy- Russia- 76.2mm Model 1942 AT gun
81mm Mortar 20mm Flak 7.5CM LEL G18 X2 Pak 35/36 Opel Blitz Truck X2
StG Immelmann Luftwaffe JU 87B Stuka
SS Heimwehr Danzig - Enters on Turn 4 SS-Haupsturmfuhrer Motorized Schutzen X3 MG34 (proxy Finnish MG) ADGZ Armored Car (proxy-Panzerspahwagen P204(f) X2
Special Rules:
Radio Free Poland!- As the battle progressed, the amazing defense put on by the soldiers was broadcast as an inspiration to the country over Polish radio. As a result, the defenders, inspired, stood firm and fought on. At the start of every movement phase, remove any face up disrupted counters from Polish Infantry (soldier) units.
Pre-sighted Mortars- A well prepared defense gave the Polish mortar crews a pre determined firing solution of the area. Polish mortars do not need line of sight nor a spotter to engage a target within range. Polish mortars also gain Blast SA.
Schleswig-Holstein Shore Bombardment- On Turn 1, at the beginning of the assault phase, the battleship will open with a salvo of 280mm shells. This attack ignores cover and hits each unit in the hex (Blast SA) The BB can target any hex on the map. The stats for the attack are as follows:
Short Range is 1-3 Hexes for an attack of 12 dice
Medium Range is 4-7 Hexes for an attack of 10 dice
Long Range is 8-12 hexes for an attack of 8 dice
On Turn 4, the Schleswig-Holstein can fire a second salvo.
Victory Conditions:
German- Smash the defenders of Westerplatte and hold all 5 pillboxes by the end of Turn 7.
Poland- Stop the German army and defend to the last man. Hold 3 of 5 pillboxes by the end of Turn 7.
Capitulate- If the Germans capture 4 pill boxes before the end of Turn 7, all remaining Polish forces will surrender.
Post by armchair general on Apr 26, 2017 19:30:39 GMT
[NOTE: This is part of the continuing effort to migrate as much of the scenario material from the original Forumini (who had migrated material from the original Avalon Hill Forum) to this new Forumini].
[Panzerpainter posted this on February 19, 2010]
"I asked in another forum if the Polish had flamethrowers. I found out that they DID. But not in their regular armies brief life span. A clever Polish underground made plans for a home-made flamethrower that could be easily made by most people, from items that were common enough to be found by most people. The Polish resistance passed these plans around and many were made. Limited success was achieved. As a result of this info, I added flamethrowers to my Polish forces, but only with the underground. In my games, Polish can be used in 2 forms - standard Polish army only, Polish underground only, no mixing of underground or regular forces. The Polish underground makes for great scenarios. I start out with Germans in control of a town, with a few vehicles, and mostly troops. Scattered throughout the town are the underground mixed in with Polish civilians. Only the Polish player knows who is underground and who is citizen. Germans may not fire on any Poles unless one of them gets within a hex of a commander (these guys get trigger fingers and shoot any Poles that get too close - but this does not trigger the full battle yet), or the Polish player opens fire. As soon as the Polish player opens fire, he removes all citizens and the game is on. Polish underground can use normal weapons immediately, but if they are using heavy machine guns or flamethrowers, they are required to spend a turn equipping themselves. Any underground soldier who equips himself with either of these weapons must be out of sight from any Germans if the cat has not yet been let out of the bag. Otherwise, if the Germans see any Pole equip himself with flamethrower or heavy MG, the gig is up and the battle starts. So flamethrowers must slip away slightly just before attacking.
The game uses a bit of the honor system. The Germans have a considerable point advantage, so the Polish player must inflict a lot of damage suddenly. But with flamethrowers, they have a chance of crippling the heavier vehicles. Molotovs will work on trucks and very light armor. The Germans that survive the initial attack will cut through the underground like a hot knife through butter, so that one turn is critical. All the Germans can do, before that first shot, is try to maneuver away from concentrations of Polish. The Poles try to mix in with the Germans as much as they can. While this is going on, the Germans can use their commanders to "thin the heard", firing on any Poles they can get close to. So the Polish player can't take too long to spring the trap, or too many Poles will have been "arrested" between the eyes."
Unfortunately, Panzerpainter never finished the project (hmmm, might be because he's the best painter I've ever seen and was constantly in demand on the old Forumini), but I wanted to post it here for several reasons. One, to proudly show the ingenuity of the Polish people (see pic of flamethrower below); yes, I AM 50% Polish in case you're wondering. Second, I also migrated this thread in case someone would like to run with it and turn it into a scenario. I think this might have the makings of a Warsaw Uprising scenario(?). Come to think of it, Sharpe created some cards that might make this whole thing work. This will have to wait until the school year is over though. In the meantime, if you have any ideas, please feel free to share!!
Post by armchair general on Apr 26, 2017 1:03:24 GMT
Also, I should be able to migrate most if not all of the scenarios. I'm doing 1 a day until the school year ends. When it does at the end of May, I should be able to spend several hours per day moving stuff. If nothing else, I think I had them all printed out anyway. I could slowly but surely get them all up.
Post by armchair general on Apr 25, 2017 19:05:52 GMT
[Note: This is part of the on-going project of the NEW Forumini of recovering as many scenarios from the original Forumini as possible before we lose them forever. Considering the date this was made, this scenario might need some updating. As always, feedback is welcome!]
Originally posted by Der Leiter 06-27-2006 in the old AH forums
[note by Neural Dream: This is part of the forumini project of recovering the most popular scenarios and campaigns from the old forums to an active forum instead of letting them die in an archive. I haven't asked all authors' permission for re-posting their brilliant work, since many have now left the community and cannot be contacted.]
OPERATION BREVITY - FORT CAPUZZO
BACKGROUND
Operation Brevity was the Allied attempt by XIII Corps to relive the Siege of Tobruk. British forces arrive piecemeal, and the Italian Forces at Fort Capuzzo, despite being poorly trained and equipped manage to inflict significant damage on the 7th Armour Division until they were finally overrun. Despite these initial successes, Operation Brevity was doomed to be a failure and the Siege of Tobruk would go on.
CHOOSING SIDES & BUILDING ARMIES
For a 2-Player game roll off 2D6; the higher number is Britain and the lower is Italy.
The British player is the attacker, and selects three waves of 50 points each.
(eg Wave #1 is a Mechanized Infantry Section + Crusder II Section)
The waves must be set aside and designated clearly - see GAME MAP & DEPLOYMENT for more.
The Italian player is the defender, and builds a 75 point defencive force.
GAME MAP & DEPLOYMENT
Create a 2x2 map, with the following guidelines:
Charlie-2 is placed in the SE corner; the 6-hex hill formation is Fort Capuzzo.
Ignore all non-Hill terrain on maps; there are no roads.
The attacker places the NW map of his/her choice, then the defender places the SW and NE maps.
The defender can place units anywhere, but most start with at least one Platoon/Section in Fort Capuzzo.
The attacking units arrive from the map edges along the NW map; before initiative is rolled if reinforcements are due to arrive then place them on any full hex touching that map edge.
The attacking player picks the initial attacking wave. Following waves arrive on turns #3, #5, and #7.
These waves are picked randomly
OBJECTIVES
The game lasts for 8 turns.
If at any time the Allies control all of Fort Capuzzo they win.
At the end of the 8th turn each side scores 2 points for each Fort Capuzzo hex they control, and the defenders score 1 point for each they contest. The attacker scores no points for merely contesting a hex.
Disrupted units can only control or contest the hex they are in.
BRITISH ARMY
COMPOSITION
Armour 75 - 100 Points
Support 0 - 25 Points
Infantry 25 - 75 Points
INFANTRY
(25 Points) Rifle Platoon
1x Vickers MG Team
1x Bren Gunner
3x Gurkha Rifle
(25 Points) Mechanized Infantry Section
2x Universal Carrier
2x Gurkha Rifle
(50 Points) Mechanized Infantry Platoon
4x Universal Carrier
3x Gurkha Rifle
1x Bren Gunner
(25 Points) Recon Section
3x Humber Scout Car
ARMOUR
(50 Points) Tank Section
3x M3 Stuart
You may exchange one M3 Stuart for a Valentine II
(25 Points) Crusader Section
3x Crusader II
SUPPORT
(25 Points) Elite Mechanized Infantry
3x Universal Carrier
2x Veteran SMLE
1x Vickers MG Team
(25 Points) Command Tank
Valentine II (Cromwell IV)
Use a Cromwell IV to represent this unit, but use the Valentine IIs stats. Treat this unit as having the type "Tank - Commander" and with the Command Ability "Initiative +2"
(25 Points) Mechanized AA Battery
1x Bofors AA
1x Universal Carrier
ITALIAN ARMY
COMPOSITION
Armour 0 - 25 Points
Support 0 - 25 Points
Infantry 50 - 75 Points
INFANTRY
(25 Points) Anti-Tank Gun Battery
2x PAK 38 OR 1x 88mm Flak 36
1x Vigilant Lieutenant OR 2x Brixia Mortar
(25 Points) Rifle Platoon
1x Stalwart Lieutenant
2x Brixia Mortar
4x Fucile Modello 1891
ARMOUR
(25 Points) Tank Section
2x Carro Armato M13/40
1x L3/35 OR Panzer II C
You may replace one Carro Armato with a Panzer III F
Post by armchair general on Apr 24, 2017 20:38:57 GMT
[In 2009, Sturmvogel asked]
In this scenario are there any other hexes, besides jungle hexes, that are considered tundra hexes? Thanks.
[Snips response]
The Jungle are Tundra - the lighter green are trees / forestr hexes and the rest is muddy ground. It's ALL Alakan Tundra but on the the hexes specified have the abilities defined above. I was trying to keep it simple, but if it doesnt work out, Houserule it!
Post by armchair general on Apr 24, 2017 20:34:38 GMT
[NOTE: This is part of the continuing project to rescue as many scenarios from the original Forumini as possible. This was originally posted by Snippersly on December 4, 2009].
F3 map with the number in the LR corner. This ocean/water is the East and represents Massacre Bay.
F1 map with the number in the UL corner. Replace the three mud hexes in the center of the map with Mountain Tiles to represent Cold Mountain.
F2 map with the number in the UL corner. The corner with the number is the North Edge.
Jungle Hexes are now Tundra Hexes
Tundra- No cover for large artillery. Soldiers can enter without penalty and have cover on a roll of 4+. Does not block Line of Sight. The darker green scrub hexes are Tundra, the lighter green hexes are forest/tree hexes.
Mountain Terrain Vehicles and Soldiers must make a movement roll to enter a mountain hex. Mountain Hexes are double cost for vehicles. LOS is blocked by a Mountain. Vehicles & Soldiers have cover in a Mountain Hex.
Setup: Japanese Set up Obstacles first and then artillery and soldiers in any hex on Map F1 & F3. Fanatics deploy in any hex on F3.
Castners Cutthroats can begin in any hex, not adjacent to an enemy, on Map F2 or F1, after the obstacles and Japanese forces are deployed.
Northern Force enters on any hex on the North edge of Map F2 on Turn 1 up to two hexes in from the edge.
Southern Force enters on any hex on the South edge of Map F2 on Turn 1 up to two hexes in from the edge.
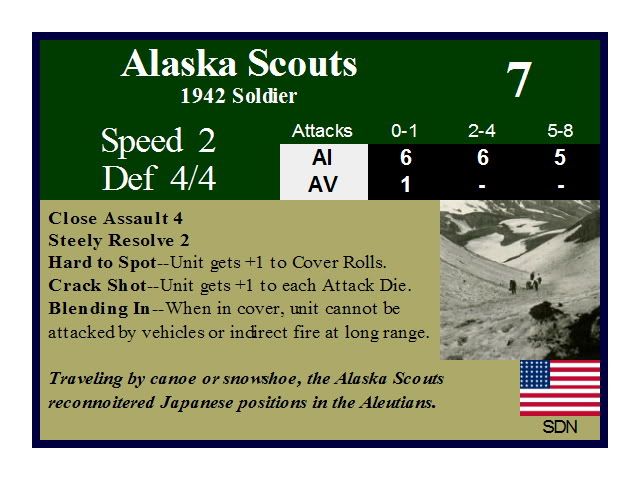
Alaska Scout X3 (27 Pts) CUSTOM CARD from the one and only Sharpedia!!
Proxy- Use Finnish Infantry for the most realistic looking piece. If unavailable, use Paratroopers or other 5/5 Infantry.
US Army 7th Infantry Division (183 Pts Total)
Northern Force - Lt. Colonel Albert Harti
1st Battalion of the 17th Infantry Regiment
Red Devil Captain (Proxy for Lt. Col. Harti) (7 Pts)
Resourceful Hero (8 Pts)
US Engineer (6 Pts)
M1919 MG X3 (27 Pts)
Untested Recruits X2 (4 Pts)
Hunting Sniper (9 Pts)
M1 Garand X3 (12 Pts)
M8 75mm Pack Howitzer (6 Pts)
Southern Force - Colonel Edward Earle
2nd & 3rd Battalion of the 17th Infantry Regiment & 32nd Field Artillery
Red Devil Captain (Proxy for Col. Earle) (7 Pts)
BAR Gunner X2 (8 Pts)
M1 Garand X2 (8 Pts)
Untested Recruits X2 (4 Pts)
M8 75mm Pack Howitzer (6 Pts)
M2 Mortar X3 (18 Pts)
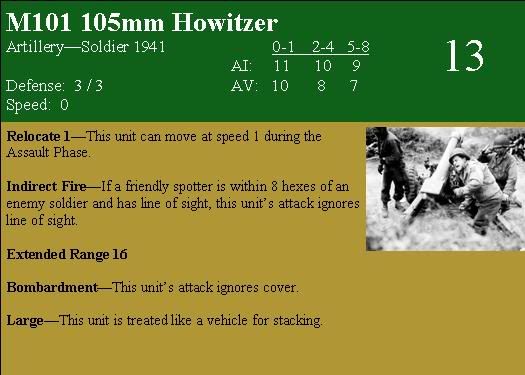
M101 105mm Howitzer (13 Pts)
CUSTOM CARD!!
Colonel Yasuyo Yamazaki (180 Pts)
Japanese 303rd Independent Infantry Battalion
Type 92 MG X4 (28 Pts)
Honor Bound Hero (7 Pts)
Imperial Sniper X2 (16 Pts)
Arisaka Rifle X4 (12 Pts)
SNLF Captain (Proxy for Col. Yamazaki) (6 Pts)
Type 89 Mortar X3 (27 Pts)
70mm Type 92 Artillery X4 (40 Pts)
Type 95 Ha-Go Tank (8 Pts)
SNLF Fanatics X3 (21 Pts)
Obstacles/Support pieces for Japanese Forces
Headquarters (7 Pts)
Pillboxes X4 (8 Pts)
Special Rules: All Japanese units, once placed, are "Dug In" and receive a +1 to cover rolls until they move. This +1 is not in addition to any unit in a Pillbox. (The two bonuses do not stack)
On Turn 7 - All Arisaka & Fanatic soldiers will execute an "Banzai Charge" on Turns 7 - 10. If not in range, they will move at every opportunity until they can execute a Banzai Charge.
-Non Artillery Soldier Units can move into an enemy unit's hex and then attack that unit. They get a +1 on each attack die for that attack.
Due to the muddy, thick muskeg tundra US Artillery are -1 speed in Tundra Hexes. If an artillery unit only has a speed of 1, roll a die. On a 1-2 it cannot move. On a 3-6 it can move at speed 1. This applies to movement phase and relocate during the assault phase. This only applies to Tundra hexes.
Spotters for Artillery: Any Commander can spot up to 4 hexes. Hero and Sniper Units can spot out to 8 hexes. They do not suffer from the chatting on the radio SA and can spot and attack in the same phase.
Victory Conditions: Total Victory: US Army: Push the Japanese Force into the bay and control Attu Island uncontested.
Partial Victory: US Army: Take Cold Mountain and hold it uncontested by Turn 9. Must kil 60% of Japanese force.
Total Victory: Japanese: Stop the Advance of the US Army by killing over 60% of the Allied Force, and holding Cold Mountain uncontested.
Partial Victory: Hold your position at Massacre Bay and kill over 75% of the Allied Forces.
Historical Outcome:
By the evening of May 31, the island was fully in American hands, but at a terrible price for both sides. Out of the Japanese defenders, 2,351 were killed and only 29 were taken prisoner. The American figures were 549 killed, 1,148 wounded and about 2,100 listed as casualties from exposure, trench foot and shock.
Post by armchair general on Apr 20, 2017 19:22:24 GMT
[from General Hoth, 2009]
To answer your questions:
1/ just the regular panzergrenadiers.
2/ only the hexes on map 1. It's funny you mention this as i only realised during my LAST playtest that this could have been an entrance hex too. I played without.
3/The trenches only add cover to the infantry. No malus for crossing them.
Post by armchair general on Apr 20, 2017 19:21:24 GMT
[from boersma8, 2009]
Played this scenario solo over the course of this week. It's definitely a lot of fun! It was a complete German victory at the end of round 8; but actually it had already become clear that this would happen by round 5 or so....What I really liked is the ability to quickly redeploy your forces being the Brits thanks to the tally-ho SA. It's also a great though simple idea to place one map partly over another one to create a different kind of map. So simple, yet I'd never thought of it, thanks!
First off a few questions:
1.) The German reinforcements, should they be SS panzergrenadiers or just " regular" ones as stated?
2.) When a hex is partially on map F3 and partially on map 1, can the Germans enter play there or does it need to be on any hex that's ONLY on map 1?
3.) Do the trenches work as is described on the back of the combat zone tiles, which is how I played (+1 on cover rolls for infantry, double cost terrain for vehicles with the high gear ability and a movement roll required for such vehicles) or do they simply and solely provide (normal) cover to infantry in your scenario?
4.) Do you roll for initiative normally on turn 1? (Important, because if the British win it, or start with it for sure, they can put some AT guns in overwatch which can make it much less appealing for the Germans to eneter play in certain hexes...)
The Germans opted for a two-pronged attack. They entered the western map edge with a flamepanzer, a Stug accompanied by several squads of infantry support and an SS haupsturmfuehrer. The rest chose the lonmg route: entering from the North map edge.
The British had set up a Vickers MG, an inspiring Lieutenant, 2 paras and a jeep and a universal carrier in the town of Oosterbeek itself.
The right flank was covered by the howitzer, an AT gun and 1 paratrooper and an officer. However, as noted above, the Germans did not enter the board here, so these units were not as useful as they could have been here. The rest of the English forces were deployed on the Western map edge, reday to meet-or so they thought-the German attack, which indeed concentrated on that flank.
The British were well entrenched on the left flank, but neverthless the Germans quickly made some incursions into their lines. Overhead an ME262 and a Spitfre fought an air duel which resulted into the ME262 scaring off the Spitfire for the time being (disruption). The British forces in oosterbeek retreated from the village proper upon seeing the superior number of German forces headed towards them. The officers in charge felt they'd better defend the ferry landings and buildings close to it (because they yield more points at the end; perhaps they should've made a stand here in hindsight).
Since the Germans had won initiative (they actually did constantly but once), no British units could be placed on Overwatch to make movement hazardous for the German armour. This wasa reoccuring problem for the British.
For a long time the battle seemed to be fairly even- the initial German penetration was somewhat halted by the timely arrival of the Polish reinforecements on the left flank (they had all arrived by turn 3) (also partly thanks to the way I played the trenches; +1 on cover rolls, which made them a better defensible position for the British). However, in the end (that is, from turn 4 or 5 onwards or so), German superior numbers began to tell: since they had encoutered only a small regard in oosterbeek proper, their main force had moved through the village practically unscathed. They were now beginning to get the other British units in their sights. The spotter meanwhile had been directing artillery fire against the left flank, aiding the German units there to push on. However, this offensive seemed to have stalled (SS leader dead on turn 1, rest, though they'd made it to the buildings and trenches, was constantly disrupted). Fortunately for the Germans the British there became a bit overconfident and tried to outflank the enemy ( i.e. create enfilade fire.) However, the one remaining non-disrupted German unit (Veterena infantrymen) disrupted all three units trying to pull this off, so rather than having superior firepower there, all the British really accomplished there is that nearly all their units on that flank were disrupted (too) and the (disrupted) SS stormtroopers now had ample units to use their ruthless SA against.
From that point onwards the battle became a slaughter. The Enmglish were eradicated at a very low cost for the Germans. A paratrooper trying to close assault a Panzer III flammenpanzer failed miserably twice (only three and two successes respectively resulting in two face up disruptions. A German MG which had by now become undisrupted dealt with the threat to the tank then. Th Spitfire also took out two manned German halftracks that had become a bit too brazen and careless. The British hero tried to defend the landings, but seeing himself hopelessly outnumbered, he opted to try and blow up a flammenpanzer nearby, but he was " killed" by defensive fire from an SS stormtrooper already in the same hex (face up disrution, face-down destroyed; lethal defensive fire from the expanded rules). So he did make it to the tank's hex, but managed to roll only 1 success out of 8 dice or so.!
In the end I guess 70% of the German force was still intact, although many of its vehicles had been damaged. The only British unit left was a disrupted AT gun.
Again, a very fun scenario. It does seem to be a bit hard for the British, though.
Post by armchair general on Apr 20, 2017 19:20:44 GMT
Battle Tips for Oosterbeek. [from General Hoth Sept. 7, 2009]
I find this scenario really interesting as the set up for the brits is hard and interesting and the arrival of the germans crucial. i hope these few notes will help you play out this scenario.
The 1st airborne:
Well, before set up you will have noticed that most of the points are on the southern part of the map. Keep in mind that all the city hexes on the map have to be occupied!
Choose well which units you will leave to defend Oosterbeek, worth 4 points in total. As the germans can enter the map pretty much anywhere apart from the Rhine banks i advise to leave at least a couple of AT guns in the town. They should cover all the german tanks advance routes.
A tactic, that worked well during the playtests is to reinforce your flanks with vickers mg teams and infantry. This will force the german to opt for the long approach to the Rhine through Oosterbeek instead of the flanks. Remember the scenario lasts 8 turns.
The combo Jeep/ inspiring lieutnant is great to get your polish infantry up to where they'll be needed most (hoping that: 1/you have lucky dice rolls for reinforcements and 2/that the poles will not be forced to defend the ferry landings! I've seen it happen.)
Nevertheless you have a strong army, even the poles have great short range attack and SA.
KG Von Tettau:
As the german player you have 3 options for entry on the map:
-A strong attack on both flanks is the most obvious one as it will get you close to the victory points. It is also the more risky one for your infantry as the red devils will shoot your assault troops right in the open. But with a bit of luck it could well work and disorganise the british defence. With this option your flame panzers will have every oportunity to burn out british strongpoints.
-What i call "the long route": an assault from the North only. It will certainly save you a lot of infantry, give you time to set up your howitzers nicely and secure Oosterbeek. If you choose this, make sure to silence the british anti tank guns first and use your sdkfz 250 to move ss stormtroopers forward!
-A combined assault on one of the flanks (probably the eastern one) with a second assault team coming from the North. I did try this option a couple of time and it worked due to accurate stug fire on british batteries. The only problem with this option is that the red devils might manage to break one of your assaults and then the second one will be doomed too!
Overall you have a tough job to do.
Historically, the german assault failed but the red devils withdrew later that night across the Rhine, leaving only the wounded and medical personnel to defend the perimeter. As Manstein would say: A lost victory.
Post by armchair general on Apr 20, 2017 19:18:27 GMT
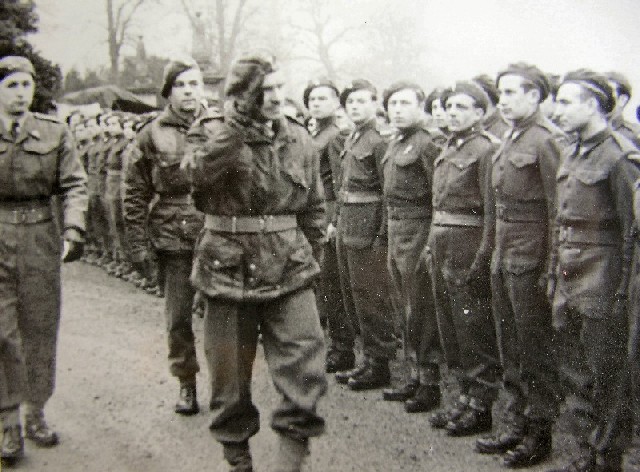
General Sosabowski inspecting his Polish 1st Independent Parachute Brigade.
[NOTE by armchair general: This is part of the continuing forumini project of recovering the most popular scenarios and campaigns from the old forums (myfast forumini and Wizards of the Coast before that) to an active forum instead of letting them die in an archive. Since many scenarios were written years ago, this one may need some updating. As always, your feedback is welcome!]
The Oosterbeek Perimeter, West of Arnhem, 25 September 1944.
Despite securing the North edge of the road bridge at Arnhem the British 1st airborne division, also known as the Red Devils, soon found itself under severe pressure from the 2nd SS Korps. General Horrocks sensing that he might just get a bridgehead over the Rhine despite the general worsening situation ordered the recently dropped Polish Brigade to cross the river by boat and reinforce the Red Devils at Oosterbeek. This boat assault would prove costly.
At the same moment in Arhnem, Bittrich, the German commander, sent his 9th SS division supported by most of the 2nd SS Korps artillery to eradicate the British threat to his right.
In Oostebeek, Urquhart's men were desperate for reinforcements...
Maps and Special set up notes:
North-Map 1- Map F3 with the river at the south end-South
Place Map 1 over half of Map F3
Creating the Oosterbeek perimeter:
Place city tiles over the jungle hexes. These are 3 british stongpoints worth victory points.
Place 2 city tiles right against the river in the middle of map 3. These represent the ferry landings worth points too.
Place trenches tiles over the forest hexes on map 3 for a total of 12 trenches. Trenches give cover to infantry only.
The line up:
British 1st Airborne division:
Set up on any city, trench or ferry landing hex with one restriction: all city or ferry landing hex on the map have to be occupied by at least one unit.
Inspiring lieutnant x2
Inspiring hero
defiant paratrooper x8
vickers mg x2
piat gunner x2
6 pounder AT gun x3
M8 75mm pack howitzer
jeep x2
universal carrier
spitfire mk1
Sosabowski's polish airborne brigade:
From turn 1 roll a dice: on a 5 or a 6, two polish determined infantrymen enter at the ferry landings.
Note only a maximum of 4 polish unit can enter the game.
KG Von Tettau, SS" Hohenstauffen" division:
Enter on turn one on any side hex of map 1. Half hexes are in play.
ss leader x2
veteran infantry x8
SS stormtroopers x6
Mg 42 x2
Stug III D x2
Flamepanzer III x2
disciplined spotter
sdkfz 250 x2
7.5cl LEL x2
Messerschmitt me 262
KG Frundsberg:
enter on turn 4 from any map 1 hex
Sdkfz 250 x2
panzergrenadier x2
Victory conditions.
Each Oosterbeek city hex on map 1 is worth 1 point.
Each city hex on F3 and each ferry landing hex is worth 2 points.
At the end of turn 8 the winner is the player holding more points.
Post by armchair general on Apr 18, 2017 19:56:23 GMT
[NOTE: Posted by Snippersley on the Forumini in March 2009]
This WAS going to be my entry for the Olympics, but due to certain restrictions I had to do something else. So here it is for everyone to enjoy. Please post battle reports!! Thanks.
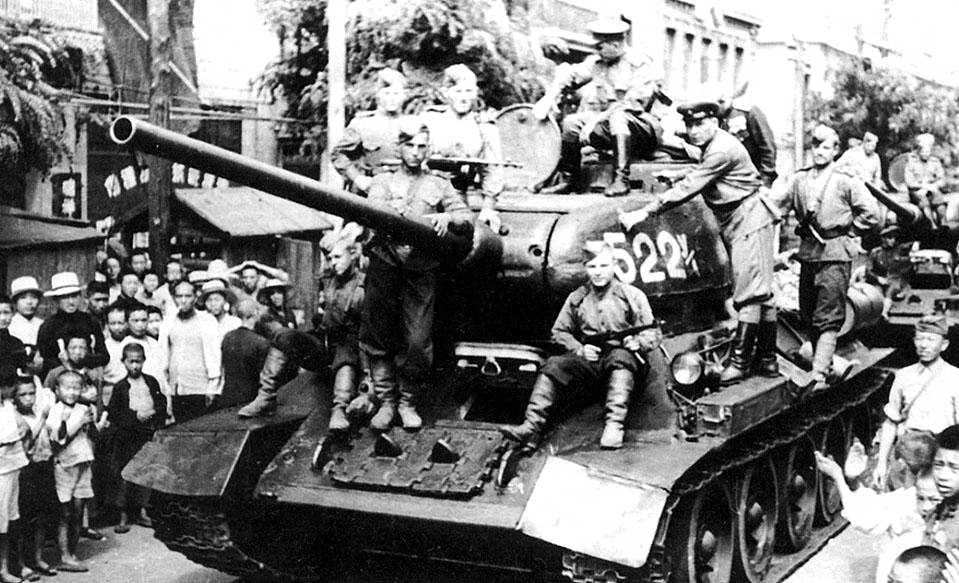
Manchuria: The Forgotten Victory
Designer Notes: The last real battle of WWII, and second only to Finland as a forgotten front, this is the final conflict that forced Japan to concede, and stretched Soviet influence into the far east. I put a lot of research into this battle, and hope that it shows as you play it out. I tried to include as many terrain features and major points of conflict as possible with the limited scope of units available in AAM. Though it seemed a lop sided conflict, and in many ways it was...Russian out numbered the Kwantung immensely, the Japanese refused to stop fighting. The end results of this battle conceded land back to China and laid the groundwork for the Korean War five years later. I hope you enjoy the scenario, this lost linchpin of history.
History: The Soviet invasion of Manchuria or Manchurian Strategic Offensive Operation (Russian: Советско-японская война), began on August 9, 1945, with the Soviet invasion of the Japanese puppet state of Manchukuo. The Soviets conquered Mengjiang, as well as northern Korea, southern Sakhalin, and the Kuril Islands. The operation is sometimes called Operation August Storm.
At the Yalta Conference, the Soviet Union had agreed to Allied pleas to terminate its neutrality pact with Japan and enter World War II's Pacific Theater within three months after the end of the war in Europe. The invasion began at dawn on August 9, 1945, precisely three months after the German surrender on May 8 (May 9, 0:43 Moscow time). This fell between the atomic bombings of Hiroshima on August 6 and Nagasaki on August 9. However, it is clear that news of the attacks on the two cities played no role in the timing of the Soviet attack. Although Soviet leader Joseph Stalin had not been told much detail of the Western Allies' atomic bomb program by Allied governments, he was nonetheless well aware of its existence and purpose by means of Soviet intelligence sources.
The Soviet Union formally declared war on the Empire of Japan on August 8, 1945 four months after the Soviets denounced the Soviet–Japanese Neutrality Pact signed in 1941.
Time:
August 9, 1945
Two days after the atomic bomb drop on Hiroshima, and the eve of the drop on Nagasaki.
Location: The Japanese puppet state of Manchukuo (Manchuria)
Maps:
Map #7 with the number face up in the upper left corner. The #7 on the map is the NW corner of the battlefield.
Map #4 with the number face up in the upper left corner, positioned below #7.
Setup:
The Japanese Kwangtung Army sets up first on Map 4 & 7 which smulates the town of Mutanchiang & the Central Valley. The Kwangtung sets up in the town hexes of map 7 and the hill hexes at the northwest (Up Left) corner of Map 4, and in the strong point. Forces can be divided any way the player likes. The Kwantung Army can deploy two Strong Point hexes anywhere in the valley on Map 4. The hill hexes on Map 7 are considered Mountain Hexes and represent the Khingan Mountains surrounding the Central Valley Plains. Strong Points and Obstacles are placed first, then army units.
Soviet Forces will deploy on the north west edge (top) of Map 7 behind the Khingan Mountains (hill hexes). The two Soviet Forces will be divided into two groups, the Transbikal Front and the Red Banner Army. The Transbikal Front begins on the NW corner up to 4 hexes south and three in from the west and the Red Banner Army on the NE corner in and behind the forest hexes up to two hexes in from the north edge and four in from the east edge.
Allied Army: Overall Command of A. Vasilevsky
Transbikal Front under R. Malinovsky.
Red Banner Armies (combined 1st & 2nd Far East Front) under Marshall K. Meretskov and General M. Purkayev.
Transbikal Front- Air Support:
Sturmovick 21 Pts
Infantry & Artillery:
Mosin Nagant X2 6 Pts
Maxim MG 7 Pts
Degtyarev DP-27 4 Pts
Veteran NCO 6 Pts
76.2mm Model 1942 9 Pts
Tanks & Vehicles:
T34/85 32 Pts
Zis 3-Ton Truck 4 Pts
SU-122 22 Pts
Katyusha 12 Pts
BA-64 Arm Car 8 Pts
Red Banner Army-
Air Support:
Yak-9 Fighter (Use Spitfire for proxy- Yakerspit!) - 14 Pts
Gains Rockets Attack of 8 dice once per game
Infantry & Artillery:
Mosin Nagant X2 6 Pts
Maxim MG 7 Pts
Degtyarev DP-27 4 Pts
82 MM Mortar 11 Pts
7.2mm Model 1942 9 Pts
Tanks & Vehicles:
T34/85 32 Pts
BA-10 12 Pts
Katyusha 12 Pts
Total: 238 Pts
Axis Army:
Kwantung Army under General Otsuzo Yamada
Air Support:
Shiden Kai (Represents Nakajim Ki-84) - 16 Pts
Gains Bomb attack of 8 dice once per game & Agility (4 hexes)
Infantry & Artillery:
SNLF Captain 6 Pts
Imperial Sgt 9 Pts
Type 97 AT Rifle (x2) 8 Pts
Ariska Rifle (x4) 12 Pts
Fanatics (x2) 14 Pts
Sniper 8 Pts
Type 89 Mortar 9 Pts
47mm Type 1 AT Gun (x2) 10 Pts
70mm Type 92 10 Pts
Type 92 MGun (x2) 14 Pts
Tanks: Type 97 Tankette (x2) 14 Pts
Type 95 Ha-Go (x4) 32 Pts
Type 1 Ho-Ni 12 Pts
Type 87 Armored Car (x2) 12 Pts
Obstacles:
Pill Boxes (x2) 4 Pts
Barbed Wire (X4) 2 Pts
Total: 192 Pts
Special Rules:
-All Russian Tanks have Exposed Transport 1
-Mosin Nagant, Degtyarev & Maxim do not have Command Dependent SA
-Japanese Artillery once placed are "dug in" +1/+1 Defense until moved, and do not have to be placed in a strong point hex to gain this advantage. They cannot gain an additional +1 if placed in a strong point.
-All Wheeled Vehicles have light towing - trucks have heavy towing
-Japanese deploys their strong point hexes and obstacles first...then units.
Victory Conditions:
SOVIET:
Major Victory: Soviet Armies control the town of Mutanchiang (uncontested) by the end of turn 7 and have destroyed 50% of remaining Japanese Forces in the valley.
Minor Victory: Soviet Army controls the town of Mutanchiang (uncontested) but has not destroyed 50% of Japanese Forces.
JAPAN:
Major Victory: Japan maintains control of (or contests) Mutanchiang by the end of turn 7.
Minor Victory: 50% of Japanese Forces survive at the end of Turn 7.