If anybody is interested in picking up some ships for a decent price, I just acquired a lot of Imperial ships (mostly earlier wave stuff). If interested, shoot me a pm with what you are interested in and I will see if we can come up with a deal.
I looked again and I am not sure if they offer grid hexes, but it might be worth it to contact them and see if they will do a custom print for you. I don't think shrinkage would be much of an issue with these.
Do I play the odds and choose the Yugoslav Partisan Infantry (because it seemed like I got at least one in every booster of Counter Offensive I opened) or go with something more sexy like an Elite Stug or Tiger?
Decisions, decisions......
Coin flip and the result is- Counter Offensive MG 34 Team
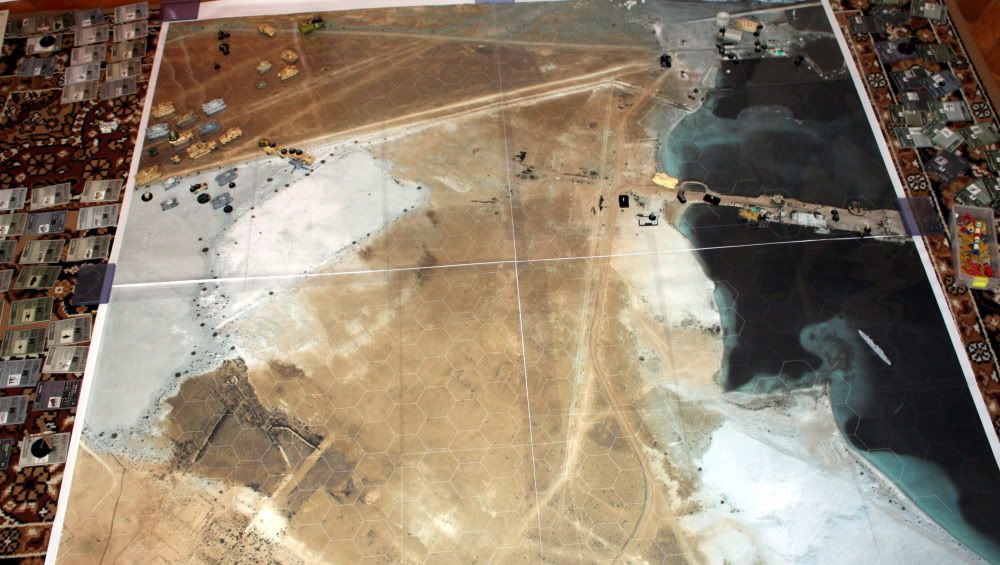
A new scenario - Operation Sunflower is more of a campaign following the arrival of Afrika Korps in Libya. For a better understanding print the scenario/campaign instructions below, because there are lots of details to keep track on. Following all the operations described below (Compass, Sunflower, Battleaxe, Crusader) you must know when to risk an attack and when to be conservative. Units that survive amongst these operation gain "veteran" like abilities.
Though it was difficult to balance this scenario/campaign, I am confident this was managed with success. Enjoy!
1.Background
In early 1941, British forces were engaged in Operation Compass, an attempt to drive the Italians out of North Africa. On 21st January 1941 the Australian 6th Division made an assault to capture the Italian garrison of Tobruk which offered one of the few good harbors between Alexandria and Tripoli. By the end of the first week in February, Operation Compass had resulted in the Italian forces being driven from Cyrenaica and in the surrender of the Italian 10th Army. However, the Allies were unable to take advantage of their victory. With the Italians close to collapse, the British Command calls to a halt the offensive in order to allow many of the most experienced British units to be moved to Greece to fight in the Battle of Greece. Meanwhile the Germans had started to concentrate in Africa the two divisions of the Afrika Korps under Erwin Rommel in an attempt to prevent total collapse of the Italian forces.
2.Allied Objective:
-Defeat the Italian garrison and capture Tobruk. -Maintain control of Tobruk in front of the imminent Axis attack. Support operations will be launched to reinforce the port, once captured from the Italians and to destroy any Axis presence in North Africa.
Maintaining the port of Tobruk is crucial to the Allied war effort. Other than Benghazi, Tobruk is the only other major port on the African coast between Tripoli and Alexandria. If the Allies lose it, the German and Italian supply lines would be drastically shortened. Operation Battleaxe is prepared in order to relieve Tobruk.
3.Axis Objective:
-Capture Tobruk and maintain control of the Port at all costs.
Axis forces are in no position to attack across the Egyptian border towards Cairo and Alexandria while Tobruk’s Allied garrison threatens the lines of supply to the front-line of Afrika Korps.
# Italian Garrison (81 pt) 3x Italian Conscript 1x Breda Modello 30 Lmg 1x Breda Modello 37 1x Stalwart Lieutenant 3x Fucile Modello 1891 1x Carro Armato 11/39 1x AutoBlinda AB41 1x L6/40 1x L3/35 1x Brixia Mortar 1x 47/32 AT Gun 1x Pillbox 1x Minefield 2x Barbed Wire If requirements met, may also deploy Italian Garrison Reserves.
On 21 January 1941 the Australian 6th Division made an assault to capture the Italian garrison of Tobruk. The Italian troops generally offered little resistance — large numbers surrendered without fighting. The Italian commander surrendered himself after only 12 hours, but he had refused to order the surrender of his forces, which meant that it took a further day to clean up any resistance.
# Australian 6th Division for Operation Compass (65 pt) 4x Veteran SMLE Riflemen 1x Australian Officer 1x Universal Carrier 1x Valentine I 1x 2-Pounder AT Gun 1x Wickers Machine Gun
In early 1941, British forces were engaged in Operation Compass, an attempt to drive the Italians out of North Africa.
# Allied Garrison (149 pt)
British 70th Infantry Division (127 pt): 1x Inspiring Lieutenant 4x SMLE No. 4 Rifle 1x Wickers MG 1x Inspiring Hero 1x Bren Machine Gunner 1x Sten SMG 1x Bofors* 2x 2-Pounder AT Gun 1x Bedford* 1x Universal Carrier* 1x Humber Scout Car* 1x Valentine I* 1x Minefield 1x Tank Obstacle* 1x Pillbox* 1x Ammo Dump* 1x Fuel Depot* 2x Barbed Wire * Heavy equipment: Can only be unloaded inside the Port of Tobruk.
The 6th Australian Division held Tobruk for over five months, before being gradually withdrawn during September and replaced by the British 70th Infantry Division, the Polish Carpathian Brigade and Czechoslovak 11th Infantry Battalion.
# Afrika Korps - DAK (256 pt):
22nd Panzer (225 pt): 1x Sdkfz 251 2x Pzkw 38 (t) 1x Panzer II F 3x Panzer III F 1x StuG III D 1x Elite Panzer IV D 1x Panzer IV E 1x Sdkfz 7/1 1x Kubelwagen V 2x Opel Blitz 3 Ton 2x Wehrmacht Veteran Inf 1x BMW R75 1x Sandbagged MG Team 4x Mauser Kar 1x Pioneers 1x 7.5 cm Lel G18 1x 88 w/Gun Shield 1x 81 mm Mortar 1x Head Quarters
Luftwaffe (31 pt): 1x Me Bf 109 E 1x Me 110
The Afrika Korps was derived and formed upon Adolf Hitler's personal choice of Erwin Rommel to its command on February 12, 1941. The German High Command had decided to send a "blocking force" to Libya to support the Italian army.
# Italian XX Motorized Corps (76 pt)
Ariete Divisione (pt): 1x Carro Armato M11/39 1x Carro Armato M13/40 1x Autoblinda AB41 1x L3/35 1x L6/40 1x Italian Alpine Troop 1x Stalwart Lieutenant 2x Fucile Modello 1891 2x Italian Conscript 1x Opel Blitz 1x 47/32 AT Gun
Regia Aeronautica (14 pt): 1x Macchi Folgore
From February 1941 to November 1942, the Ariete Division fought alongside the German Africa Corps in the North Africa campaign. Ariete was attached to the Italian Mobile Corps (Corpo d'Armata di Manovra Italia). This unit was later to become Italian XX Motorised Corps.
# Allied force for Op. Battleaxe (140 pt)
XIII Corps (140 pt): 3x Crusader II 1x Matilda II 1x Humber Scout Car 1x Universal Carrier 1x Bedford 1x Spitfire Mk.1 1x Bofors 1x 2-Pounder AT Gun 1x Wickers MG Team 1x Bren Machine Gunner 1x Gurka Riflemen 1x Inspiring Lieutenant 3x SMLE No.4 Rifle 1x Royal Engineers
Operation Battleaxe was launched in June 1941 with the goal of clearing eastern Cyrenaica of German and Italian forces; one of the main benefits of this would be the lifting of the siege of Tobruk.
# Allied force for Op. Crusader (228 pt)
XXX Corps (pt): 2x Crusader II 4x M3 Stuart 1x Matilda II 1x Valentine I 2x Universal Carrier 1x Determined Polish Infantrymen 4x SMLE Rifle 1x Gurka Riflemen 1x Wickers MG 1x Bren MG 1x Sten SMG 2x Inspiring Lieutenant 1x Royal Engineers 1x Bofors 1x 2-Pounder AT Gun 1x Bedford 1x Spitfire Ace If requirements met, may also deploy XXX Corps reserves.
Following the costly failure of Operation Battleaxe, Operation Crusader was launched by the British 8th Army between 18 November–30 December 1941. The operation successfully relieved the 1941 Siege of Tobruk.
# DAK and Italian XX Motorized Corps Reserves (64 pt): 1x SIG 33 1x Sdkfz 222 1x Light Mortar 1x Grizzled Veteran 1x Panzergrenadier 1x Veteran Carro Armato M13/40 3x Blackshirts If requirements met, may also deploy DAK and Italian XX Motorized Corps Reserves.
Opposing the Allied troops in Operation Crusader were the hardened veterans of General Erwin Rommel's Afrika Korps.
5.Scenario Plot
Deployment and Objectives:
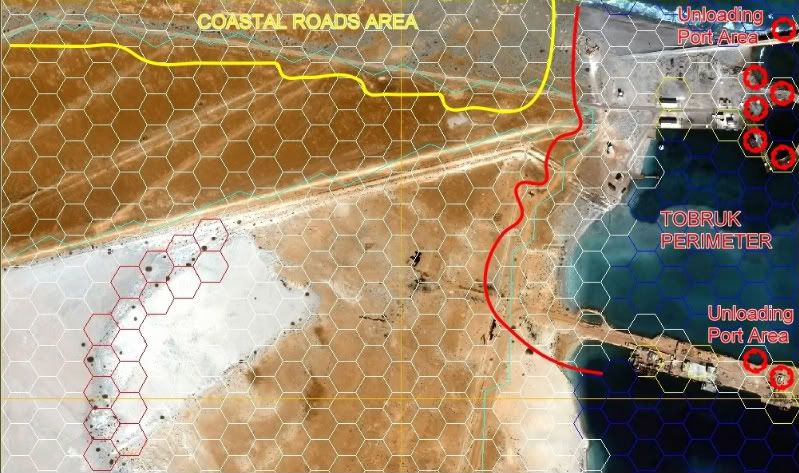
# Italian Garrison will be deployed first in its deployment area (“Tobruk Perimeter”) and cannot move outside it. Its objective is to inflict as much damage as possible to the attackers, the Australian 6th Division. If the Garrison holds and destroys all attacking forces, it will be reinforced by sea with Italian Garrison Reserves deployed in the marked area in the Port. The amount of reserves will be equal to the amount of enemy unit points destroyed, the Axis player(s) having the possibility to choose any Italian unit available until 1941.
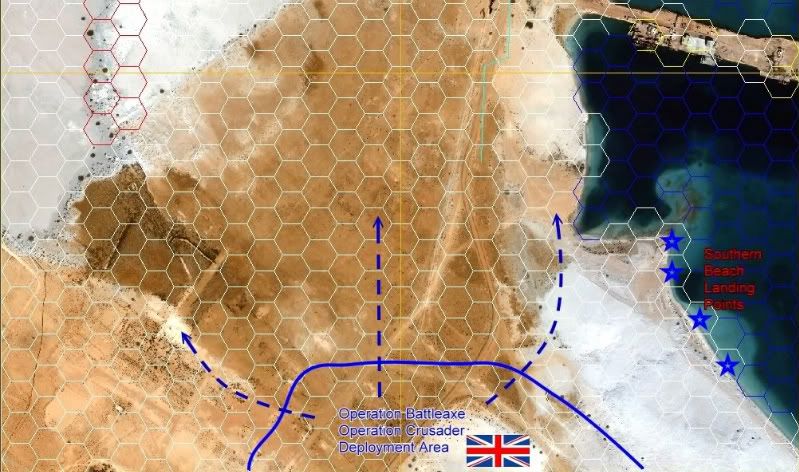
# The Australian 6th Division will deploy second, in its designated area. The Allied player must destroy all Italian Garrison units and still have at least one unit inside the “Tobruk Perimeter”, before the Port of Tobruk is declared conquered. Failing to do this, forces the incoming British 70th Infantry Division (that was supposed to form the Allied Garrison inside Tobruk) to land on the “Southern Beach” without the possibility to unload any Heavy Equipment (see deployment map). The player controlling Australian 6th Division must declare if his attack on Tobruk fails and retreat any forces inside the “Tobruk Perimeter” to the outside, in order to activate the incoming British 70th Infantry Division which will land in this case on the “Southern Beach”. If Australian 6th Division is successful and Tobruk falls into Allied hands, the Port will be reinforced by sea with British 70th Infantry Division which will form the Allied Garrison.
# The Allied Garrison will be deployed in the marked area in the Port (see deployment map). The new formation will deploy also an Ammo Dump and Fuel Depot - these support units will serve only the Allied troops inside the “Tobruk perimeter”. The Allied Garrison will have limited movement (only inside “Tobruk Perimeter”) until the deployment of the Allied force for Op. Battleaxe, after which is free to move and join operations with friendly Allied units.
# After the Allied Garrison troops are deployed (either in Tobruk or on the “Southern Beach”), the Axis players controlling Afrika Korps (DAK) and the Italian XX Motorized Corps are allowed to deploy in their designated areas. Their objective is to conquer the Port of Tobruk in 5 turns from deployment, if the Port is in Allied hands. Axis troops must try and capture the Ammo Dump and Fuel Depot, hence they will not attack these support units. The Port will be considered conquered if the Axis players place one unit on all target hexes inside Tobruk at the end of any turn, from the 5 allowed. If the port is conquered, the Axis players gain control of the Ammo Dump and Fuel Depot inside the port, all (existent) Axis Vehicles gain “Veteran Crew” Special Ability, all Axis Soldiers gain “Hardened Veteran” Special Ability, while all Axis Aircraft gain “Ace” Special ability and all Axis Artillery gain “Seasoned Crew”. If Tobruk is under Italian Garrison, the Axis players can choose which units (if any) to reinforce the Italian Garrison (the newly formed Garrison will be allowed to move outside the Tobruk Perimeter though and join friendly forces at will). In this case, the Axis players won’t receive any reinforcements or Special Abilities for the existing units. If the combined Axis force is able to destroy all Allied force for Op. Battleaxe, the Axis players win the game.
# Any Aircraft can be deployed starting with the 3rd turn after DAK deployment.
# Allied force for Op. Battleaxe (XIII Corps) will be deployed after 4 turns from the moment of the Afrika Korps deployment, in its designated deployment area. The objective is to destroy all Axis units present in the “Tobruk Perimeter” and “Coastal Roads Area”, in this case the Allied players winning the game. The Objective is considered achieved if no Axis units are present in the above areas at the end of any turn. The player controlling the Allied Force for Op. Battleaxe must declare if and when his attack fails and retire Op. Battleaxe units to the deployment area. The units once arrived in the deployment area will be taken out of play permanently at the end of the turn. If all units are destroyed and cannot retire to the deployment area, then Allies lose the game. Any Axis unit destroyed by the Allied Force for Op. Battleaxe will be added as available cost points supplement to the Allied force for Op. Crusader in the form of the XXX Corps Reserves. The Allied player(s) can choose from any UK, Australian, Polish or Free French units available until 1941.
# Allied force for Op. Crusader (XXX Corps) will be deployed if all previous attempts to destroy the Axis Units in “Tobruk Perimeter” and “Coastal Roads Area” failed. In order to win, all Allied units on the map must destroy all Axis units present in the “Tobruk Perimeter” and “Coastal Roads Area”.
# DAK and Italian XX Motorized Corps Reserves: deployed in the Afrika Korps deployment area immediately after the deployment of Allied force for Op. Crusader (in the same turn), as a last attempt to reinforce Axis presence in Africa. Part of the reserves can be chosen by the Axis player(s) from all Italian and German units available until 1941, consisting of the same amount of points as the enemy units destroyed starting with the 5th turn after deployment of DAK and Italian XX Motorized Corps. All reserve units do not receive any special abilities, than the ones they already have.
6.Dice modifiers / Units restrictions/ Color hexes:
- Fortifications, Obstacles and Traps once deployed cannot move - the player controlling the port controls them. If disabled, they will be removed from the battlefield.
- Minefield does not affect own troops.
- Naval Inland Bombardment: Allied player can choose any land target in the Assault phase and attack it with 10 dice. Special abilities: Inaccurate 1, Shrapnel 2, Blast and Bombardment. Range: 5 hexes inland from last sea hex. Available: in any turn in which the port is in Allied hands.
- Barbed Wire: deployment – on the intersection point of 2 hex sides, as a result both hex sides have this obstacle.
- Minefield: deployment – across a hex side, so being available in two hexes. Casualty: if an unit other than an Engineer, passes or stops in a minefield hex, it will roll a dice: on an “1” – mine ineffective, “2-3” – one hit face down, “4-5” – two hit counters face down, “6” – three hit counters face down.
- Tank Obstacle: deployment – across a hex side, so being available in two hexes.
- Cars (Jeeps): may carry up to 3 Soldiers – no artillery.
- Half-tracks: Halftracks with Gun Transport may transport any type of artillery.
- Engineers / Pioneers: if the unit enters a Minefield, Tank Obstacle or Barbed wire hex, the trap/obstacle is removed immediately from that hex, if the unit does not attack or move in the Attack phase.
- Color hexes: white - clear, yellow - city, red - hill, blue - sea, blue axis - road.
*Optional: use the Weather House Rule starting with the 3rd turn, for “enhanced” fun/realism – the Player that wins Initiative rolls a die, if it turns out an “1” you get “bad weather” and any airborne units can’t be deployed.
*Optional: For scenario enrichment use WAS Ships as symbols for the special off-board “Bombardment”. The ships can’t be attacked or the Allied players stopped from using Naval Inland Bombardment.
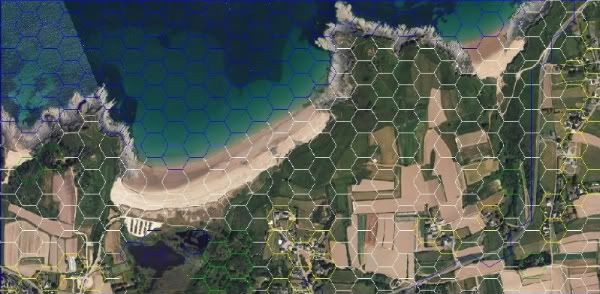
How to get the Map? The map for this scenario is available. For more information PM me.
7.Victory Conditions:
-If the Axis player(s) are able to destroy all Allied units from Op. Battleaxe, the Axis wins and the Allies do not deploy Op. Crusader units. -If the Allied player(s) are able to destroy all Axis units inside the “Tobruk Perimeter” and “Coastal Roads Area” during Op. Battleaxe, they win the game. If this is not the case, then the same victory condition is valid for Op. Crusader. If Op. Crusader fails to destroy all Axis presence in “Tobruk Perimeter” and “Coastal Roads Area”, the Axis player(s) wins the game.
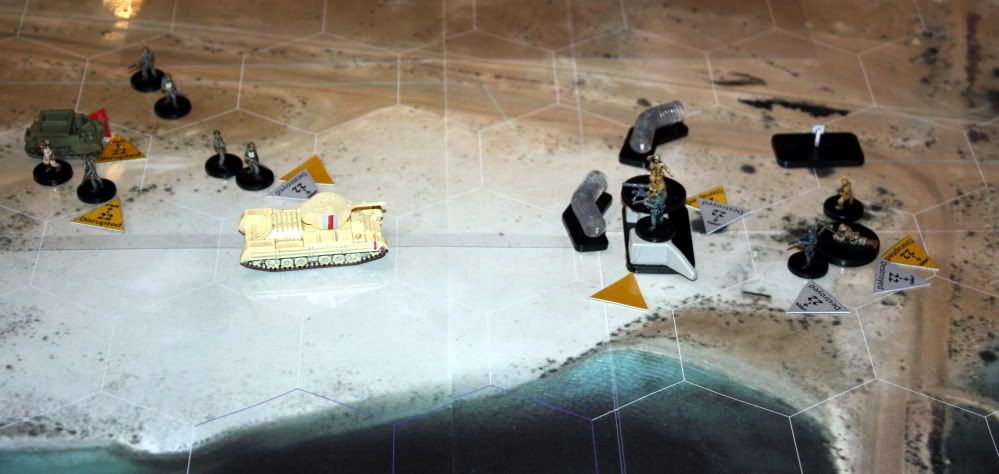
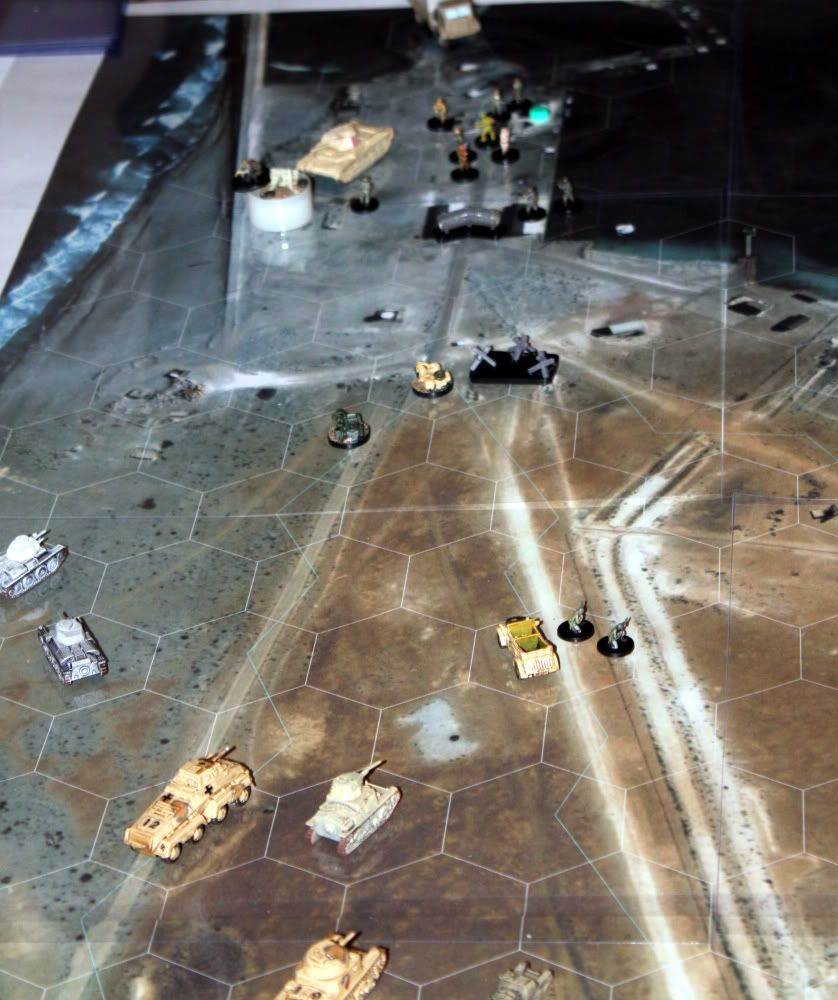
It all starts with Operation Compass, in which Australian 6th Division is on the mission to conquer the port (used some proxies for Australian veteran smle):
But the port is guarded by an Italian Garrison which takes in a lot of "damage":
Nonetheless, Australians find it hard enough to conquer the port:
After a quick two turns, Australians are at the outskirts of Tobruk and they defeat the Italian garrison:
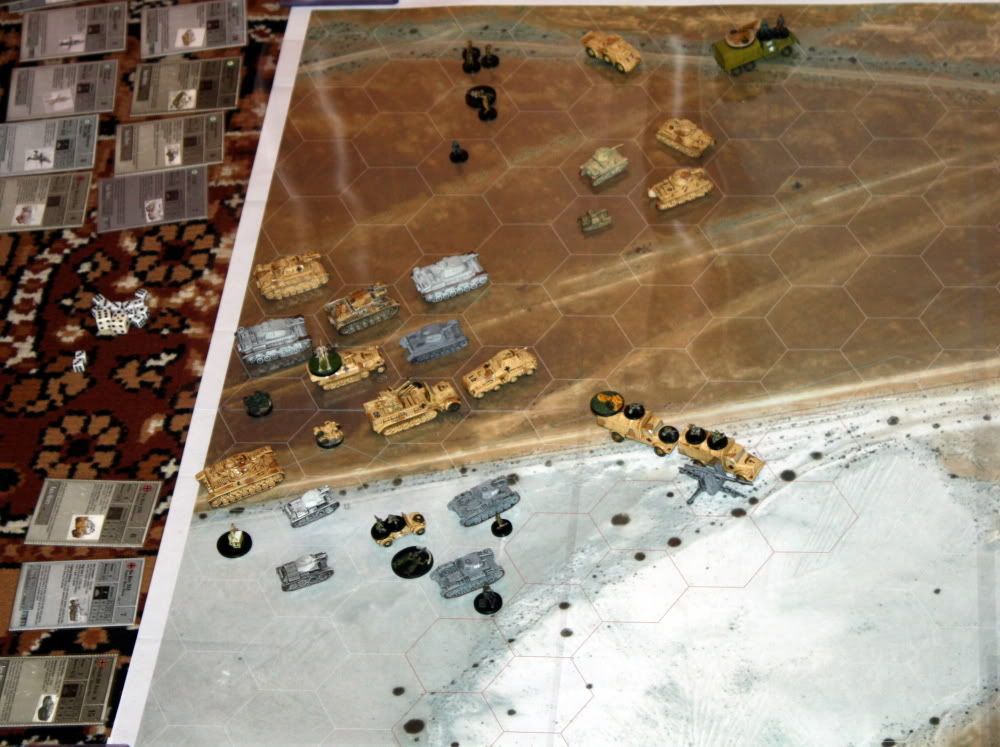
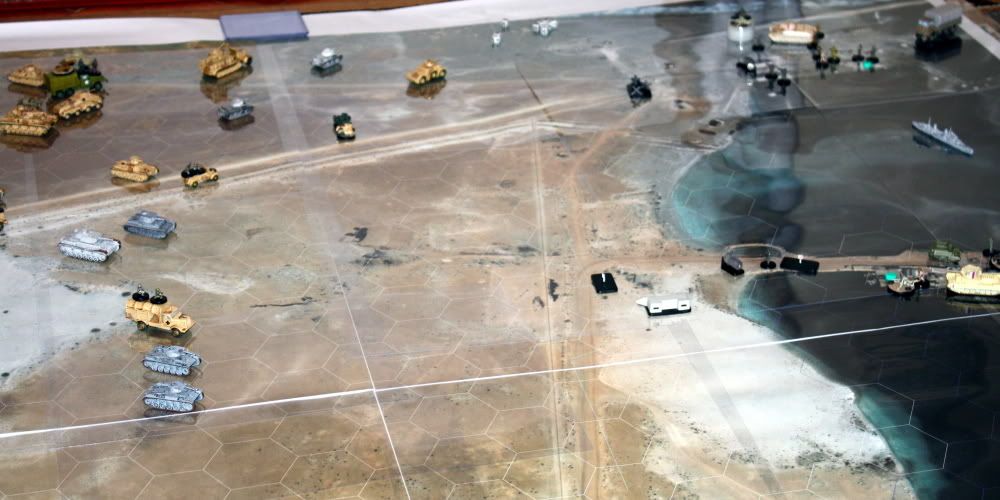
But then... wait!, something is wrong, from Berlin, Operation Sunflower means German support for the Italians XX Corps in Africa:
Meantime British 70th Infantry Division reinforce the Australians in Tobruk, alongside the Polish Carpathian Brigade:
The Axis will try to take back Tobruk at all costs:
So, the assault on Tobruk starts:
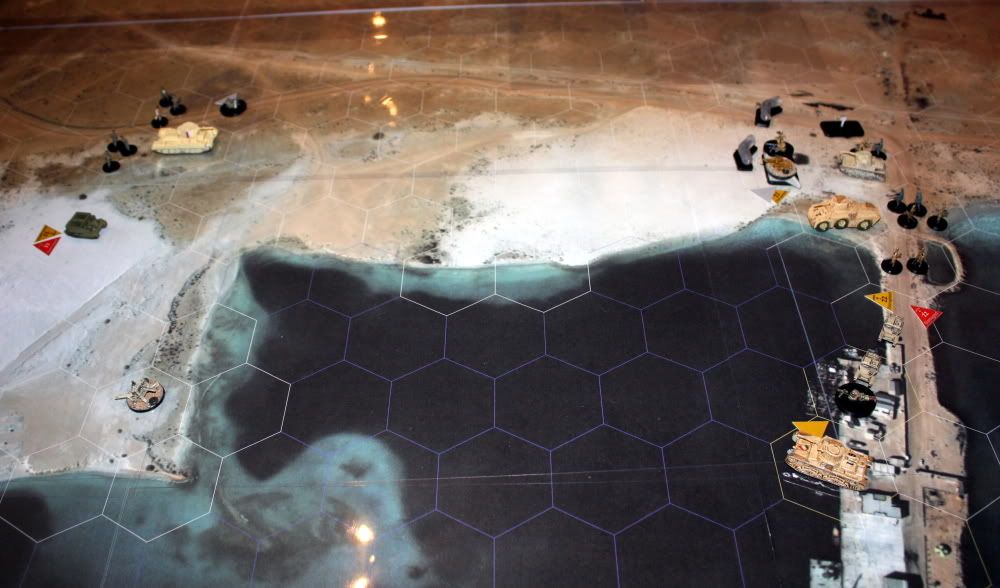
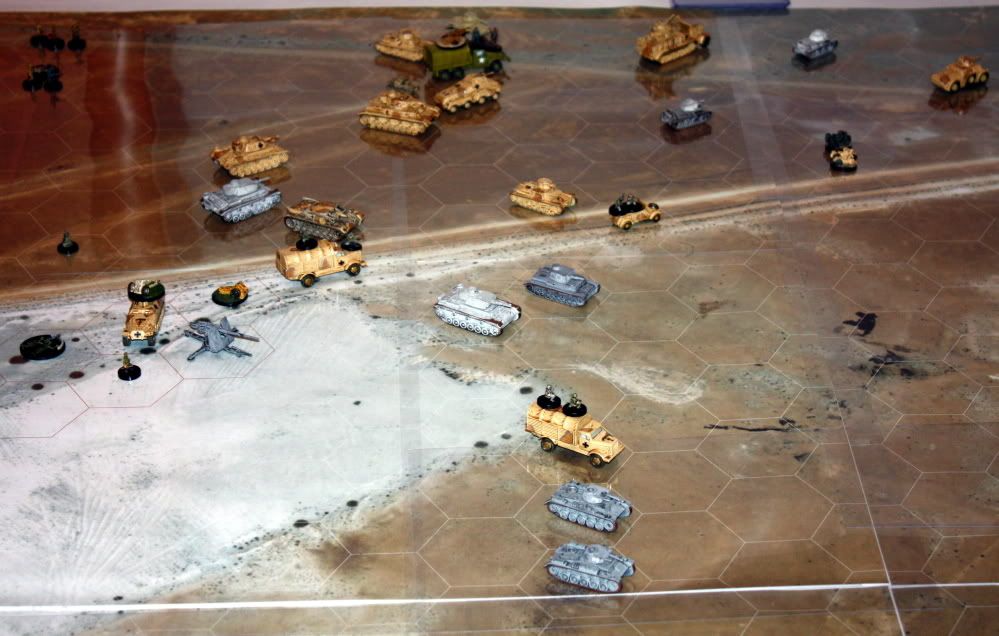
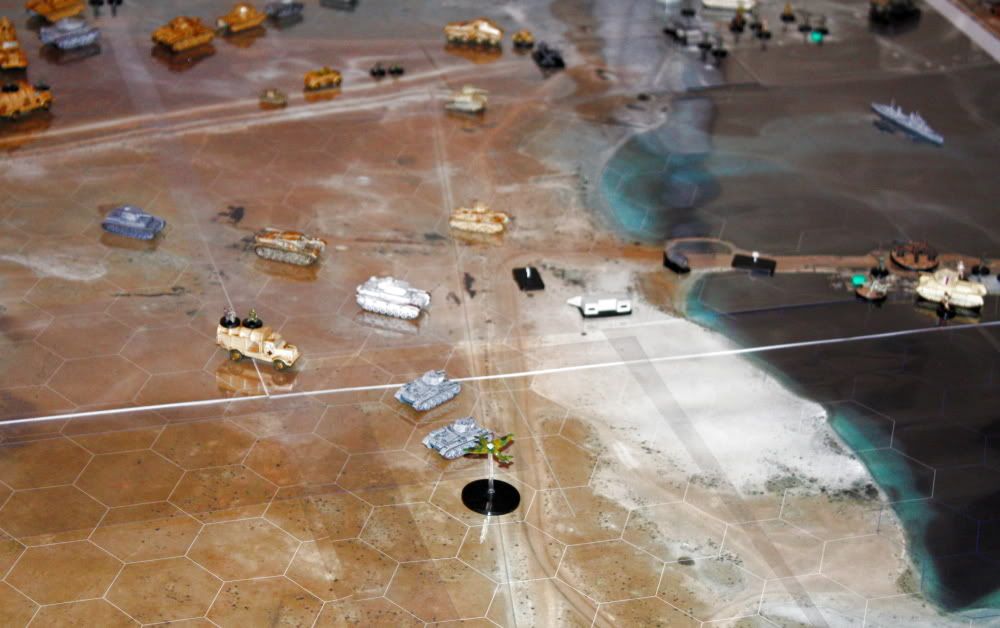
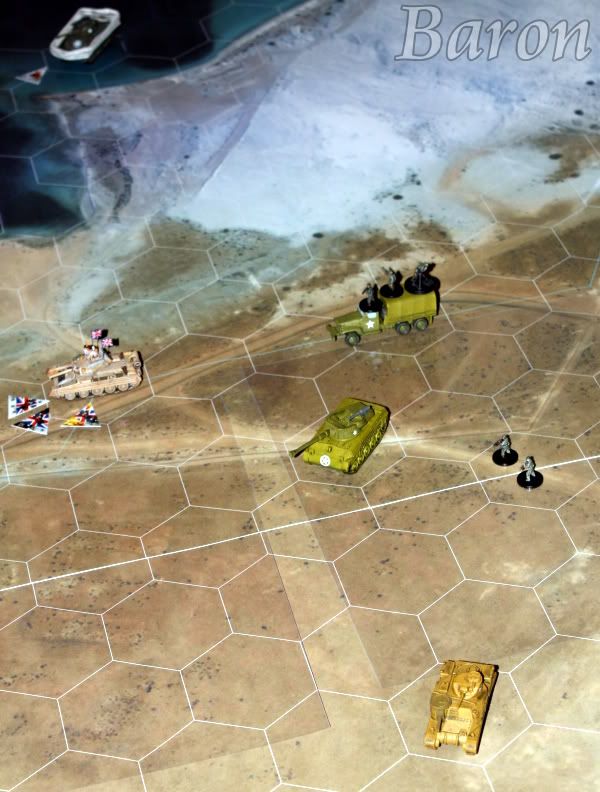
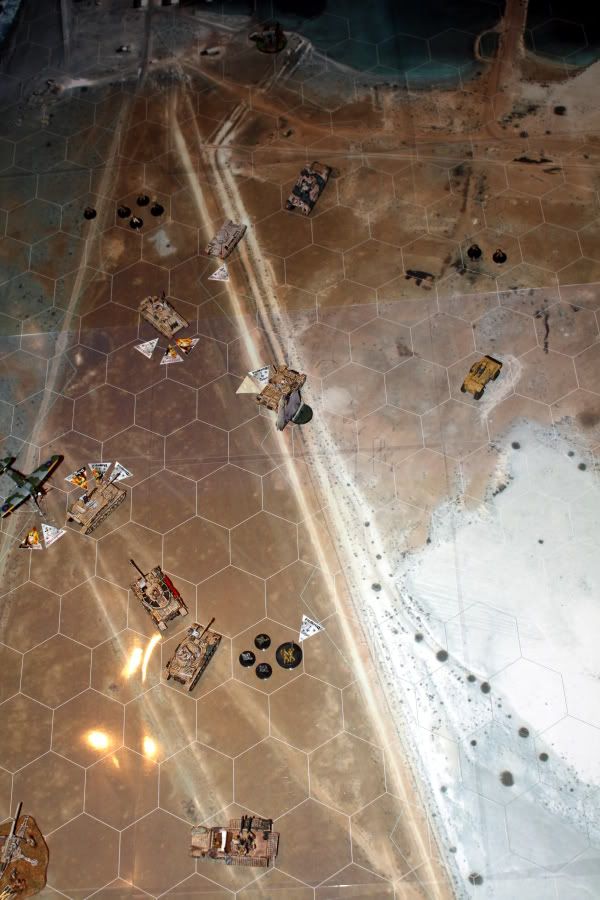
Rommel's trap is ready. 88 Flak battery and other artillery deployed on high ground. Allied Valentines disappear from the 20 hex range LOS - unfortunately:
Tobruk, the vital piece of land... no one affords to lose it, it's the only port that can supply both sides in Tripolitania:
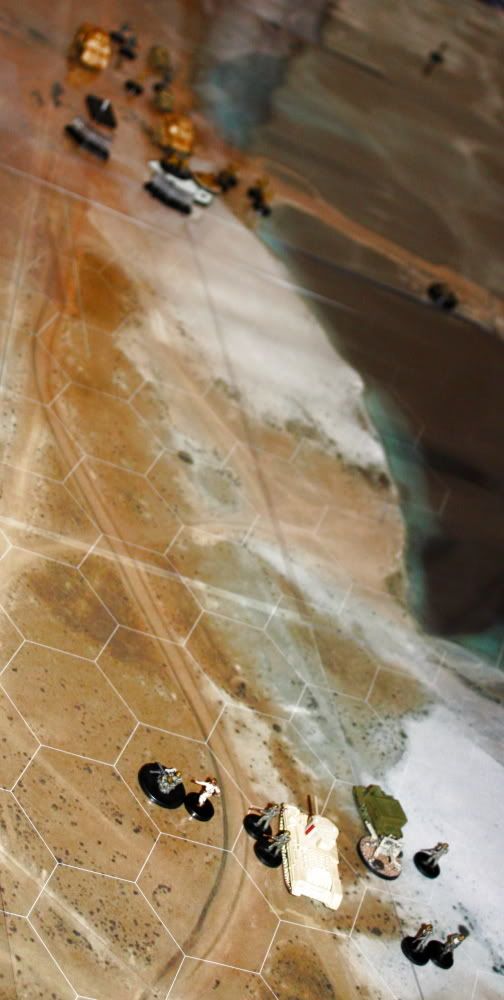
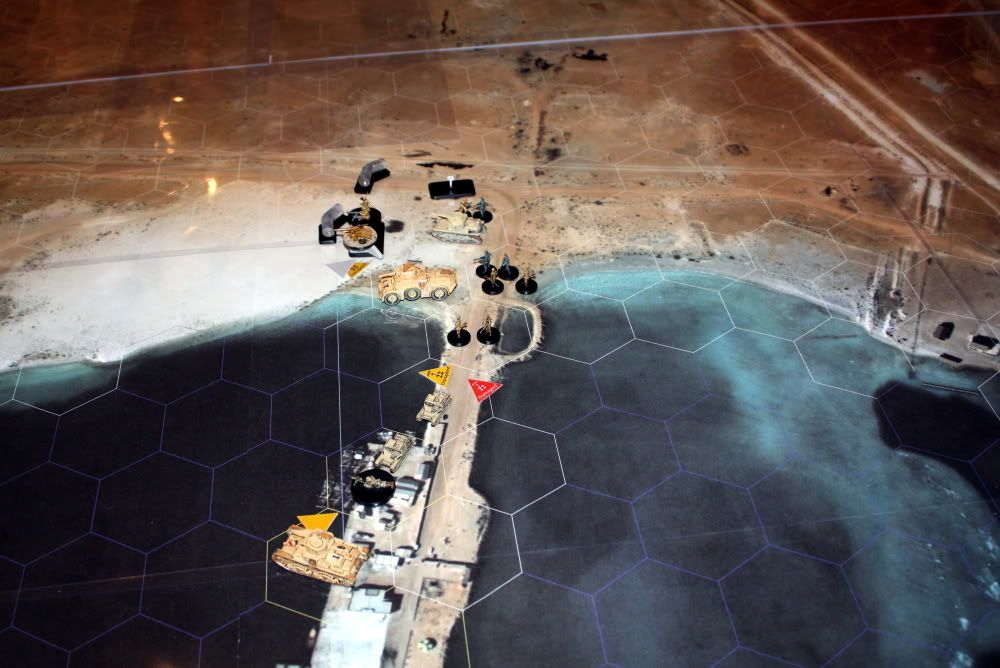
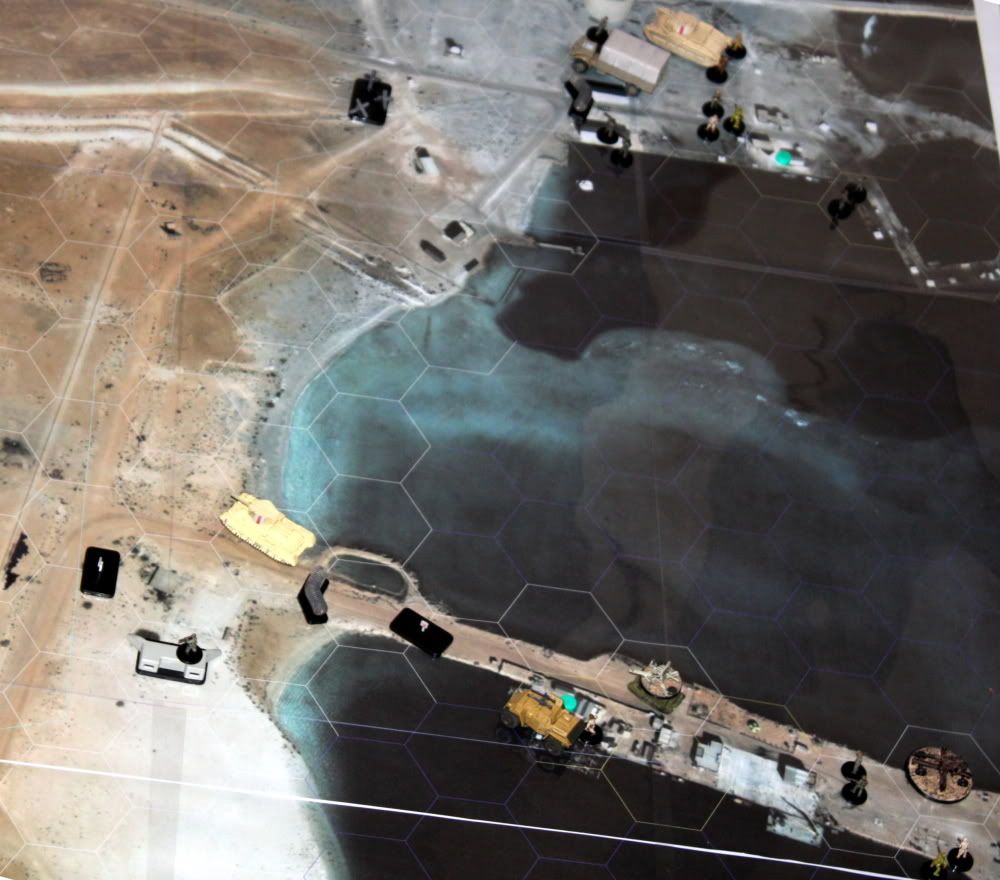
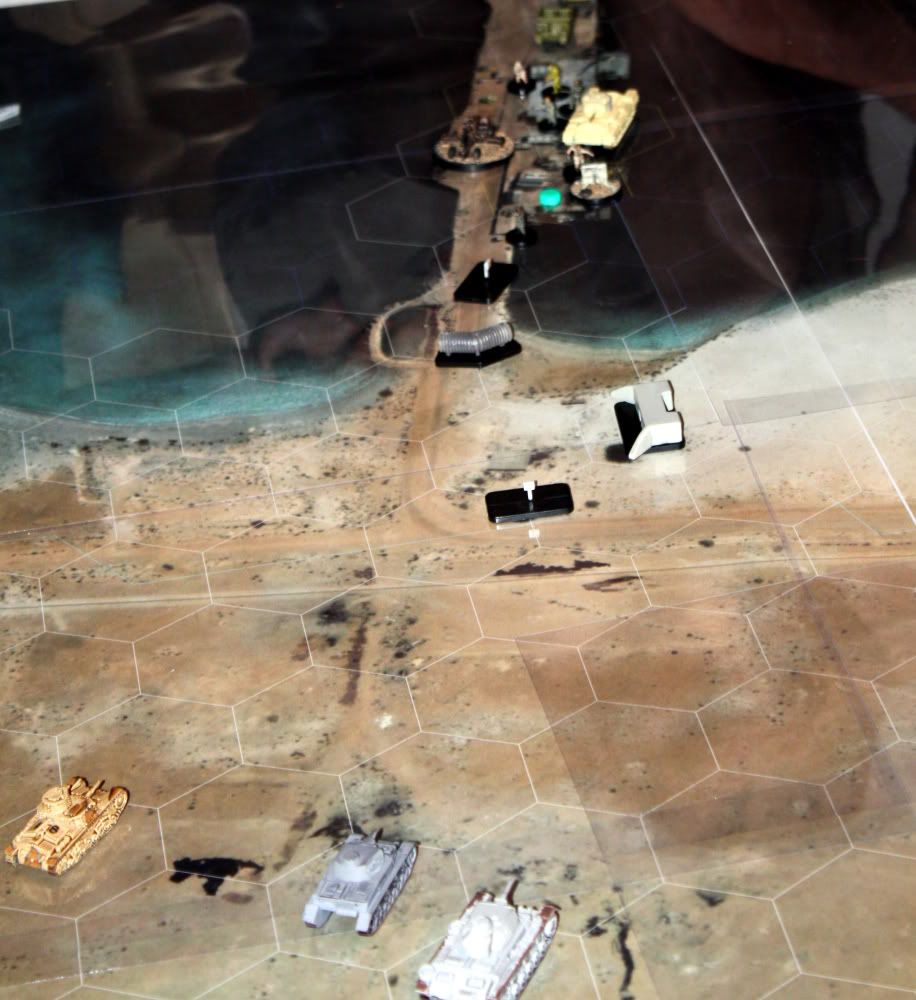
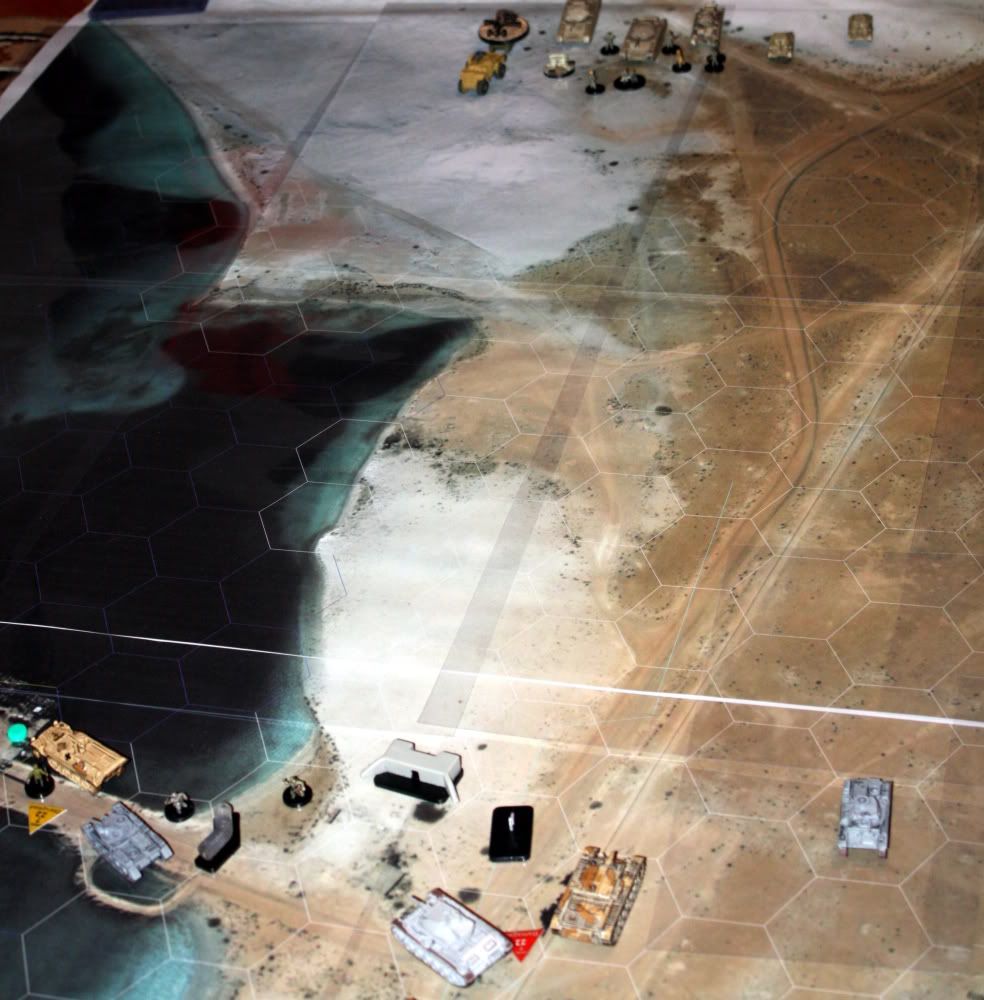
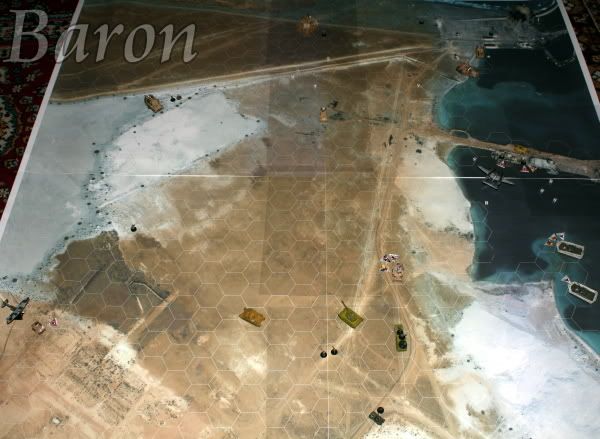
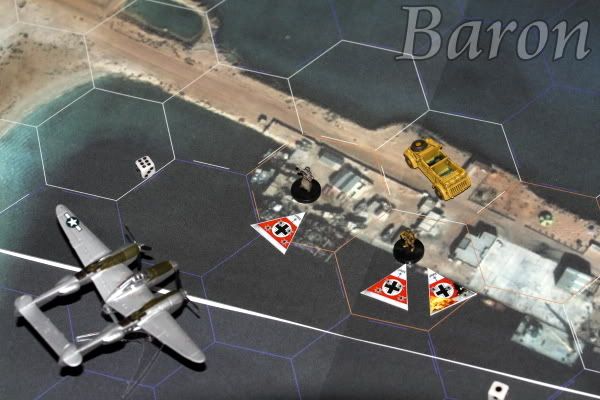
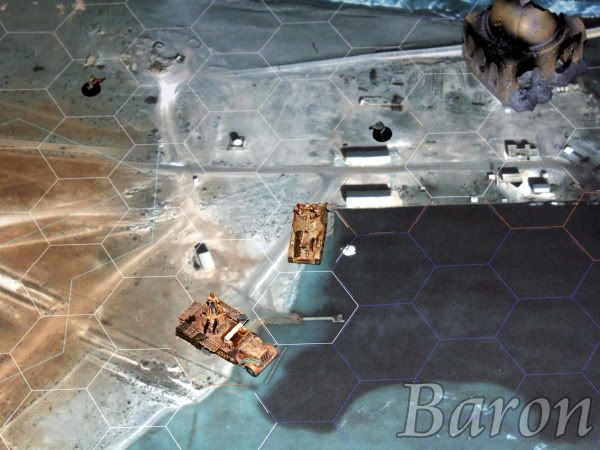
Axis forward elements reach the southern part of the port:
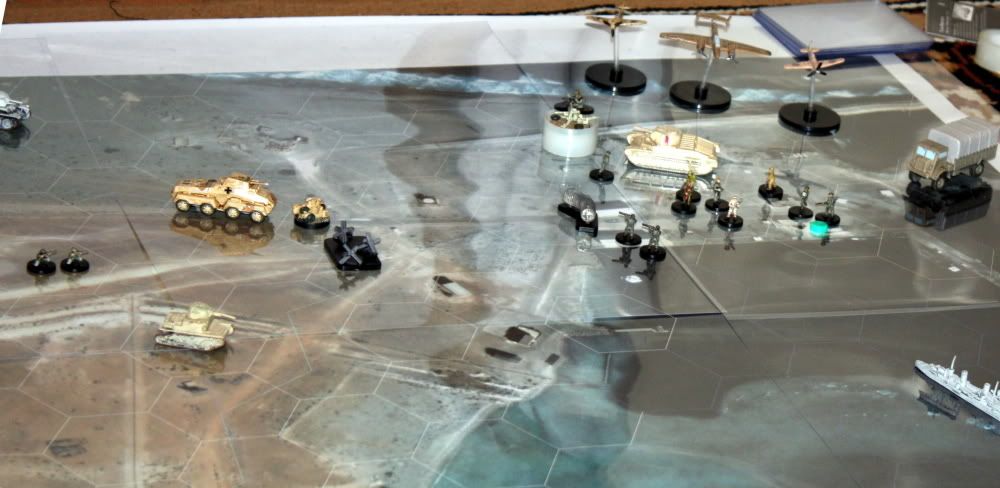
While the North part is not neglected either:
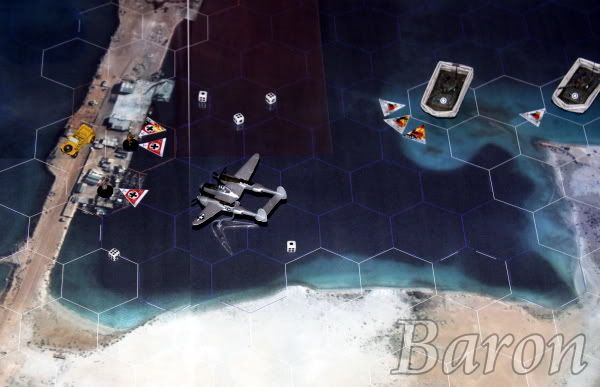
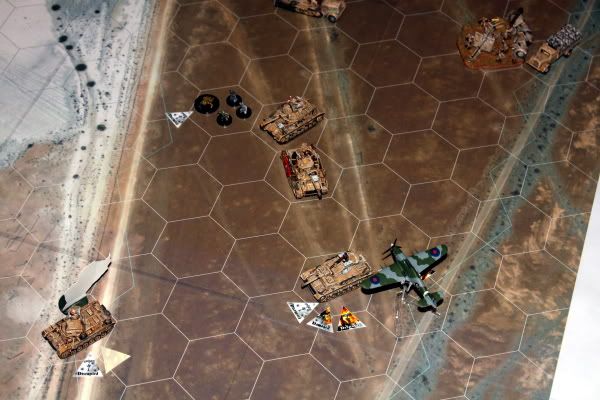
Royal Air Force and Royal Navy support the operations on the Allied side. A Spitfire takes on a Pzkw II F, but misses:
Luftwaffe support for DAK and Regia Aeronoautica support for XX Italian Korps is also present:
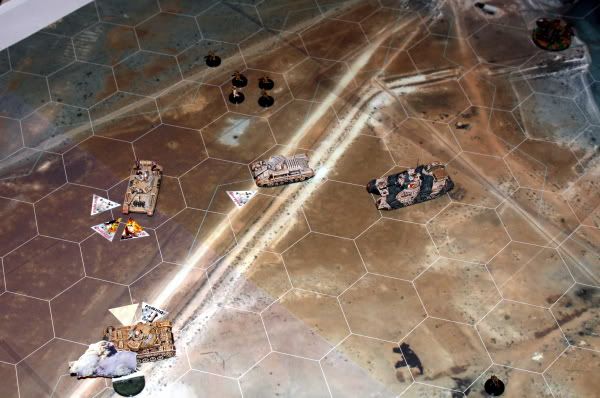
Afrika Korps takes the two objectives in Tobruk, the port is conquered, while the Allies launch Op. Battleaxe to relieve the port, once more:
Revision July 2009 for scenario: DDAY - Op. Trident[/i][/u]
Introduction:
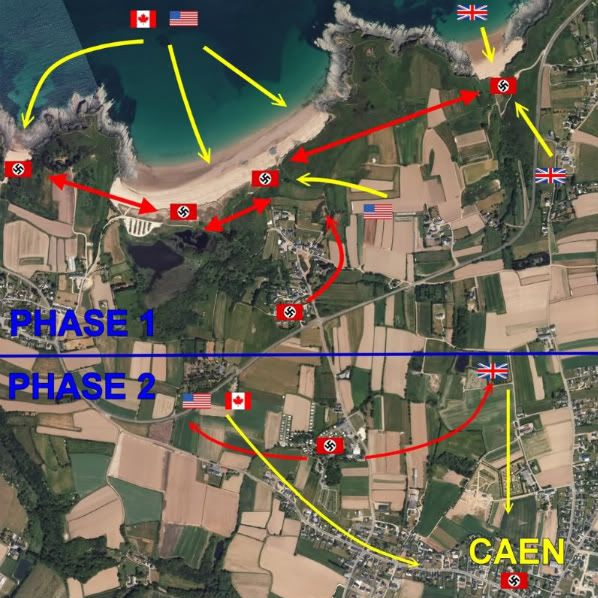
6th of June 1944, the Allied sea-invasion of Occupied Europe begins. Operation Trident will see the combined effort of American, Canadian and British forces in order to secure a beach head into Normandy. After careful planning, the Allied Command is able to deceive the Germans who do not expect the invasion in this part of Occupied France. The Atlantic Wall is not the formidable defense that the German High Command wants it to be, but it can serve as a major obstacle if used properly. The Allied “effort” is concentrated on 3 beaches called 1-2-3 in the First Phase of the plan. German Coastal Defenses there are composed mainly by static forces and somewhat inexperienced. The Allied strategy is to wipe-out the German Coastal Defenses in order to secure a big enough beach head in order to land afterwards more troops. Sea and Air superiority is to be of help for the Allied invasion. German forces guarding the beaches are highly immobile but rely on some heavy artillery that is positioned behind the “Wall” and a few Reserve units assembled in the nearby villages. To counter these, the Allies will launch an airborne assault just before the landings, assault that should prevent the enemy to inflict too much damage. The Second Phase of the Allied plan will start once the beaches are cleared and the landing of new troops begins. The Objective is the capture of the town of Caen, a difficult task since the town is guarded by a SS Panzer Division. From the first moments of the invasion, it is expected that the SS Division will move partially or totally from Caen towards the Atlantic wall in order to counter and even push back into sea the Allied invaders, while the Axis Coastal Units will try to hold on and inflict as much damage as possible.
1st Phase of the Scenario
[/i][/b]
ARMY BUILDS
Allied Expeditionary Force – 1st Phase (291 pt):
USA – Landing forces (86 pt): 2x Higgins Boat The Higgins Boat was used for many amphibious landings including Operation Overlord on D-Day, and previously Operation Torch in North Africa or the Allied invasion of Sicily. 3x M1 Garand 2x Untested Recruit 1x US Engineer 1x Thompson Gunner 2x Red Devil Cpt 1x BAR Gunner 3x Marine Riflemen 1x Marines Flamethrow 1x 37 mm Gun 1x Mortar M2
USA – Airborne forces (20 pt): 1x Screaming Eagle Cpt 1x Screaming Eagle Paras USA – Air Force (34 pt): 1x P38 Lightning The P-38 was the primary long-range fighter of USAF until the appearance of large numbers of P-51D Mustangs toward the end of the war. Called "fork-tailed devil" by the Luftwaffe, the role of the P-38 in the European theater was that of fighter-bomber during the invasion of Normandy and the Allied advance across France. 1x Mustang Beginning in late February 1944, Mustangs began systematic strafing attacks on German airfields that picked up in frequency and intensity throughout the spring, with the objective of gaining air supremacy over the Normandy battlefield.
UK – Airborne forces (8 pt): 1x Defiant Paratroopers
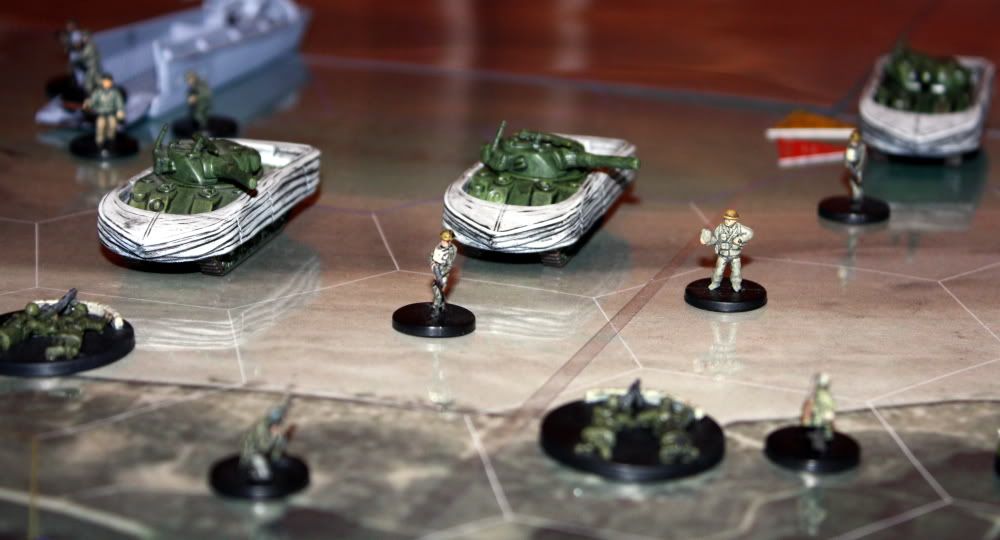
CAN – Landing forces (96 pt): 1x Amtrack 1x Eagled-Eyed NCO 2x Canadian Infantry 3x Sherman DD The DD Sherman (Duplex Drive, but nicknamed Donald Duck) was used to equip ten tank battalions of British, Canadian and American forces for the D-Day landings.
*For enrichment of the scenario use WAS Ships as symbols for the special off-board “Bombardment” (see details below). The ships can’t be attacked or the Allied players stopped from using Shore and Inland Bombardment.
German Forces – 1st Phase (231 pt):
Coastal defense (164 pt): 3x Sandbagged MG 1x MG42 The MG42 entered service with the Wehrmacht in 1942 and was manufactured until the end of the war. It had a proven record of reliability, durability, simplicity, and ease of operation, but was most notable for being able to produce a stunning volume of suppressive fire. 1x 81 mm Mortar 6x Mauser Kar 1x Wehrmacht Oberlt 1x Luftwaffe Infantrymen 1x Panzerfaust 1x Wehrmacht Veteran Inf 3x Fortress Defender 1x Disciplined Spotter (allowed to move outside deployment area) 2x Light Mortar 1x Lel G18 1x BMW R75 1x 20 mm Flak 1x PAK 35/36 AT 1x Opel Blitz 2x Pillbox Early in 1944, Field Marshal Erwin Rommel was assigned to improve the Atlantic Wall's defenses. He believed the existing coastal fortifications were entirely inadequate and he immediately began strengthening them. Under Rommel direction, a string of reinforced concrete pillboxes were built along the beaches, or sometimes slightly inland, to house machine guns, antitank guns, and light artillery. Minefields and antitank obstacles were planted on the beaches themselves, and underwater obstacles and mines were placed in waters just off shore. The intent was to destroy the Allied landing craft before they could unload. 2x Barbed Wire 4x Minefield 2x Tank Obstacle
Coastal defense - Reserves (31 pt): 1x Panzersp. P204 1x StuG III D The StuG III assault gun was Germany's most produced armored fighting vehicle during World War II. Sturmgeschütz units held a very impressive record of tank kills – some 20,000 enemy tanks by the spring of 1944. 2x Mauser Kar
Coastal Defense – Luftwaffe (14 pt): 1x Me 109 The Me109 was one of the first true modern fighters of the era, including such features as an all-metal monocoque construction, a closed canopy and retractable landing gear. The Bf 109 was produced in greater quantities than any other fighter aircraft in history, with a total of 33,984 units produced up to April 1945. [/quote]
Deployment:
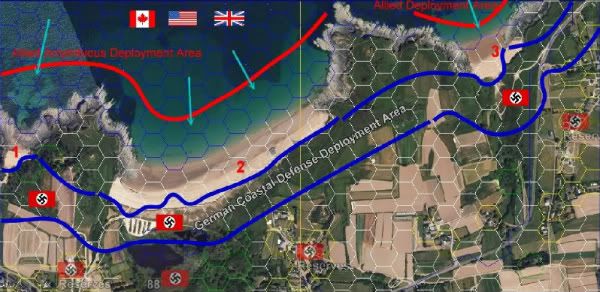
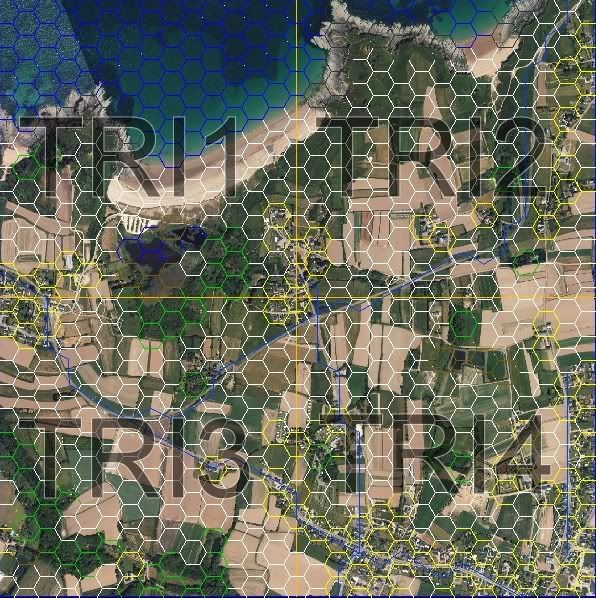
Axis Player(s) must deploy first all its units in the established deployment zones, as described below. - Coastal defense units can’t move outside their deployment area (see map) until one of the beaches is lost to the enemy (cleared by the enemy). Obstacles can be deployed anywhere on the map (land hexes only). Pillboxes must be deployed inside the Coastal defense deployment area. - Reserve units must be placed behind the Coastal Defense deployment area in any city hex (yellow hex) and are allowed to move only from 3rd Turn. These units can activate prior to 3rd turn if attacked by the enemy. - Flak Battery units will be placed behind the Coastal Defense deployment area in any marsh hex (brown hex). - SS Panzer Division: will deploy in its deployment area (see map – 2nd phase of the scenario) and can’t move until the movement phase of turn 4.
Allied Player(s) will deploy second, after the Axis player, as described below: - First Allied units to deploy are the Soldier-Paratrooper subtypes in the 1st Turn. Aircraft can be deployed in any turn (optional: use the Weather House Rule starting with the 3rd turn, for “enhanced” fun/realism – the Player that wins Initiative rolls a die, if it turns out an “1” you get “bad weather” and any airborne units can’t be deployed). The rest of the units will deploy starting from the 2nd turn. “Naval Shore Bombardment” can be used once per game, only in the First Turn. - From the Second Turn of the game, the Allied player will deploy the rest of the units in the established deployment zones (1-2-3). The player can choose which units to land in the first wave of attack on the beaches (except Untested Recruits which can’t be landed in the first wave), but he must try to land at list once on all three beaches until the beginning of turn 4 (see deployment map key points 1-2-3). The various Allied nations can be mixed.
After all Axis coastal defense units are destroyed on at least one beach (one beach cleared), the Allied player may use once per game “Naval Inland Bombardment”. Also, after the Costal defense is annihilated on at least one beach, new Allied units can be deployed directly to the beach hexes as described in the Second Phase of the Scenario.
Scenario Plot: - 1st and 2nd turns only: the Allied player(s) must go first, the German Reserves are inactive (if not attacked). - 1st turn only: Allied player may use Naval Shore Bombardment. - 1st, 2nd and 3rd turns: SS Panzer division is inactive (if not attacked). - 2nd and 3rd turns: the Allied player must try to land at list once on all 3 beaches – Scenario condition.
2nd Phase of the Scenario
[/i][/b]
ARMY BUILDS
Allied Expeditionary Force – 2nd Phase (389 pt):
USA (247 pt): 1x Jeep 2x CCKV 352 1x M4A1 Sherman Commander 3x M4A1 Sherman The M4 and M4A1 were the main types in US units until late 1944, when the preferred M4A3 with its more powerful 500 hp engine began replacing them, though M4s and M4A1s continued in US service for the rest of the war. 1x M5 Halftrack 1x M8 Greyhound 1x M10 1x M3 Light Tank Most US tank battalions had three companies of M4 Shermans and one company of M3s or M5/M5A1s. 1x Buffalo Soldiers 1x Resourceful Hero 2x Rangers 3x M1 Garand Rifle 1x Untested Recruit 1x Red Devil Cpt 1x M1919 MG 1x M1 81mm Mortar 1x M8 75 mm Howitzer 1x 3” Gun M5
UK (125 pt): 1x Universal Carrier 1x Churchill Crocodile The Crocodile was introduced as one of the specialized armored vehicles known as one of "Hobart's Funnies". It was produced from October 1943, just in time for the Normandy invasion. 1x Cromwell IV Cromwell type IV was the most numerous variant with over 1,935 units produced. It first saw action in June 1944 during Operation Overlord, the Allied invasion of Normandy. 1x Inspiring Hero 1x Wickers MG 1x PIAT Gunner 2x SMLE Rifle 1x Inspiring Lt 1x 6 Pounder AT Gun 1x Spitfire After the Battle of Britain, the Spitfire became the backbone of RAF Fighter Command and saw action in the European Theatre, Pacific Theatre and the South-East Asian theatre. Much loved by its pilots, the Spitfire saw service in several roles and was built in many different variants.
CAN (14 pt): 1x Jeep 1x Intrepid Hero 1x Canadian Infantry
FRA (3 pt): 1x Free French Infantrymen
German Forces – 2nd Phase (389 pt):
SS Panzer Division (389 pt): 1x Tiger I 1x SS Panther ausf G By June 1944, Panthers were about half of the German tank strength both in the east and the west. 1x Panzer IV ausf H Commander 1x SS Panzer IV ausf F2 Most of the Panzer Divisions that saw action in Normandy initially contained an armored regiment of one battalion of Panzer IVs and another of Panthers, although Waffen-SS Panzer Divisions were generally larger and better-equipped than their Heer counterparts. 1x Panzer IV ausf E 1x Marder III ausf M The various Marder IIIs fought on all fronts of the war. Even in February 1945 some 350 Ausf M were still in service. 1x Puma 1x Wirbelwind 1x Sdkfz 250 The Sd.Kfz. 250, very similar in appearance to the larger Sd.Kfz. 251, was a light armored personnel carrier for reconnaissance units, carrying scout sections. This basic variant usually mounted one or two MG34 machineguns. 1x Sdkfz 251 2x 20 mm Flak 38 2x SS Stormtroopers 2x SS Panzergrenadier 1x SS Haupsturmfuhrer 1x Grizzled Veteran 1x Wehrmacht Veteran Infantry 1x Panzershreck 1x Goliath Although a total of 7,564 Goliaths were produced, the single-use weapon was not considered a success due to the high unit cost, low speed, poor ground, vulnerable command cables and thin armor which failed to protect the remote bomb. A few Goliaths were also seen on the beaches of Normandy during D-Day. 2x Mauser Kar 2x MG 42 1x 81 mm Mortar 1x Nebelwerfer Nebelwerfers participated in every campaign of the German Army during World War II with the exception of the Balkan Campaign. 1x PAK 40 AT Gun 1x Opel Blitz [/quote]
Deployment:
Axis Player(s): -SS Panzer Division: deployed at the beginning of the game. -Coastal Defense Units: surviving units can move freely across the battlefield and engage any enemy units.
Allied Player(s) will deploy in this phase, as follows: -After all Axis coastal defense units are destroyed on at least one beach (one beach is cleared), the Allied player can use once per game “Naval Inland Bombardment”. Also, after the Coastal defense of one or more beaches is/are annihilated, new Allied units can be deployed directly in any beach hex adjacent to a sea (blue) hex before the beginning of the turn. -The various Allied nations can be mixed.
Modifiers, Special Abilities, Color Hexes:
# Higgins Boat and Trucks: may carry up to 4 Soldiers or 2 Soldiers and one Soldier Artillery; H-Boat will end its move in the last sea (blue) hex adjacent to the beach, and will unload in any adjacent beach hex (white hex).
# Amtrack: may carry up to 3 Soldiers or 1 Soldier and 1 Soldier Artillery; will end its move in the last sea (blue) hex adjacent to the beach, and will unload in any adjacent beach hex (white hex).
# Cars (Jeeps): may carry up to 3 Soldiers – no artillery.
# Half-tracks: Halftracks with Gun Transport may transport any type of artillery.
# Royal Engineers & US Engineer: if the unit enters a Minefield or Barbed wire hex, the trap/obstacle is removed immediately from that hex, if the unit does not attack or move in the Attack phase.
# Naval Shore Bombardment: Allied player can choose any land target in range in the Assault phase and attack it with 12 dice. Special abilities: Inaccurate 1, Shrapnel 2, Blast and Bombardment. Range: 5 hexes inland from the last blue (sea) hex. Available only in the First Turn.
# Naval Inland Bombardment: Allied player can choose any land target in the Assault phase and attack it with 10 dice. Special abilities: Inaccurate 1, Shrapnel 2, Blast and Bombardment. Range: 5 hexes inland from German Coastal Deployment Area. Available: in any turn after all Axis Coastal defense units from one beach are destroyed (one beach is cleared).
# Barbed Wire: deployment – on the intersection point of 2 hex sides, as a result both hex sides have this obstacle.
# Minefield: deployment – across a hex side, so being available in two hexes. Casualty: if a unit other than an Engineer, passes or stops in a minefield hex, it will roll a dice: on an “1” – mine ineffective, “2-3” – one hit face down, “4-5” – two hit counters face down, “6” – three hit counters face down.
# Tank Obstacle: deployment – across a hex side, so being available in two hexes.
# Blue hex: water. # Green hex: forest. # Yellow hex: town. # Brown hex: marsh.
Victory Conditions:at the end of a (any) turn, the Allied player(s) must have at least one unit on the “target hex” inside the town of Caen (bottom right corner of the map) in order to win, while enemy units do not occupy that hex in order to validate the win. Failing to do that gives the victory to the German(s) defenders.
How to get the Map Pack? The map pack for this scenario is available for anyone, for more information about acquiring it PM me.
The Soundtrack for the scenario: <embed src="http://www.youtube.com/v/IrJAwCBbnuc&hl=en&fs=1&" type="application/x-shockwave-flash" allowscriptaccess="always" allowfullscreen="true" width="320" height="265"></embed>
To wrap this up, I specify that new input for perfecting this scenario is always welcomed (as it has been until now also), please do PM me for any info regarding my Custom map(s).
Last, some pictures from one of test games for Op. Trident (for now only 1st Phase of the scenario in pictures, soon to follow pictures from second phase also). Regards, ----------------------------- My tribute to DDAY!
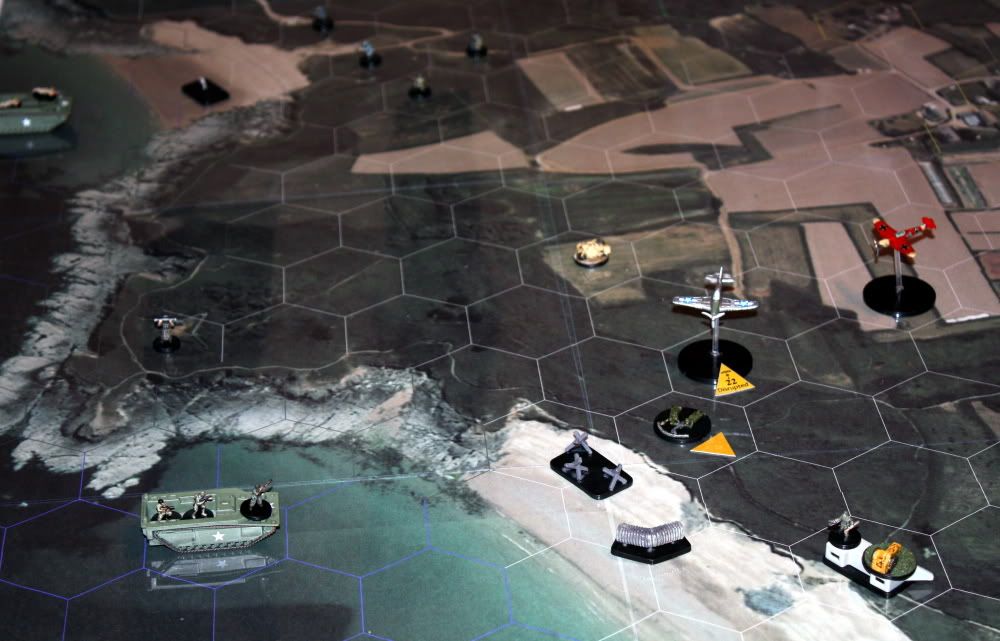
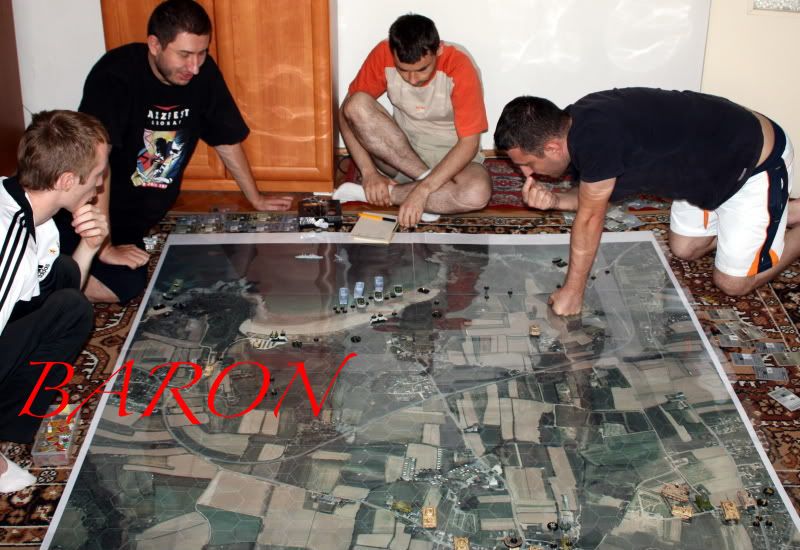
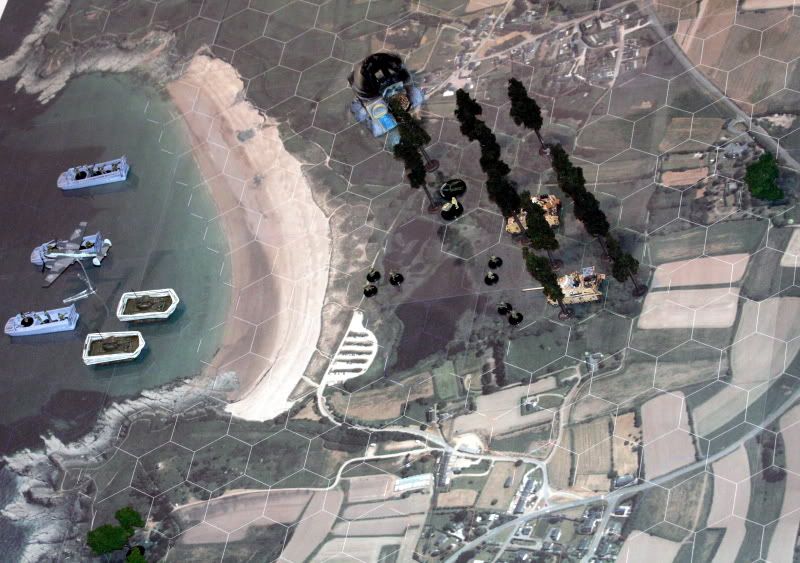
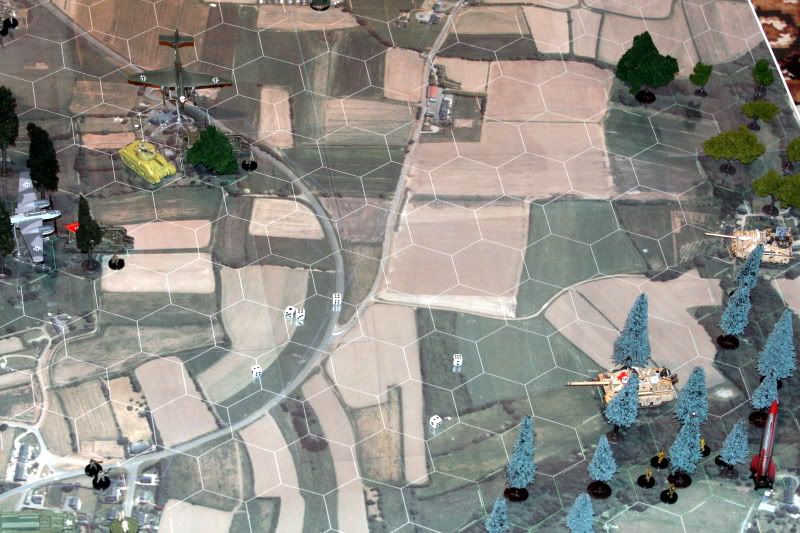
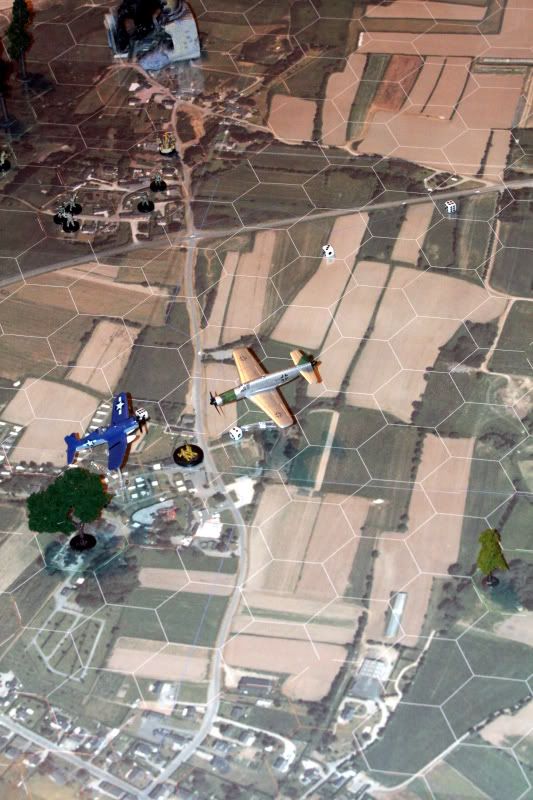
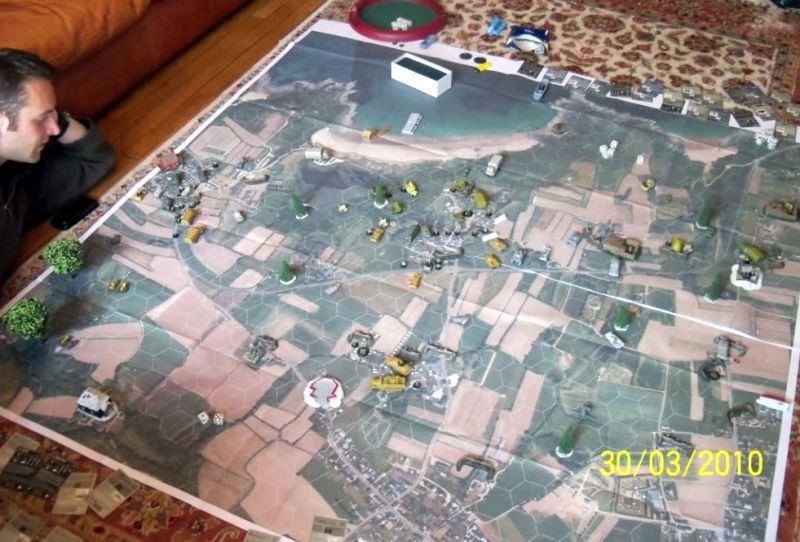
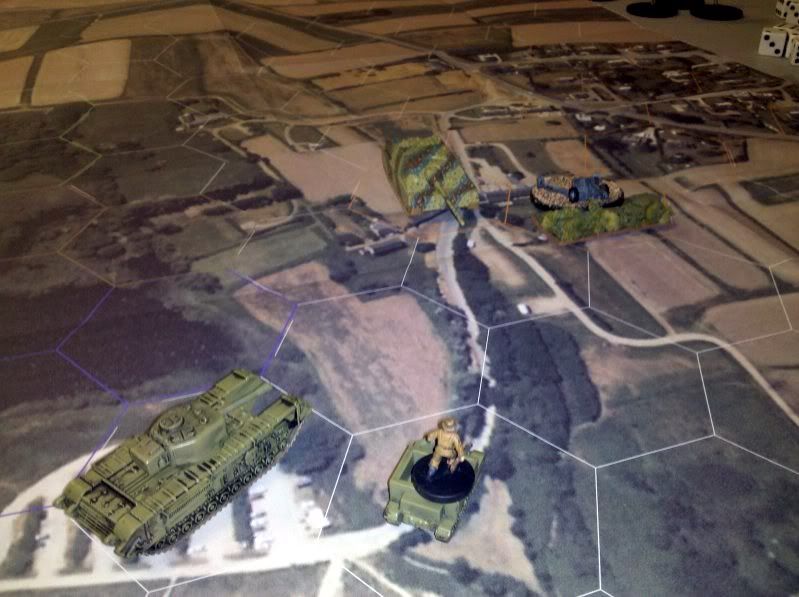
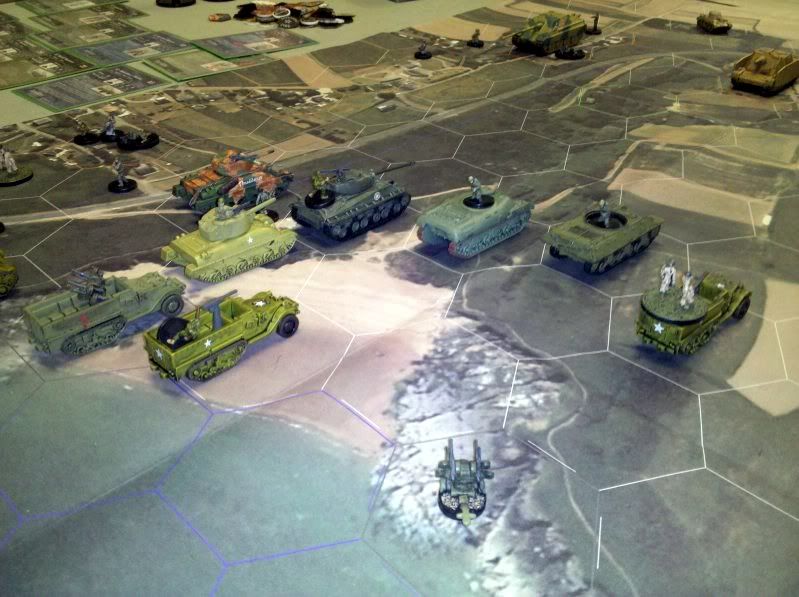
The second diorama, taken from a nice little game I called "Red Baron comes to Britain".
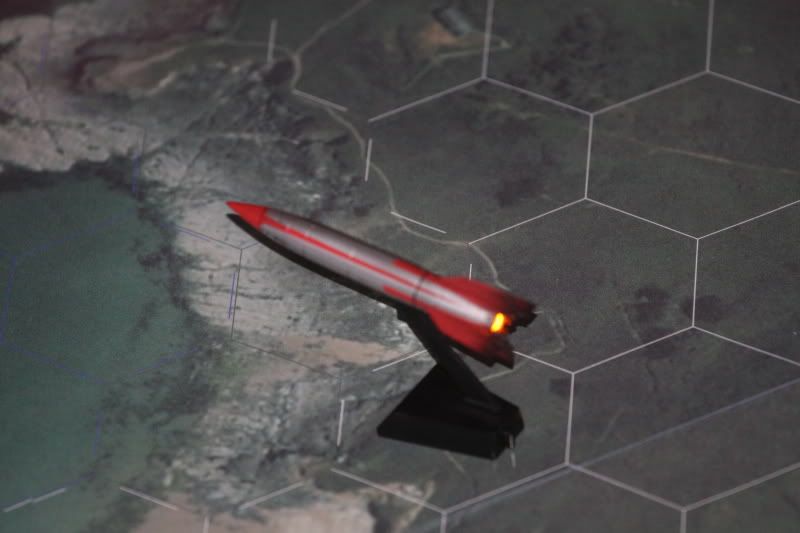
Allied Objective was to stop the Germans launch the Red Baron. I will skip the scenario details. This was a scenario based game, but no fixed builds. Restrictions were put in place for the Germans who weren't allowed to use more than 3 vehicles, they had to deploy as much as possible all Vengeance weapons / experimental. So the Do335 A0 was deployed, the Goliath Infantry and a few others.
The map that you see in the pics is the France 1944 DDAY (Op. Trident) Map Pack, but rotated (all maps deployed) - see above picture. AAM minis, except the planes, terrain and buildings.
Long story short, here it is:
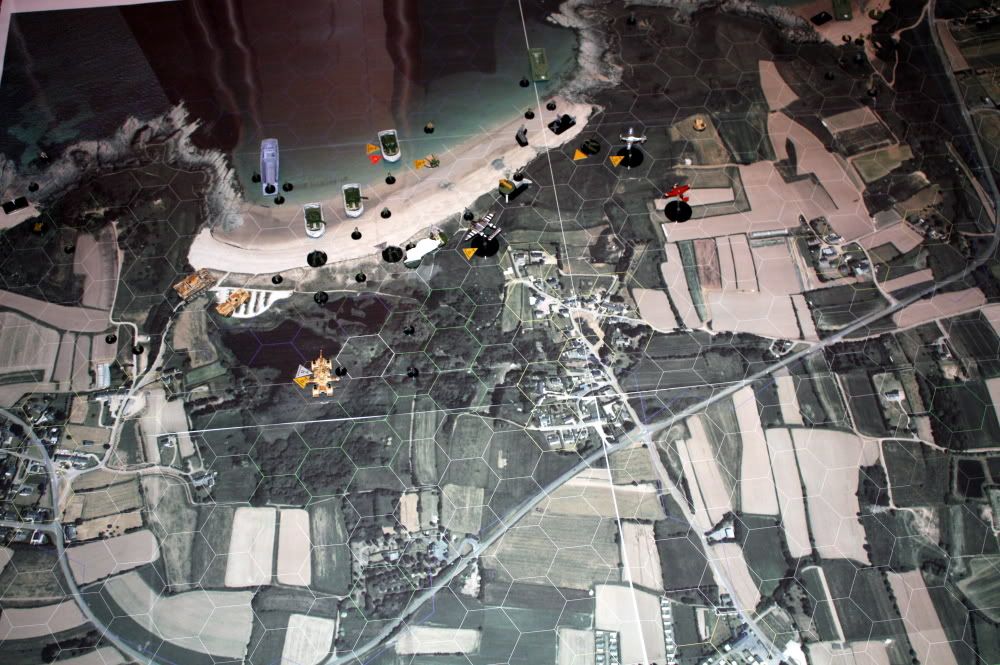
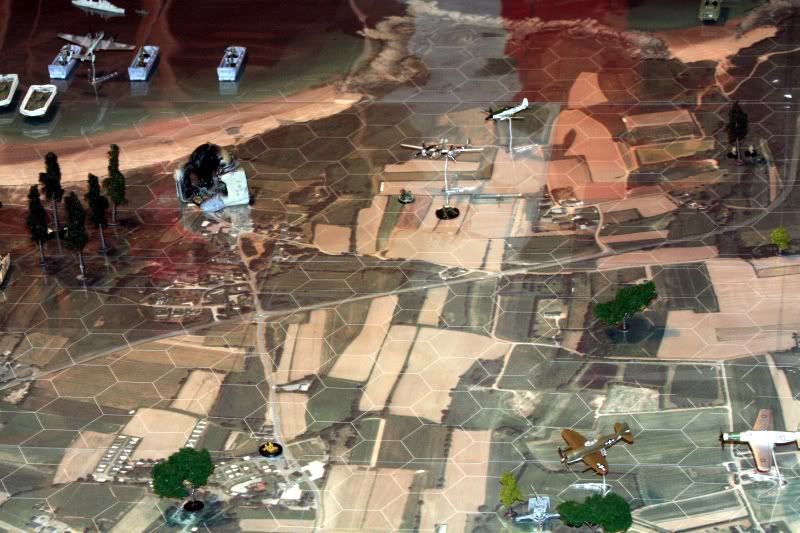
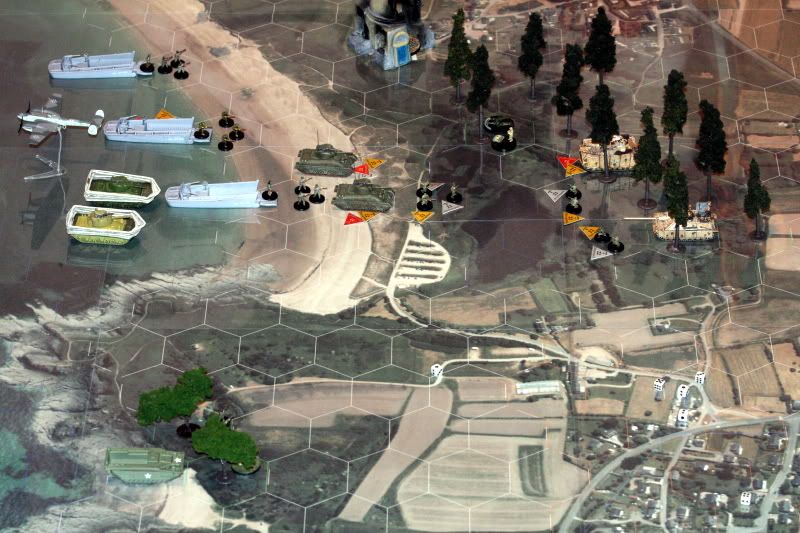
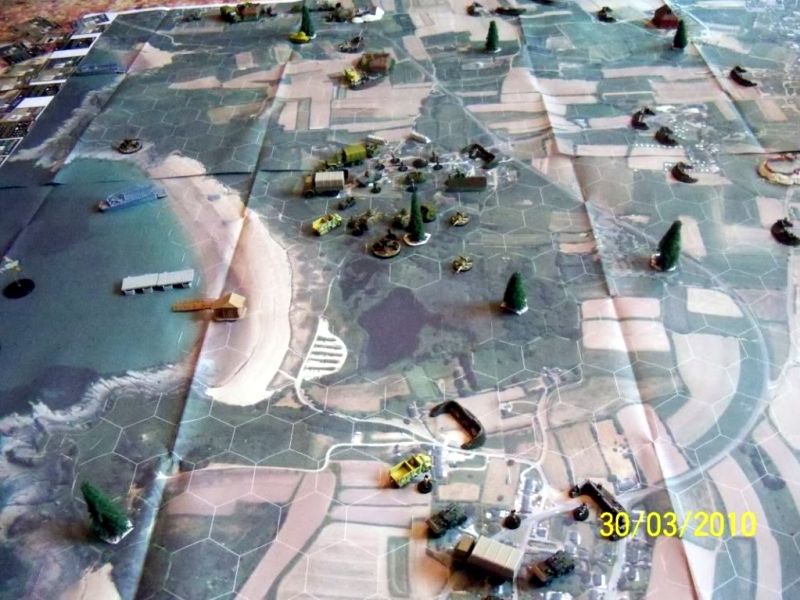
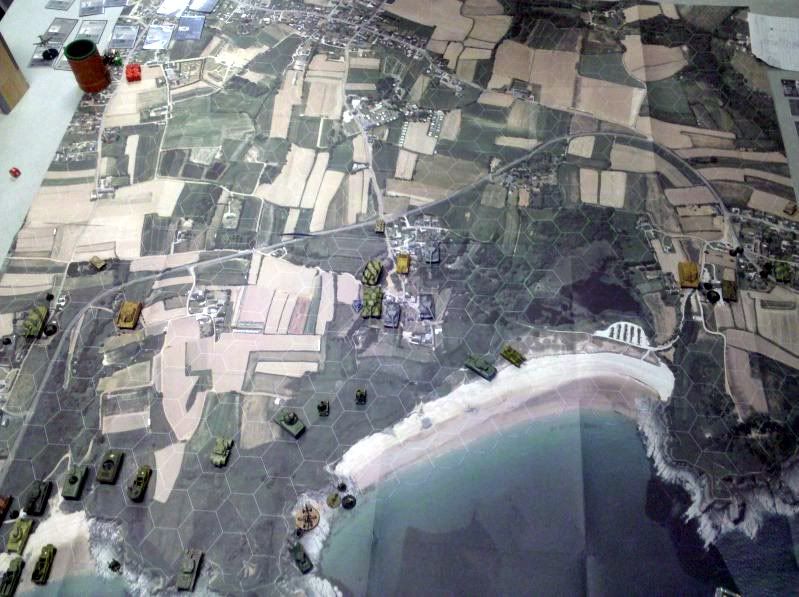
Overview N-S
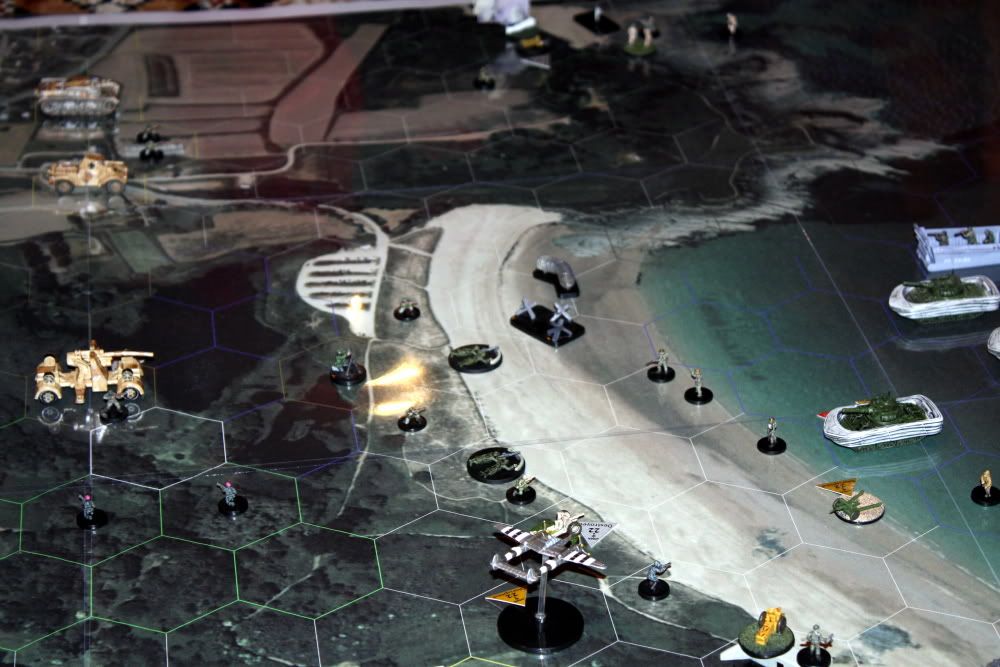
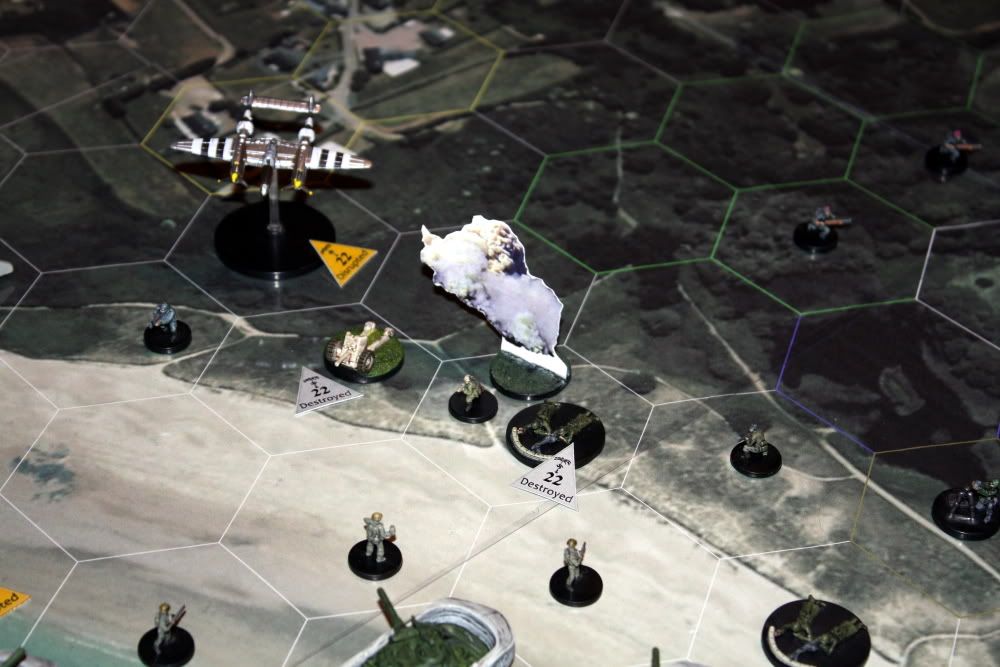
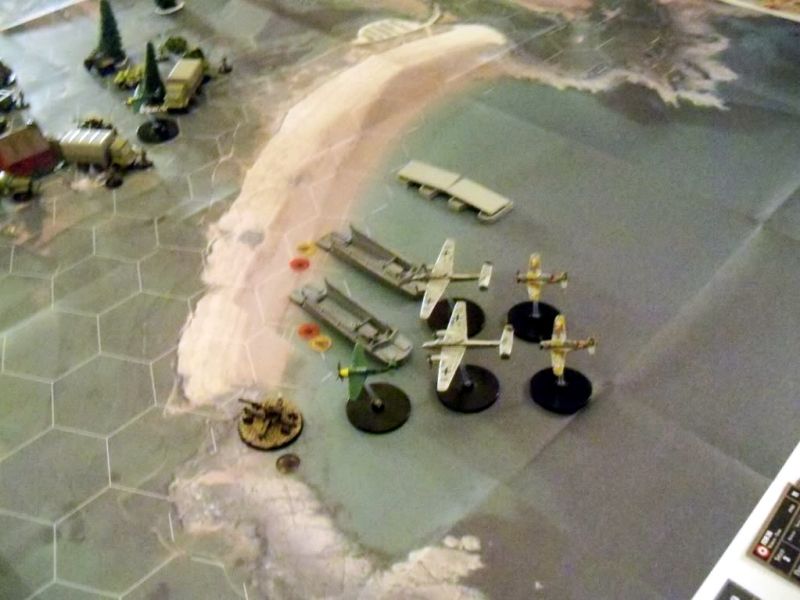
Overview German Beach defenses, US Paratroopers deploy:
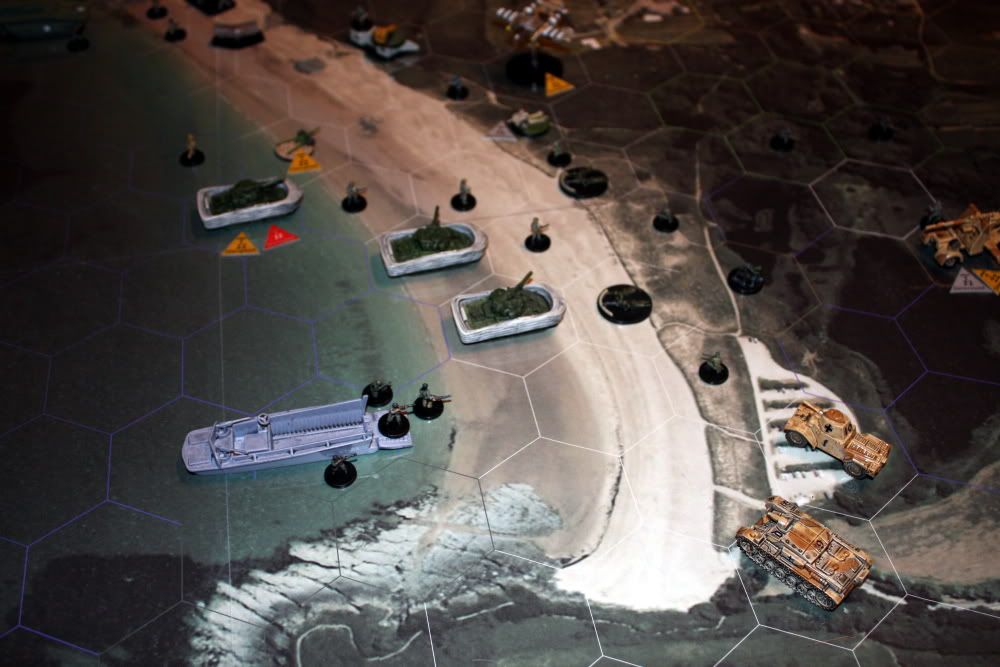
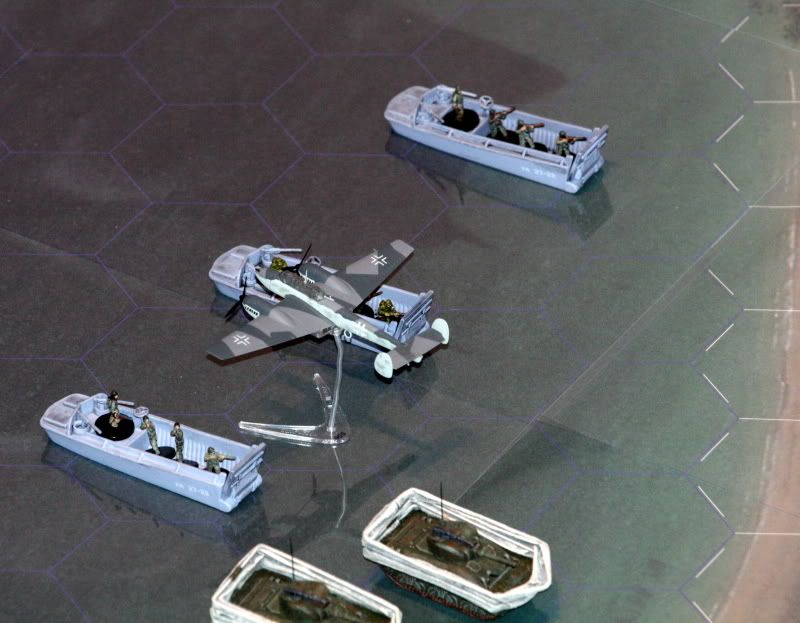
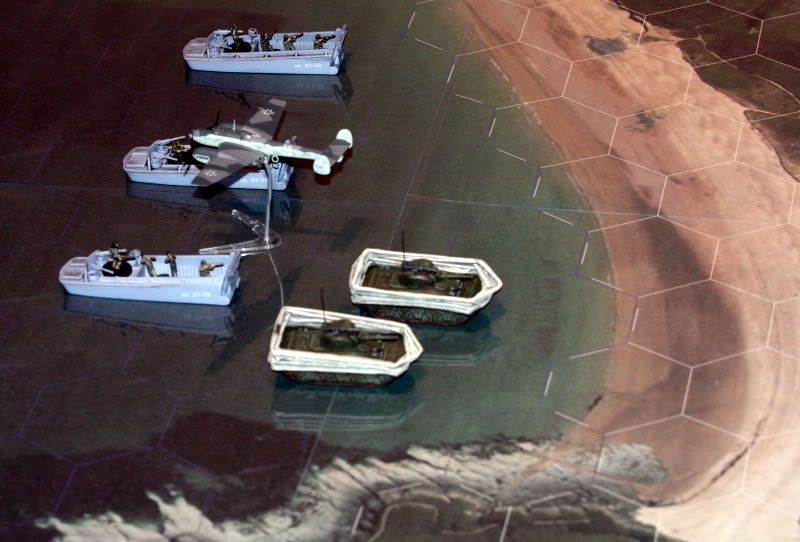
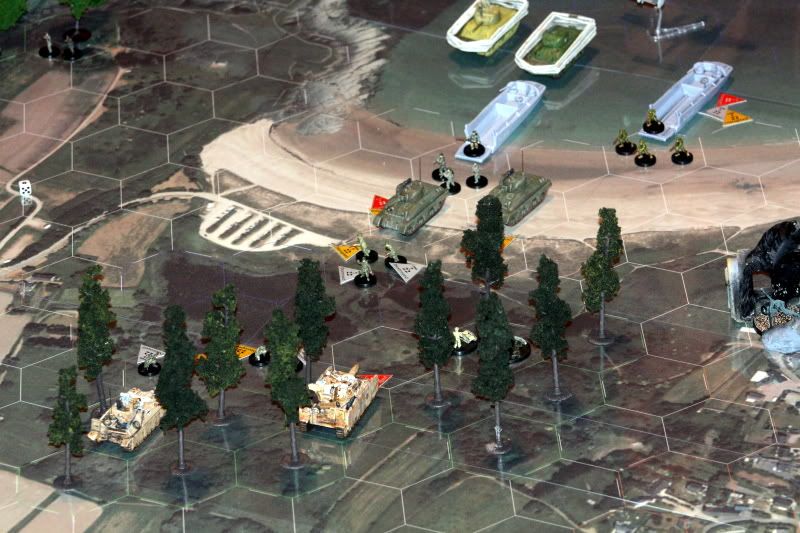
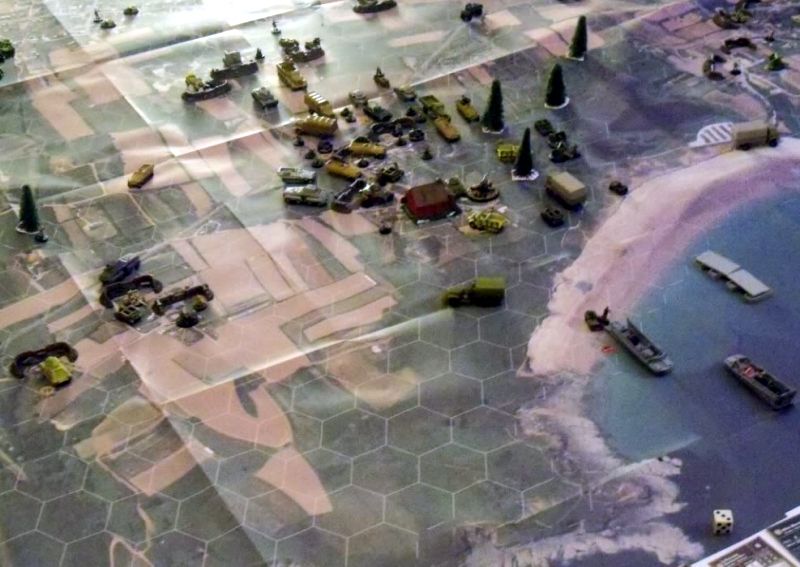
US landings begin, Me110 attack a Higgins Boat, DD Shermans:
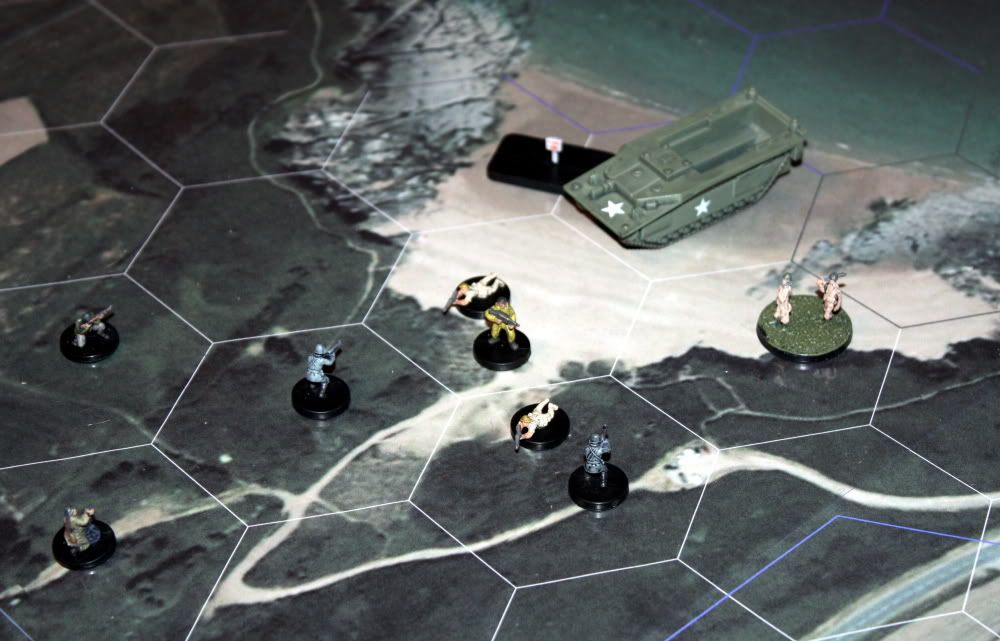
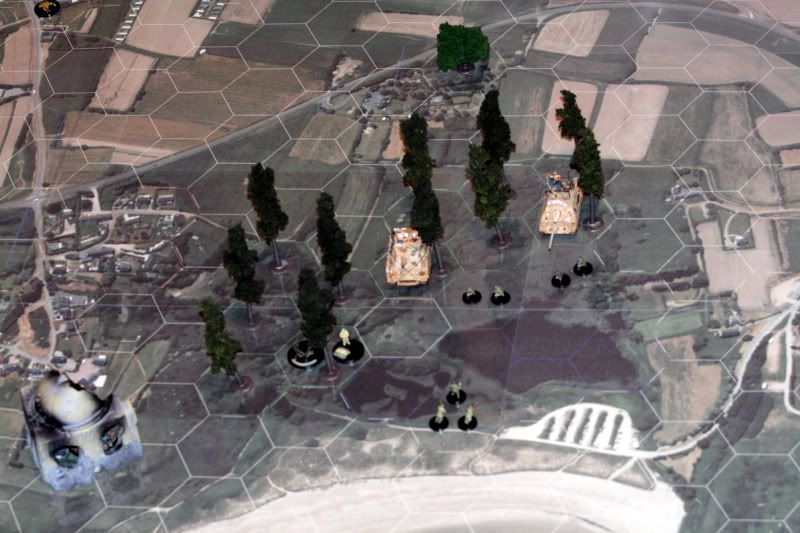
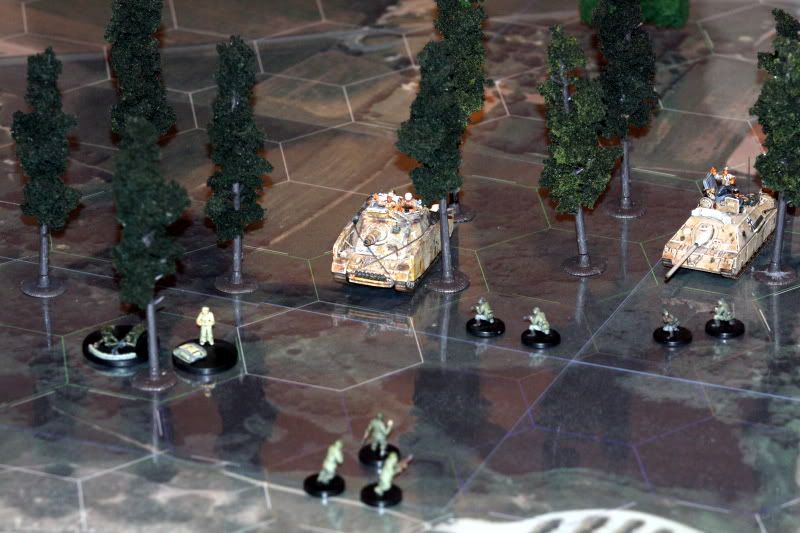
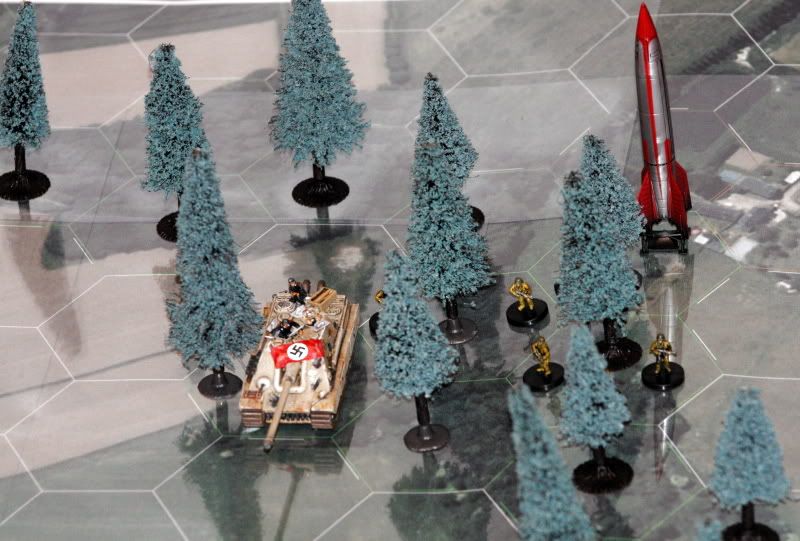
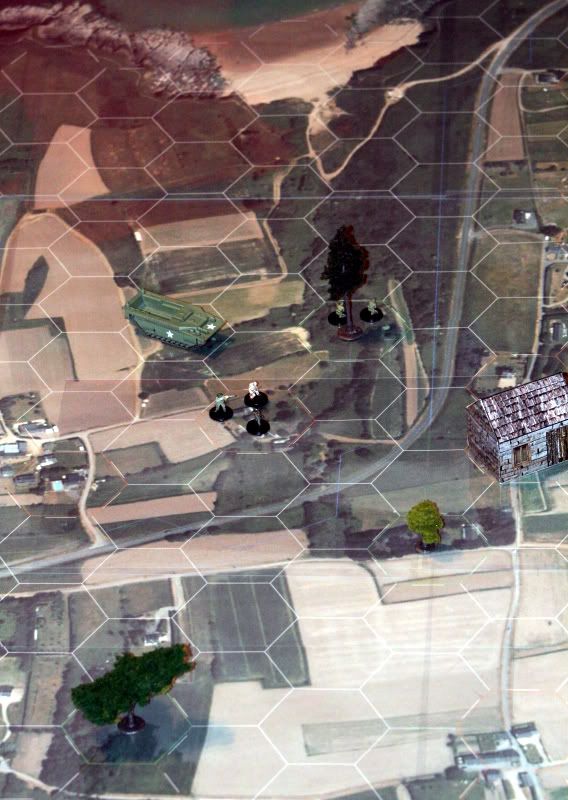
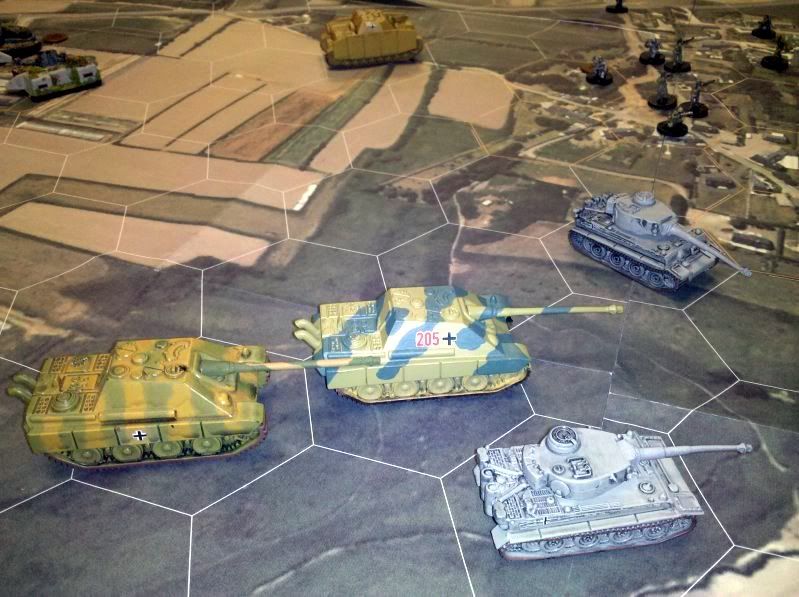
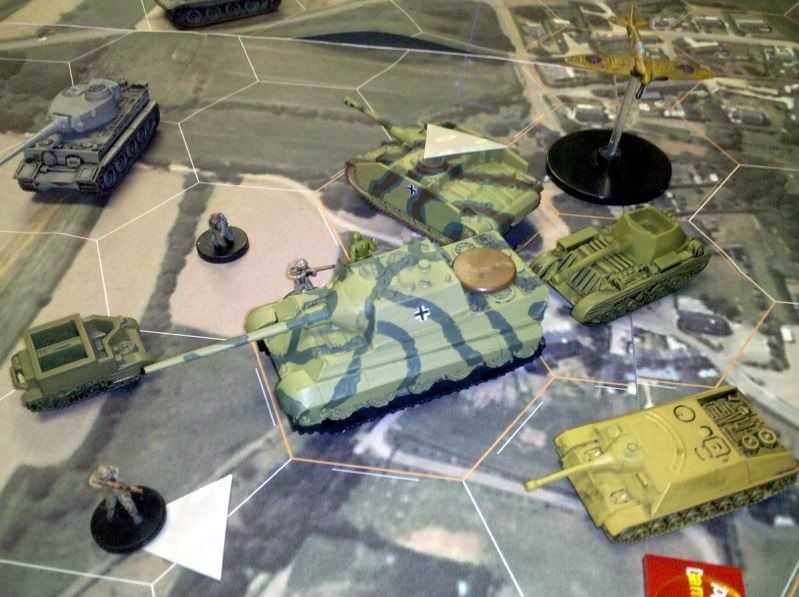
SS Division guarding the Red Baron, hidden in the evergreen forest:
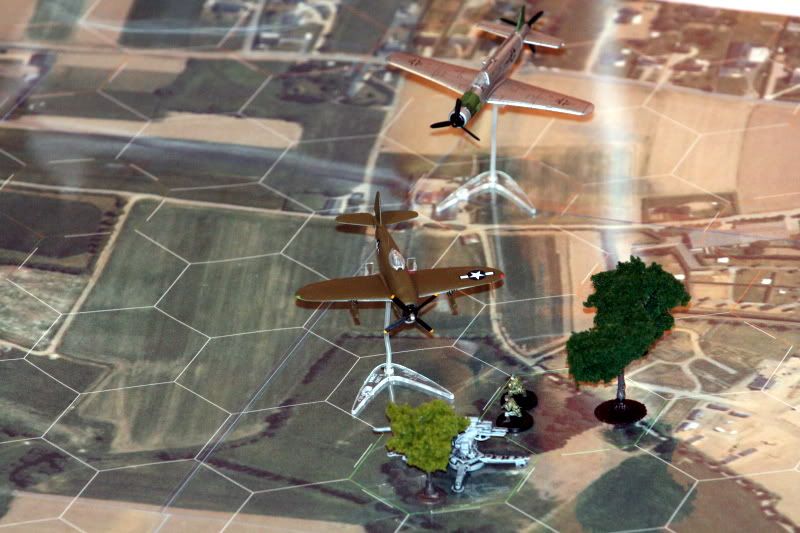
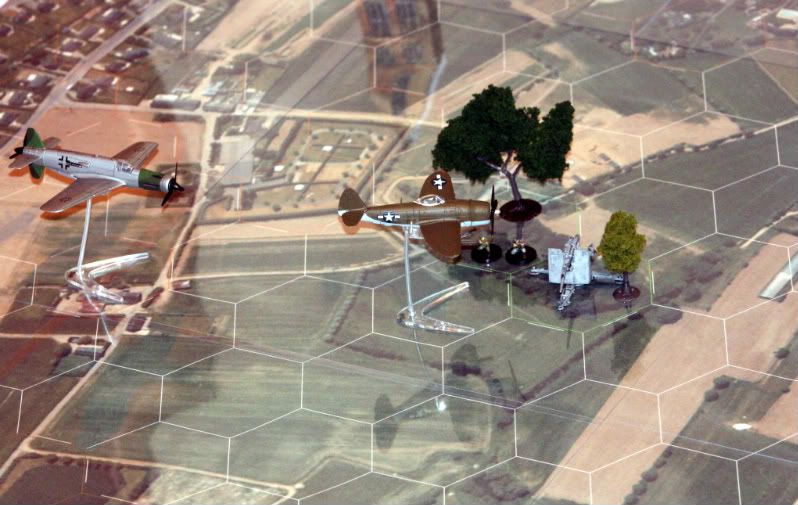
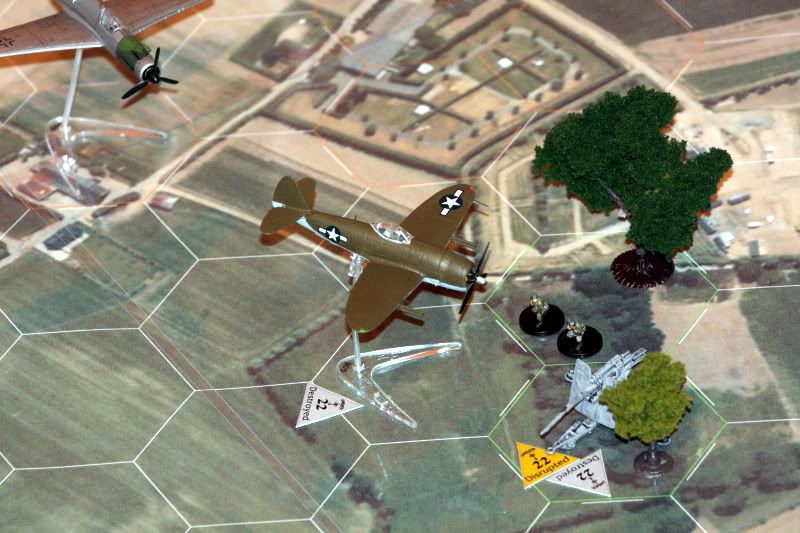
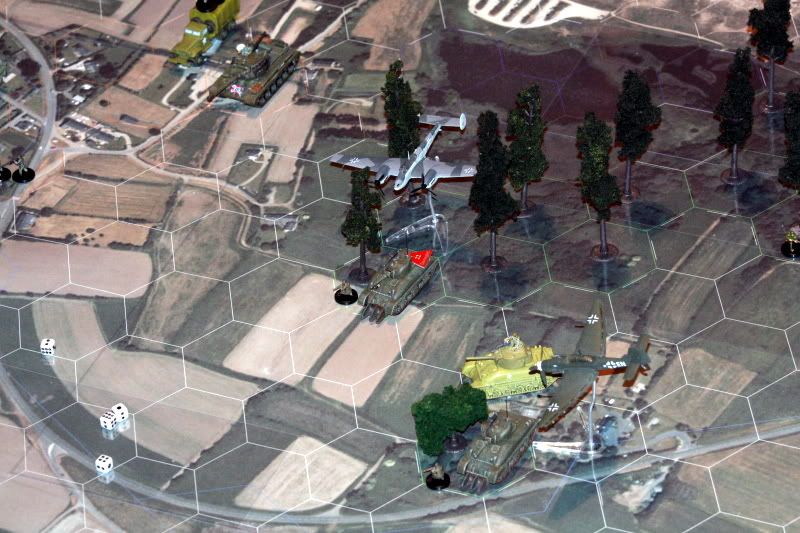
While landings take place, US Air Force blasts 88 Flak (Thunderbolt), but with strange aircraft chasing their planes (Do335):
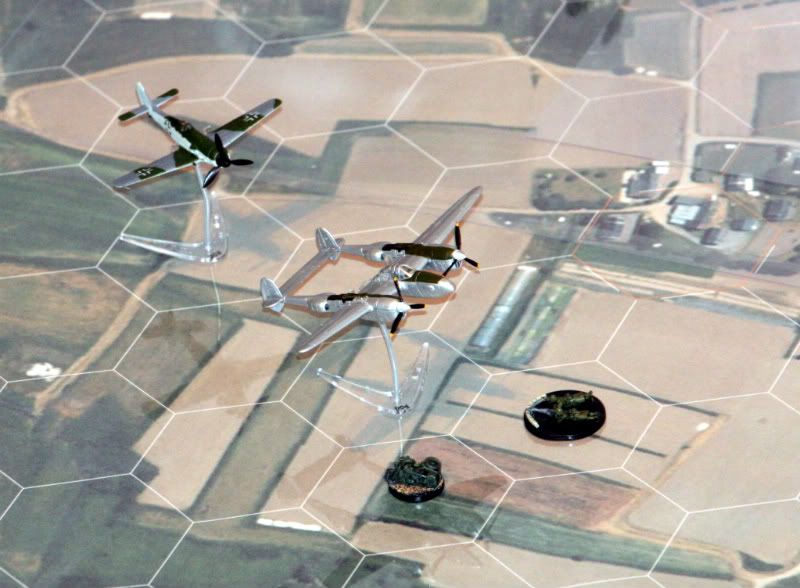
Lightning strafes some infantry while a FW190 Dora shoots it down:
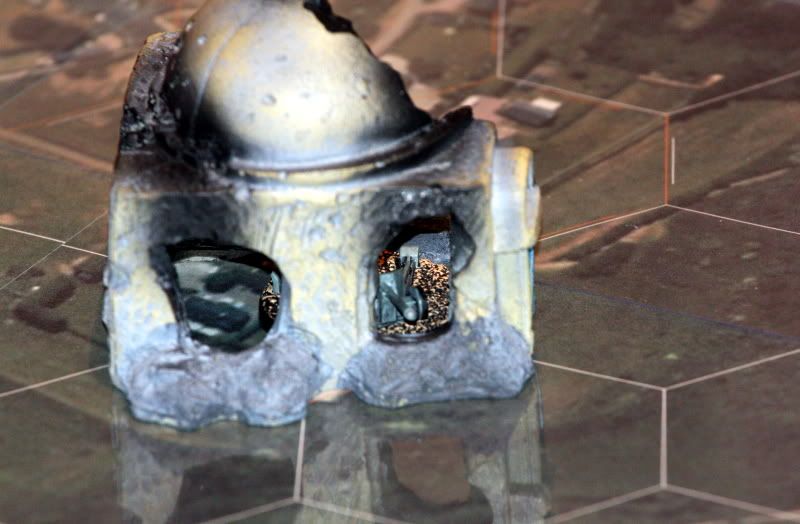
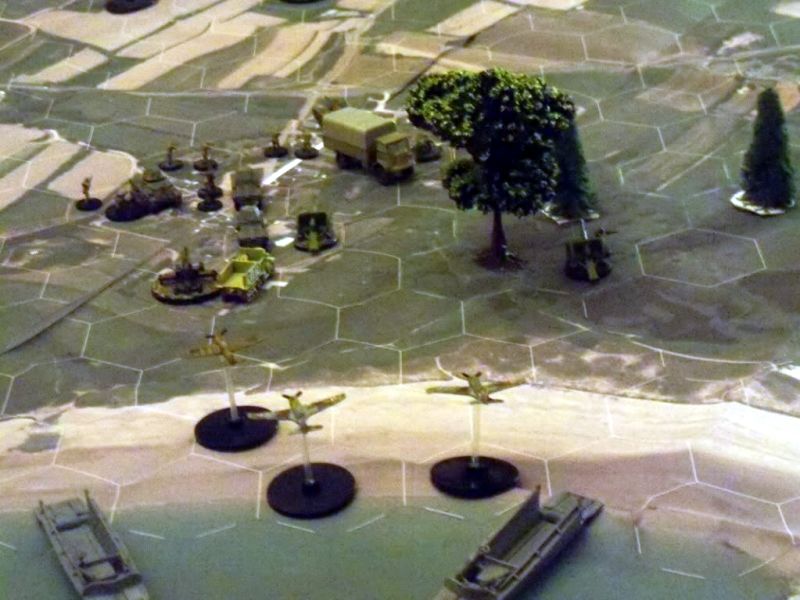
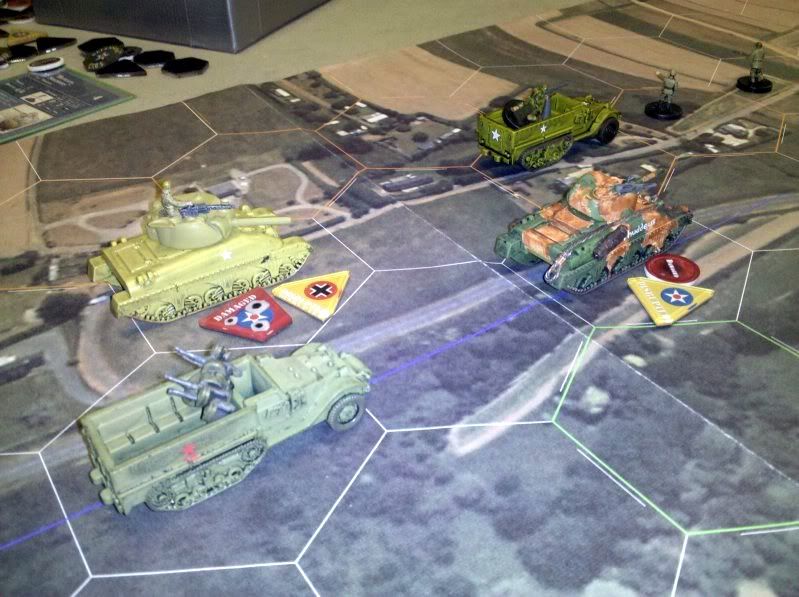
Near the landing beaches, PAK 40 is hidden in a damaged building:
US forces break through, the battle moves towards inland:
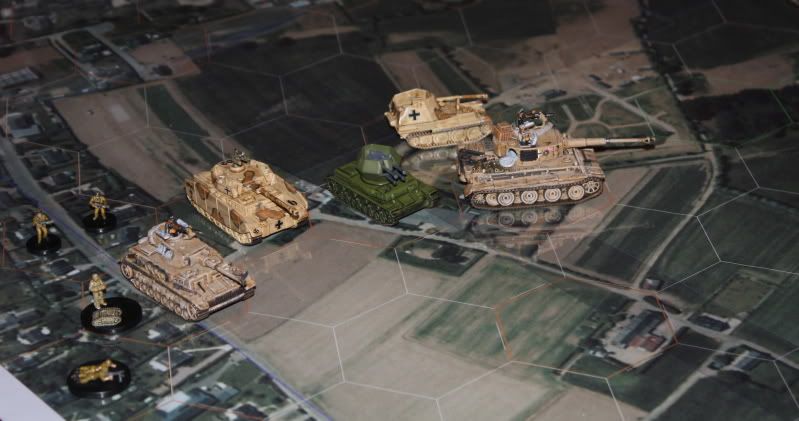
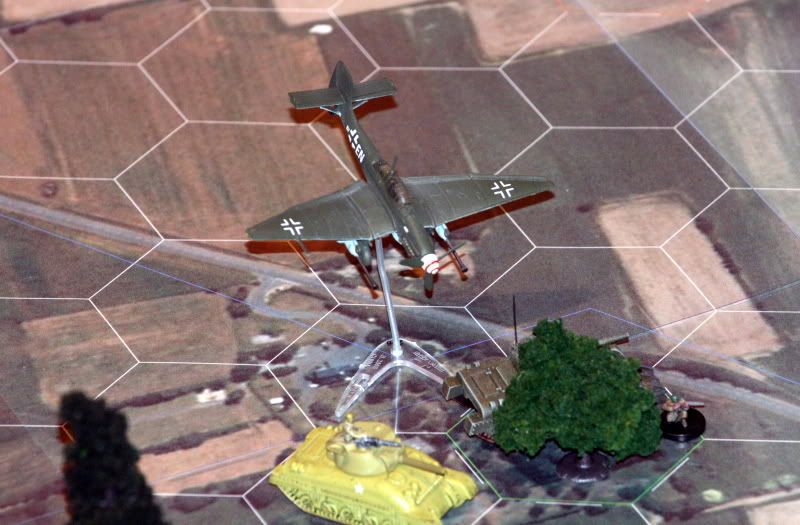
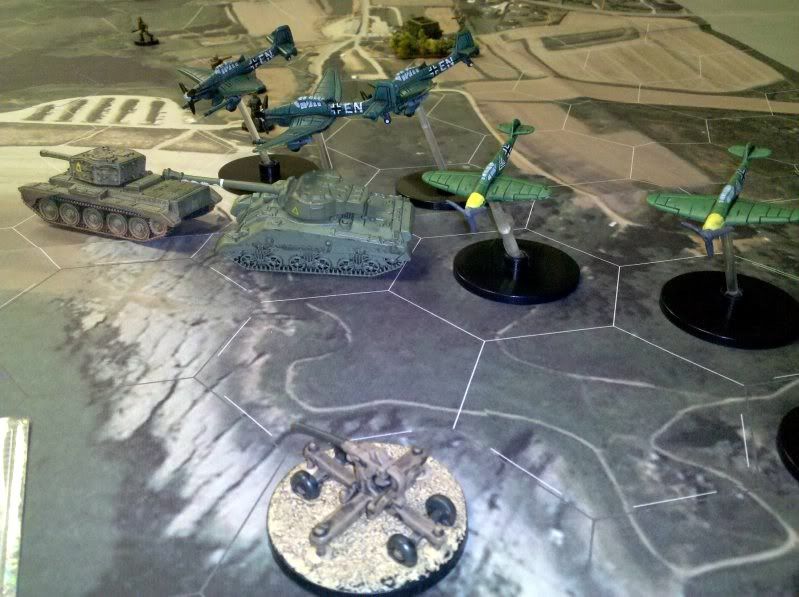
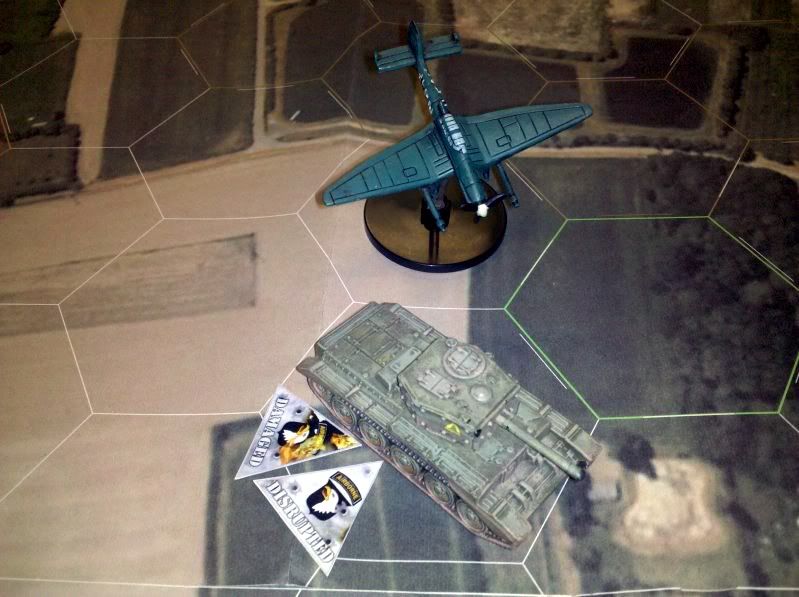
Once the Allies secured the beaches, heavy tanks appear (Pershing) while Stukas pick up some "leftovers":
Battles rage all over, Allies gain advantage and are close to achieve their secondary objective:
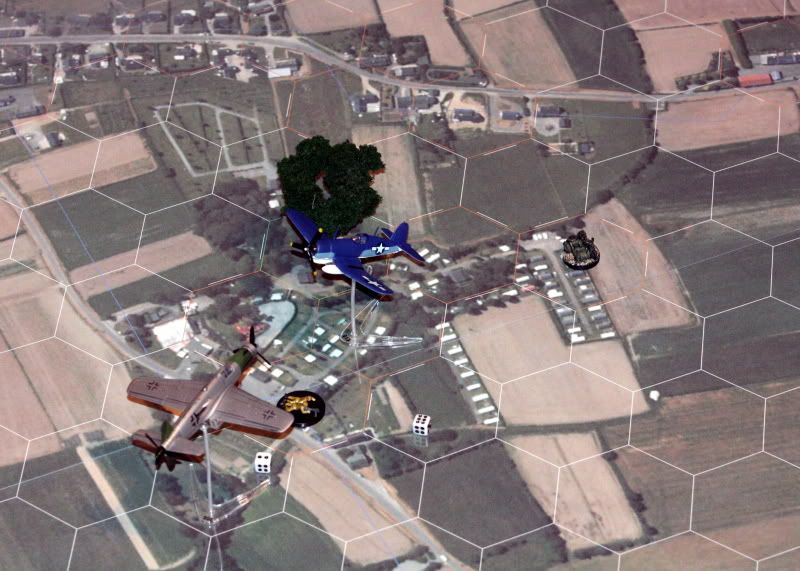
The Do335 survives the initial encounter with the Thunderbolt and gets another challenge from a Corsair:
Distracted by all the various german forces, the Allies fail to destroy the SS Division and Red Baron is launched over the channel, here a pic while leaving the french coast:
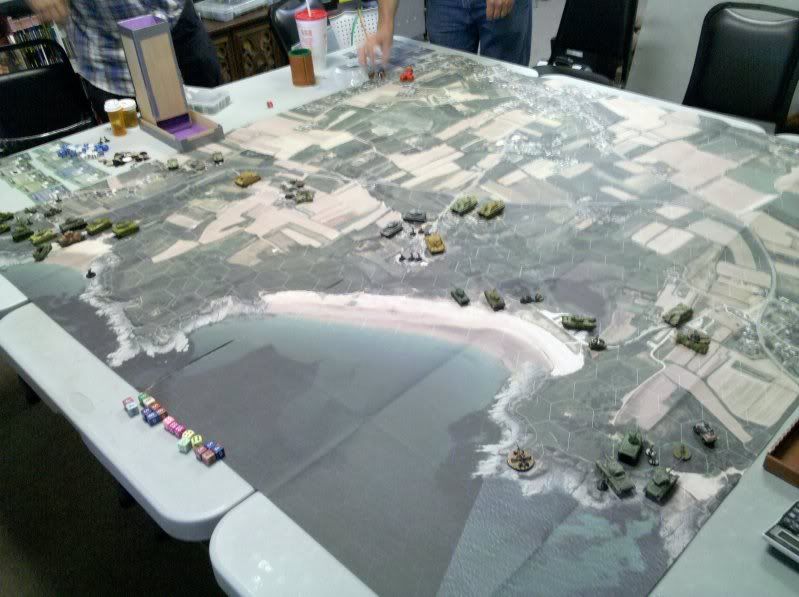
Some more pics with this map pack received from Gen. Hoth. Please note that all maps of the map pack are deployed!
Pics courtesy of Snippersly - custom game with this map pack: