Macrossmartin's Battle of Britain 75th project
May 8, 2017 8:25:26 GMT
Fighting6, au64, and 1 more like this
Post by boomerbill on May 8, 2017 8:25:26 GMT
This is Macrossmartin's Battle of Britain project, posted on the old Forum over a period of four months in 2015.
Greetings, all!
Well, I finally did it. After an awfully long labour, my Battle of Britain game finally got a run today, over a month and a half behind it's intended delivery back in September.
Scroll down to the bottom of this post for some shots of the game itself.
I started with an Angels 20 starter set which I purchased ages ago, and added another via member Xen O's ebay store. (Nice chap to deal with, folks!)
So, now I've 12 aircraft to fix up and repaint in less than 2 months. I'n going to chronicle my efforts here, and hope that you guys can encourage me to maintain my enthusiasm when I'm up to my elbows in plastic shavings.

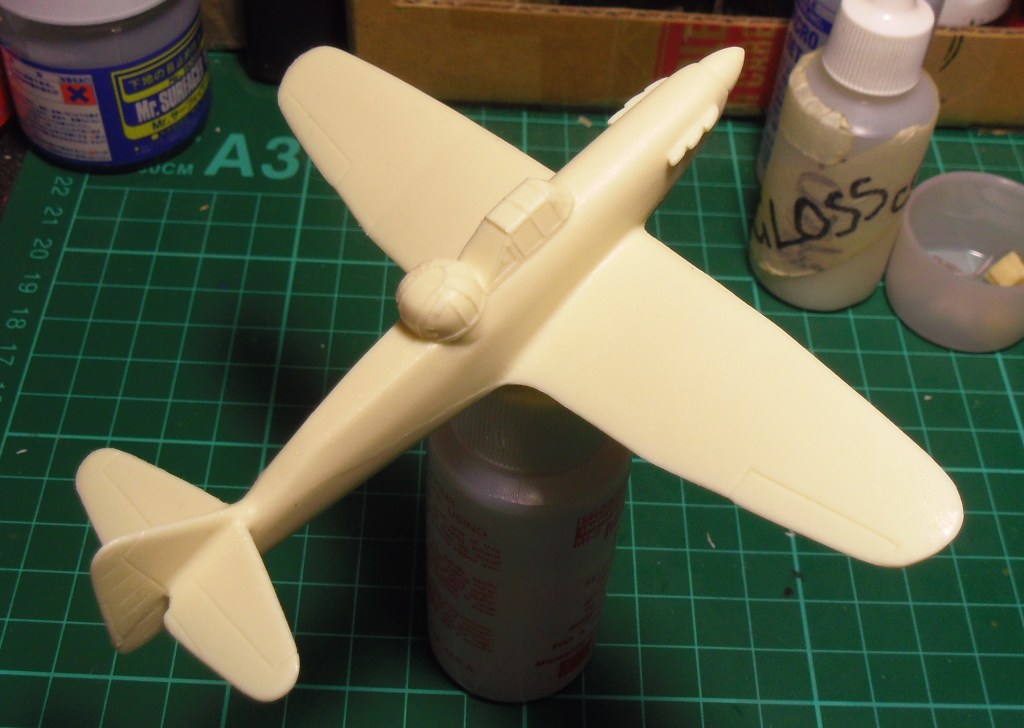
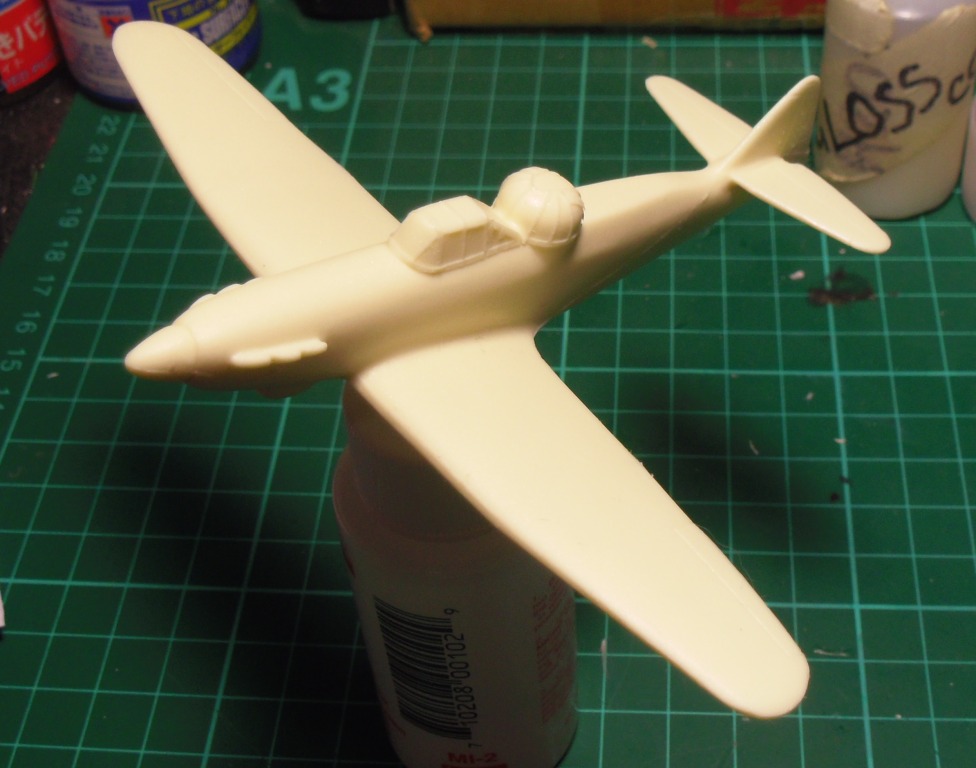
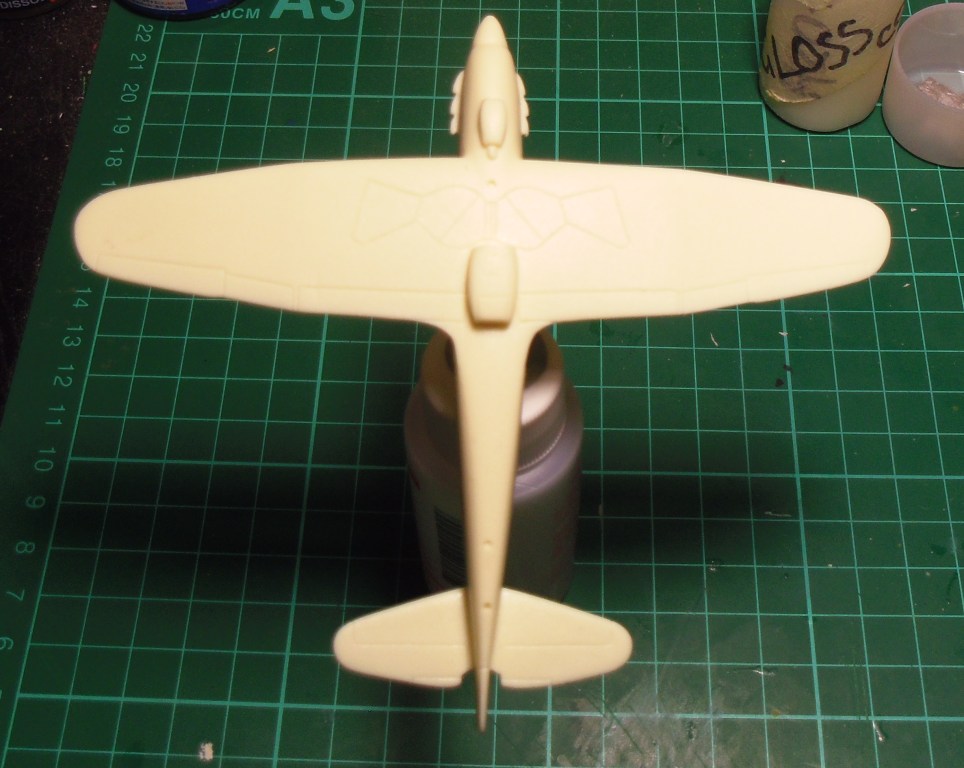
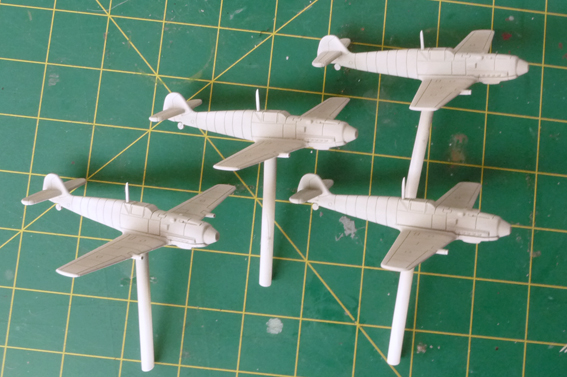
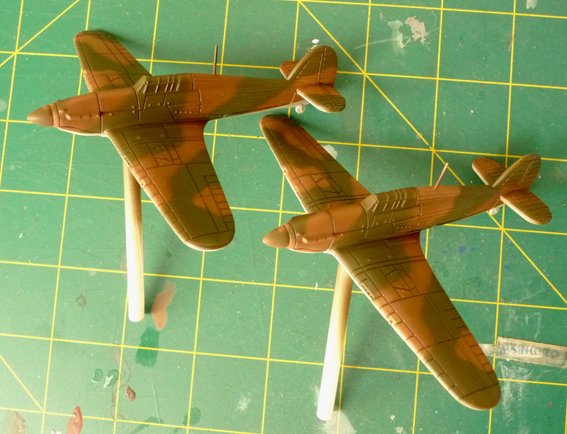
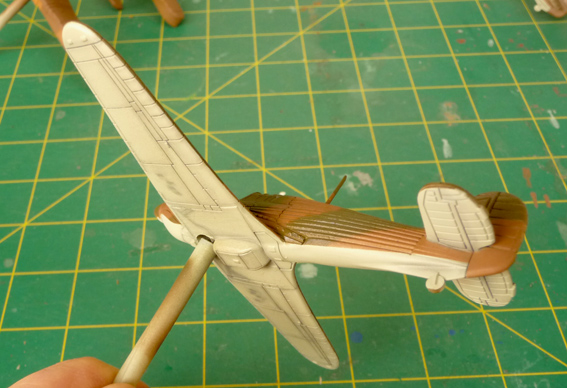
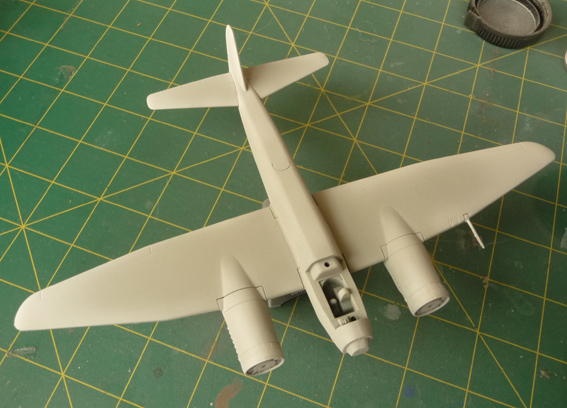
Here's a couple of shots of one of my four Hurricanes to show how they're looking so far.
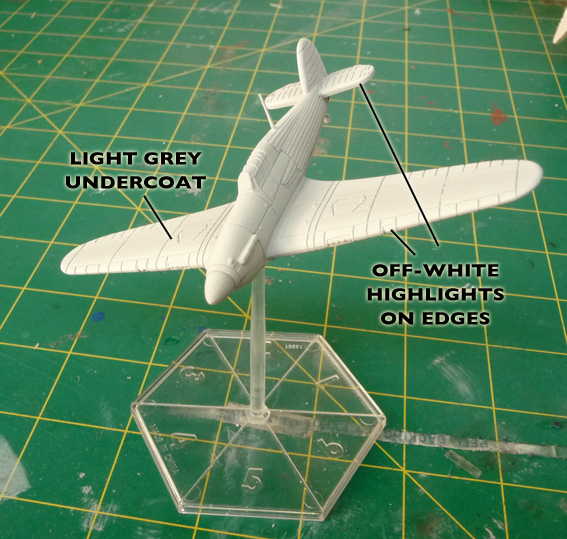
Long way to go yet! Colours are Tamiya, shot through my Iwata Revolution airbrush. The off-white highlights are to give the model a little more depth, which will come through the light coats of final colours.
Before I do that, I will be pre-shading the panel lines, with MIG pigments - a technique I have not tried before, but am eager to have a crack at.
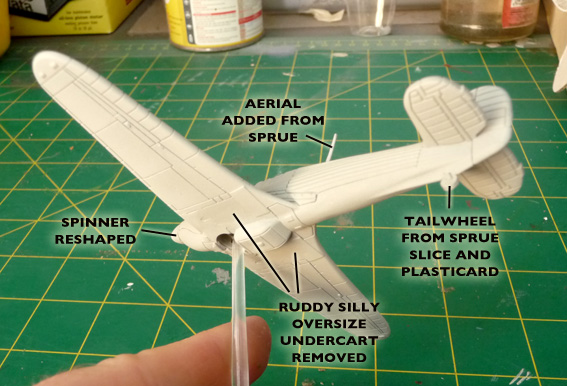
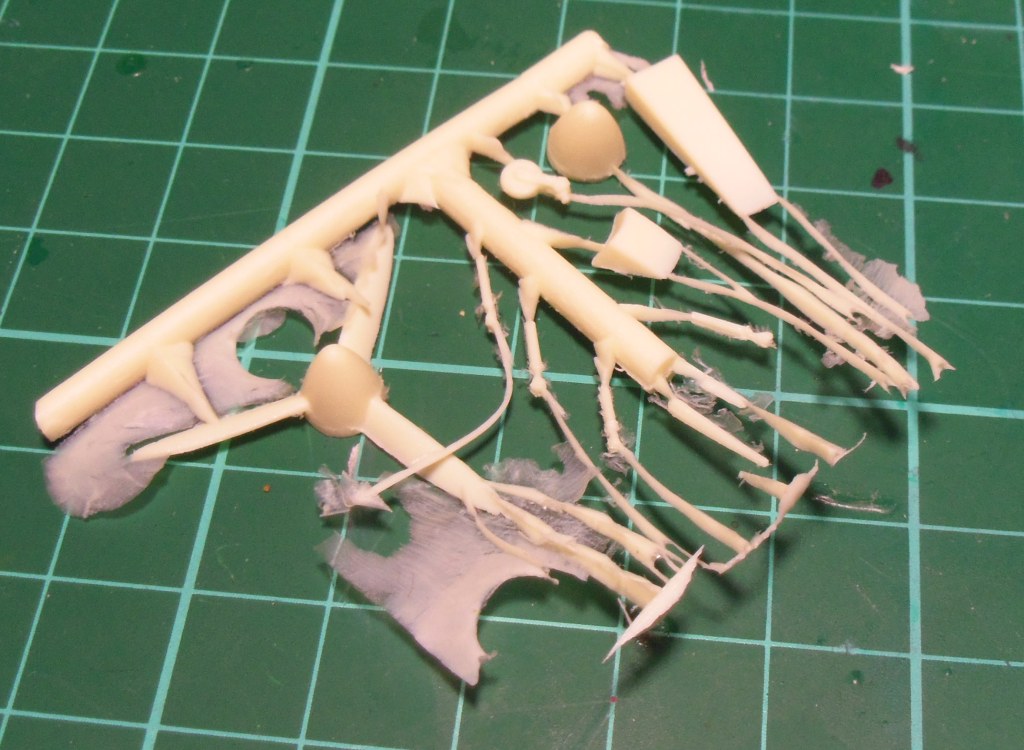
As is usual for me, I can't leave a miniature as-is if I'm dissatisfied with the detail. It's the kit modeller in me. So, all my AAAF planes will be getting (at the least!) tailwheels and aerials.
In the case of the Hurricanes, I also fixed the shape of the Rotol spinners (not quite right, but they'll do.) and removed those horrible, oversized, completely bogus undercart doors! What is with those?!? Why are there a couple of what appear to be pistons sticking out behind them? I suspect the 3D artist who sculpted these didn't have access to a physical model for reference. If they did, then shame on them for this ugly abuse of artistic licence.
Rant over! :lol:
The doors, and the shell ejector ports, which were also shaved down, will be replaced with home-made decals later.
The Me109's are on the workbench now, so I hope to get them primed later today.
That's all for now! See you again next weekend.
- Martin
——— UPDATE ———
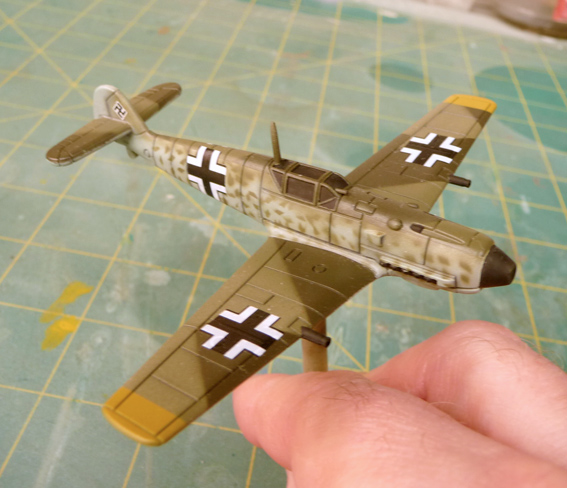
The Me109's are fixed, filled, detailed and primed, ready for the next stage.
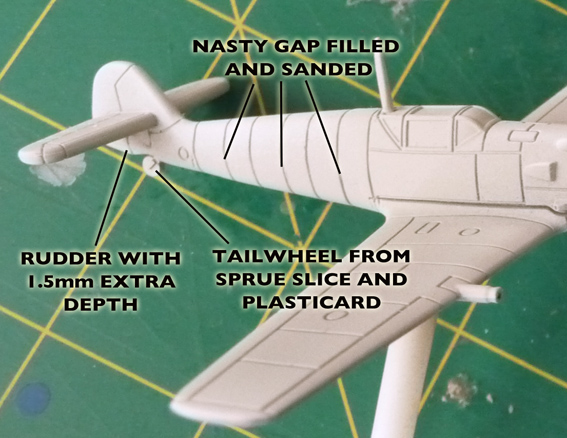
Most of you will be more than familiar with the huge gap that runs down the sides of the 109's fuselage. Naturally, that couldn't stay, so on each 109 it was filled with Tamiya putty and the panel lines were re-etched.
Once again, tailwheels were added, and, after looking far too intently at reference images, I decided the rudder isn't deep enough. By a whole 1.5mm.
Honestly, why must I make things hard for myself...? :roll:
So, the area fore and aft of the tailwheel was built up with plasticard strip and putty, then sanded back to the desired shape. Now I can sleep at night. :wink:

Aerials were added from 1mm plastic rod, and, because everyone will notice if I don't, I drilled out the muzzles on the cannons.
All ready to go hunt Indianen over Der Kanal! As soon as they get some more paint on them, of course...
Next - Me110's, and, the first stages in pre-shading the panel lines.
See you all next time!
——— UPDATE ———
Better late than never...? :wink:
I'm trying to make sure that I post an update on my Battle of Britain project each weekend, but I missed my deadline last night, due to the weather gods conspiring to prevent me from getting any airbrushing done.
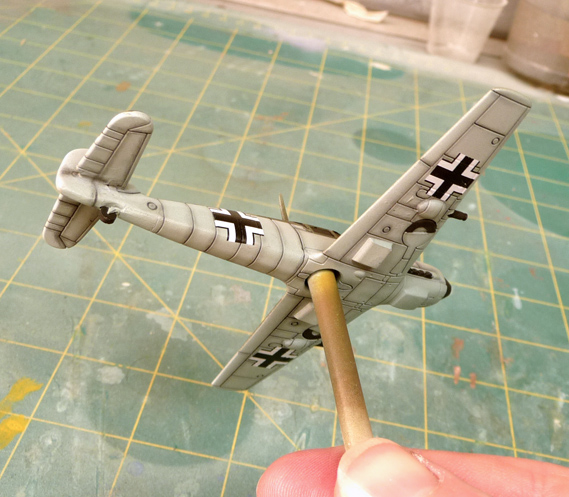
On the upside though, I've spent the week engaged in a very successful experiment - Preshading with Mig Pigment.
If this technique looks familiar, you're most likely remembering that this forum's own Mr T used the same trick to preshade a night fighter Me110, and described it on his thread about said Nachtjager:
aaminis.myfastforum.org/about32316.html

Basically, the idea is to create a subtle level of depth to the seam lines on a model. Normally, I would airbrush preshading onto a model aircraft, but at 1/100 scale, things become just too fiddly for my airbrush to handle.
Instead, applying a dark pigment powder (in this case, Mig's Black Smoke), neatly simulates the same effect as an airbrush, but with a much finer line.
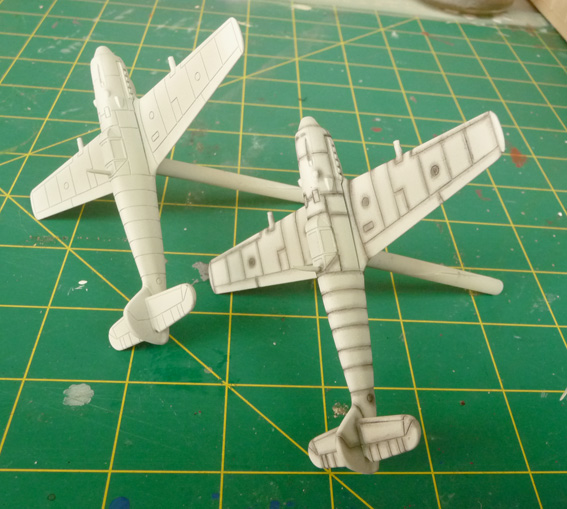
When you airbrush on a topcoat of colour, the result becomes quite gentle, but still builds depth without going over the top:
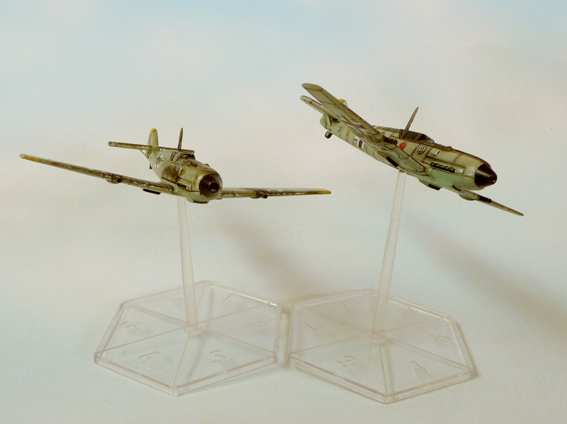
On the left - an Me109 with preshading; on the the right - again with preshading, but with a coat of Tamiya XF23 slowly ghosted on top.
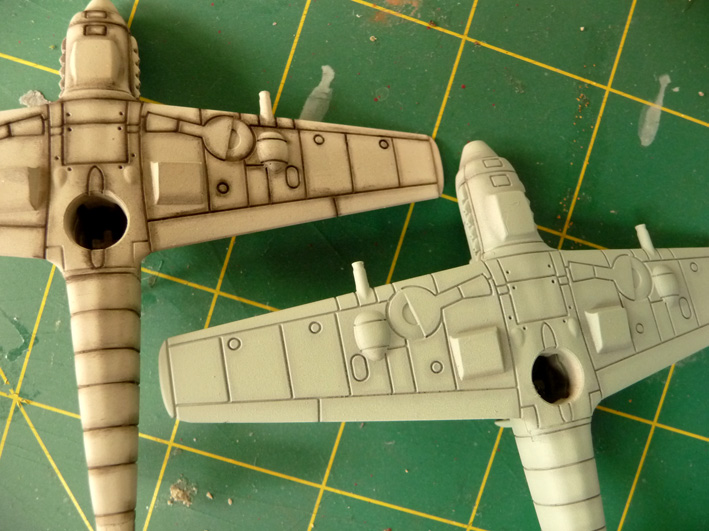
Here's the 110's showing the effect a little better. You'll have to trust me that the camera isn't capturing the contrast as accurately as it deserves!
Also, after ordering some decals from 1/144 Direct, I was a little... disappointed... the RAF roundels, in particular, reveal that the ALPS printers are really beginning to show their age; the red centres in particular are very obviously halftones, rather than solid colours.
I also needed markings for 303 (Polish) Squadron, plus the myriad of details that festoon the 109's of JG26. So, a few enjoyable hours in Illustrator, and some inkjet decal paper, resulted in this:
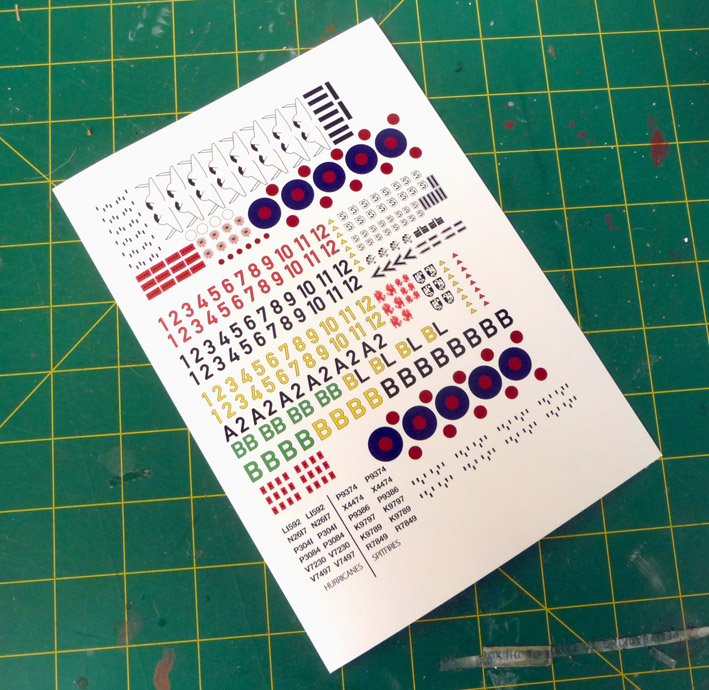
I'm quite pleased with how well they came out!
So, at the end of this (last!) week, Most of the aircraft are pre-shaded and have had their first topcoats of underside colours applied.
Next up, I'll draw and cut up some camouflage templates, and these little machines will start really looking like their real-life counterparts. (They'd better, or I'll want to know why...) :evil:
That's all for now, see you all next weekend!
——— UPDATE ———
Greetings again, chums!
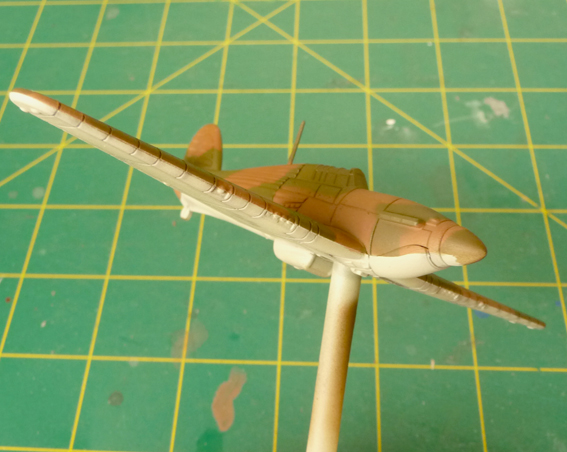
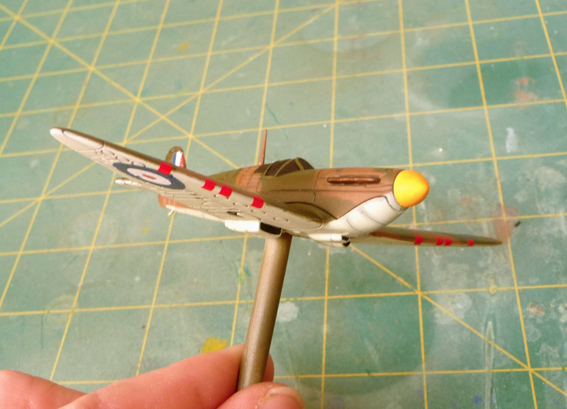
Finally, some decent amounts of paint are starting to go through the airbrush. The rain stayed away long enough on Sunday for me to get some basic colours onto the Hurricanes.
The preshading came through a treat on the brown layer, but, to save time, I did the brown (XF52 with a touch of red,) as one, all-over coat, then, masked it for the RAF Dark Green (XF-81). However, this resulted in the preshading mostly disappearing beneath the green, as it was hidden beneath two layers of paint, not one. Hm! I think some post-shading will be in order, after I've added the decals.
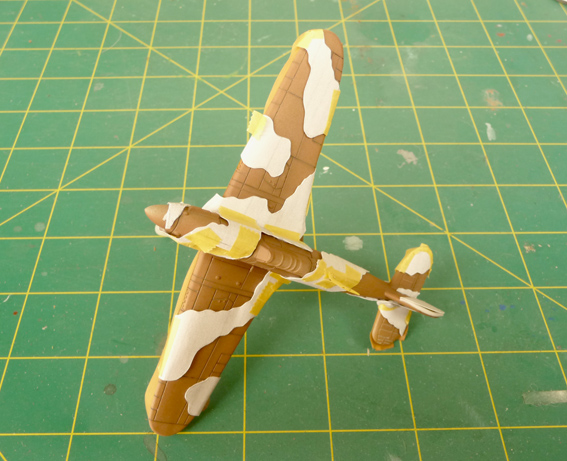
The masks are just regular copy paper, on which I printed scans of a set of 1/48, self-adhesive, Hurricane camouflage masks, which I'd reduced to 1/100 scale. Blu-tack holds the masks barely 1mm off the surface of the model, whilst Tamiya masking tape takes care of the sharper edges, such as the demarcation between Sky undersides and camouflaged topsides.
I'm rather pleased with the results, although I think the 'feather' between the brown and green is a bit too soft for this scale.
In any case, I'm eager to get some decals on these Hurri's, so I think a mini-update will be inbound very soon.
See you all again soon!
——— (mini) UPDATE! ———
Hello again!
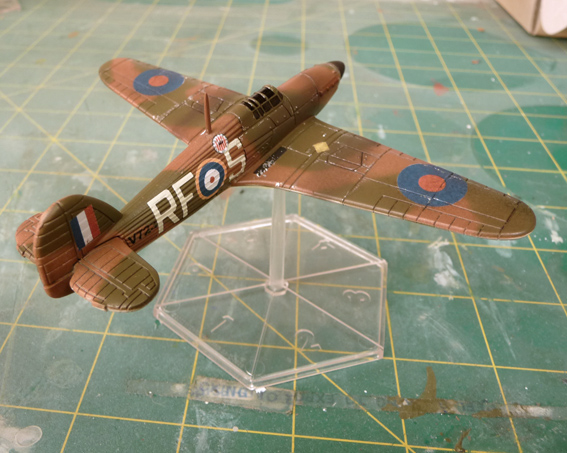
As promised, here's a mini-update showing a couple of the Hurricanes, with their decals applied.
As it turned out, the roundels from my home-made decals weren't sufficiently opaque to use against the dark colours of the camouflage. So, I settled for the 1/144 Direct items, and was pleasantly surprised...
You can see where the white ink layer is 'bleeding through' on the edge of a couple of the roundels, but the halftone red centres are not as noticeable as I feared. Huzzah!
The squadron codes are from the Decals Carpena range (Set 72.93 - Codes RAF 'M. Sea Grey' 24, 16" Fighters 1936-1947) They have the tightest registration of carrier film I've ever encountered, but they are a bit thick, and - the letter 'L's are all backwards! :shock:
Thankfully, the decals sit ok, even when wrong-side up, with the aid of some Tamiya Mark Fit, and dire threats...
Other markings, such as aircraft numbers, spent case ports, and the red dope panels over the gun muzzles, are home-made.
There's some touch-up work to do, and details such as the spinners, canopies, etc. Then, some post-shading, and oil stains, cordite streaks, chipping, etc.
All in all, I am very happy with how these turned out. A boyhood dream to wargame the Battle of Britain is edging closer!
See you all next weekend!
——— UPDATE! ———
Hey gang! How'd the weekend go? Actually, where'd the weekend go...??
Oh well! With only one day off this time, I made the best use I could of the day, and got to work on two types that are lagging far behind the others - the Spitfires and the Junkers 88's.
To start with, here's the first of the 88's undercoated. They're from the Model Power Postage Stamp series, (pretty big stamps...!) and rather large beasties. I didn't like the raised panel lines, so they got sanded off, and I'll use decals to reproduce the required surface detail. Debating if I should undercoat the clear sections (removed here) and finish them the same as the canopies on the A&AAF minis, or leave them as is...
Now the Spitfires... hm.
To be honest, the Mk 2 Spits from the Angels 20 boxed set are among the poorest of the sculpts in this range. The canopy is completely wrong, and set much too deep. A feature of the Spitfire is that bulbous perspex hood, added to improve the limited visibility from the cockpit. I think the 3D modeller who built the file for the Spitfire accidentally pushed the entire canopy down into the fuselage without realising before the file went off to China for production. Rapid prototyping has its drawbacks!
So, armed with Tamiya epoxy and plastic strip, I remodelled the canopies on my two Spitfires.

In this side view, you can see how I've improved the shape, to look more in line with the original's canopy. I also added the armoured windscreen from very thin plastic sheet.
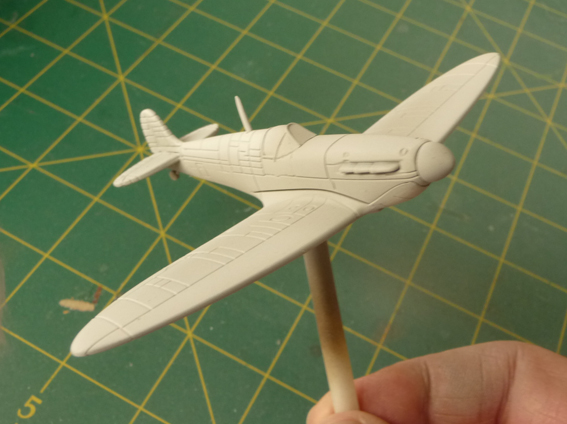
I think this shot shows off the result very well. I'm much more satisfied with this shape.
Only problem is, if I want to expand my collection to include more Spitfires, I'll have to make this modification each time! I don't fancy that! Maybe I'll use some silicone putty to make a simple mould, and cast up some replacement canopies in resin.
1/100 scale aftermarket kit details? Who'd a thunk it??

Next time: The 109's get some proper paint! (I hope...) See you all again soon!
——— UPDATE ———
Back from the dead! Well, it certainly feels like it...
Greetings, all. Apologies for the lengthy wait for this new instalment, but a funless combination of a family member's cancer, full-time work, and the 'flu has put a massive dent in my 'me' time.
Alas, today was the deadline for my Battle of Britain game. A few aircraft are finished, but far more are not. Still, there's bound to be opportunities in the near-ish future to get these kites battling, as planned.
Having said that, I am told that Lord Beaverbrook is not happy with my output! :lol:
So, what did i get done since last time? Well, quite a bit, actually...
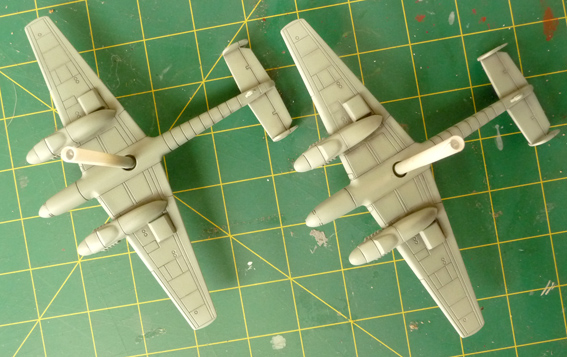
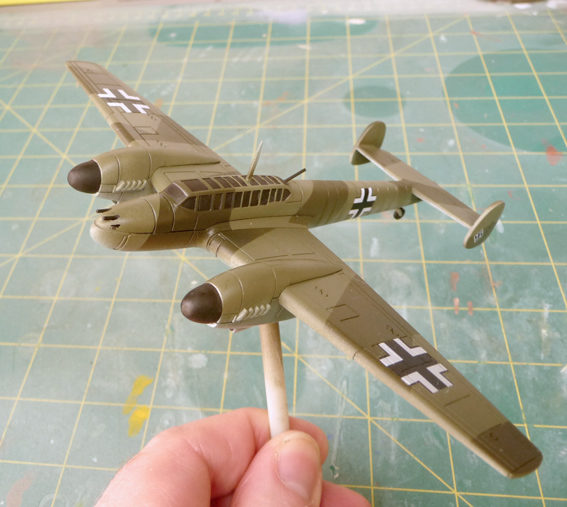
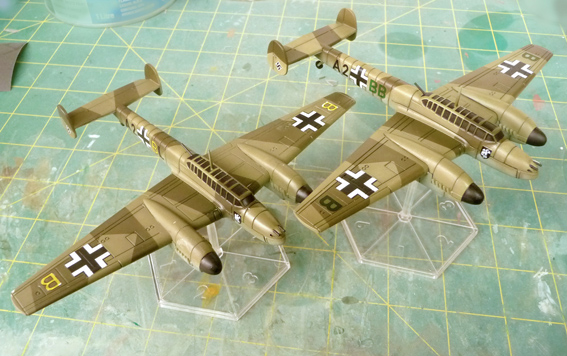
Here's the Me110's as they currently stand. Both have been given the same camouflage finishes, in order to keep things simple: Tamiya XF22 mixed with XF49 for RLM02, followed with XF62 (with just a touch of XF49,) for the very dark green of RLM71.
The decals are again from 1/144 Direct.
The colours were very slowly dusted over the aircraft, with the airbrush turned down to about 15psi. As a result, I was able to get a nice fade down to the hellblau undersides.
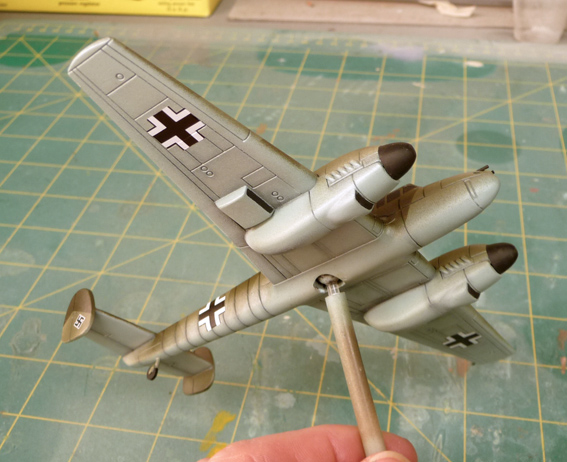
The canopies, spinners, etc, have been given a simple coat of Vallejo black, applied with a fine brush. Painting 110's canopies is hell, I tell you!!
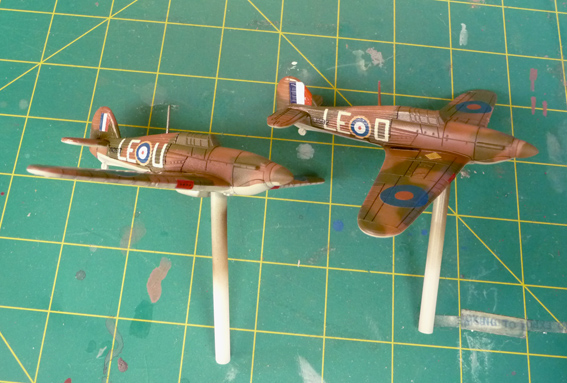
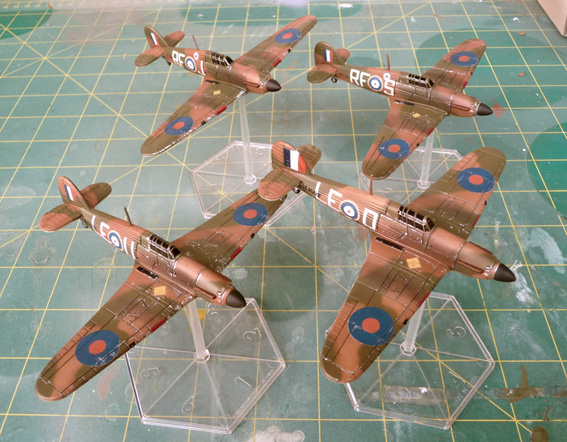
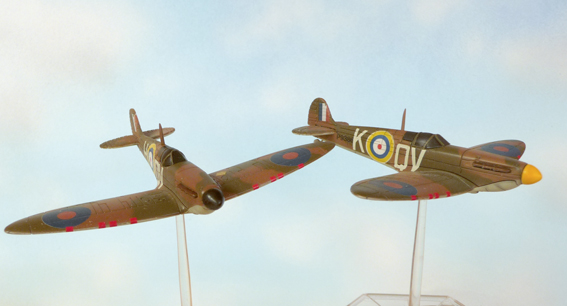
Moving along, here's my duo of 19 Squadron Spitfires, resplendent in their warpaint:

The sharp-eyed amongst you may have noticed that I tend to do the RAF pairs in either 'A' or 'B' schemes, but never both. This is simply to save time, because I can re-use a set of masks from one aircraft on the other.
Wee roundels on the undersides of this Spitfire's wings. There seems to have been a lot of interpretation of Air Ministry instructions for the marking of RAF fighters. Along that train of thought, I've yet to mask and spray some oversized roundels on the fuselages of these aircraft.

Brian Lane's 'Spit' has, of course, its distinctive ex-OTU yellow spinner.
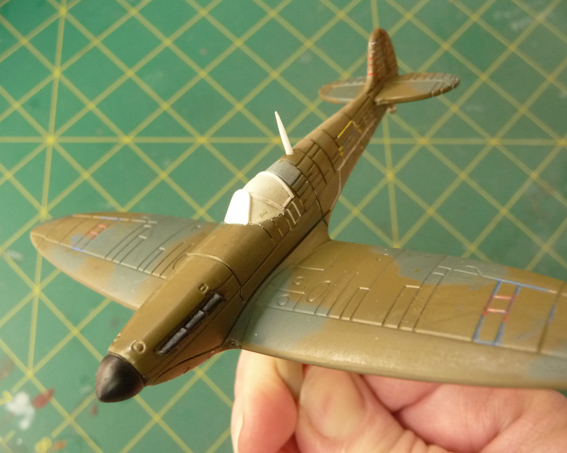
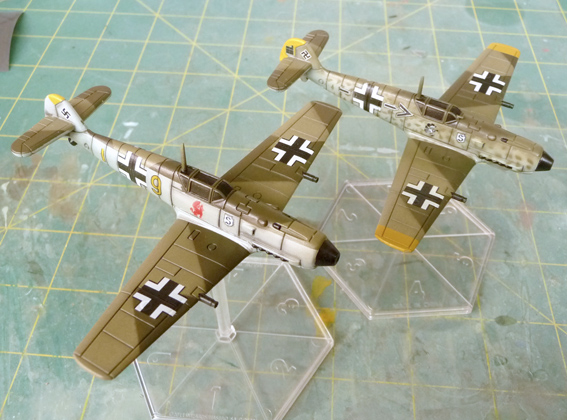
Back to the Luftwaffe again! Here's the 109's:

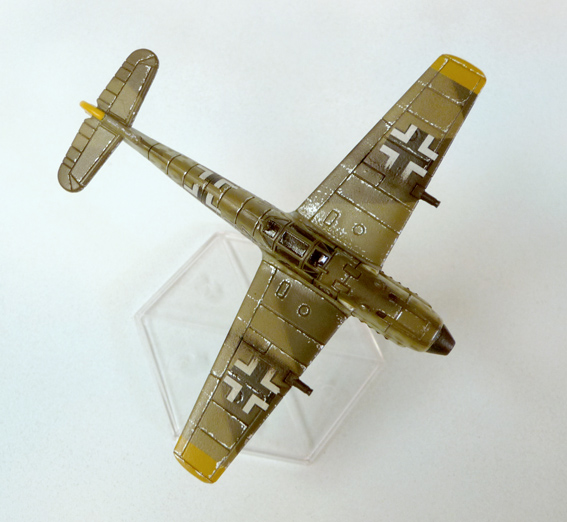
These were a delight to mask up compared to the RAF fighters. The only thing I'm not happy with is that I let my enthusiasm get the better of me, and I sprayed the yellow noses without first adding a basecoat of orange or pink, to give some warmth to the yellow. As a result, it looks a bit lemon-y, and 'mean'.
But, I am rather chuffed with how the mottling looks...
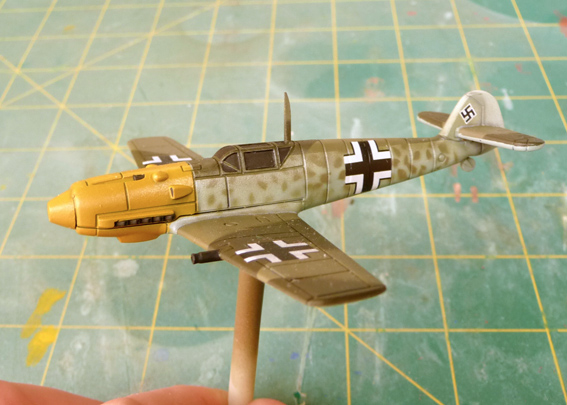
This was sprayed through a hand-held paper mask, using minimal pressure, and really thin paint. Then, the same colour was lightly sprayed over the edge of the camouflage / hellblau demarkation, to soften it. Quite nice!
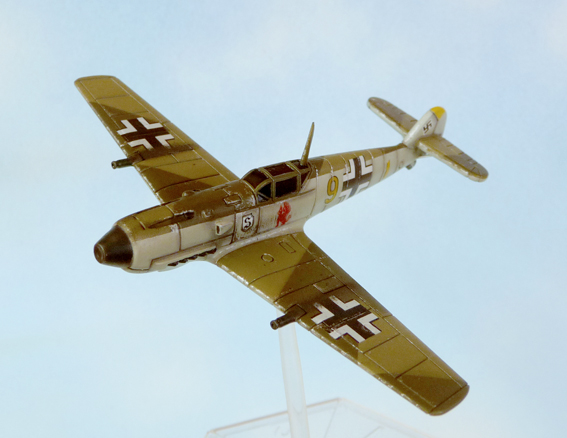
Same thing on Galland's 109. Also, you can see the telescope poking out of the windshield. I really should add a special rule to Galland's card for that... suggestions, anyone?
Galland's wingman really shows off the result of preshading with Mig Pigments in this shot:
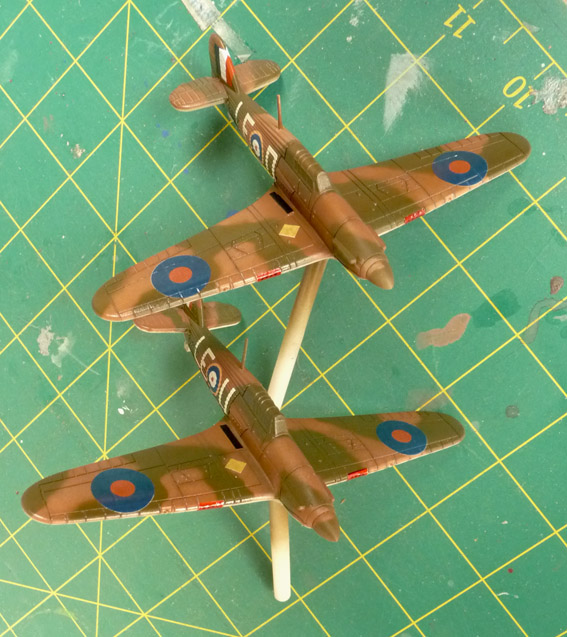
Annnnd lastly, but not leastly - all the Hurricanes. Finished!
:shock:
Huzzah!
You've seen the Hurricanes at the forefront of progress, so as you can probably guess, it didn't take too much to roll them off the assembly line. Canopies and other details painted in matt black (gloss varnish for the glass work after), a lot of chipping added with a very fine long-liner brush using Vallejo Steel, and then some Mig Pigment streaks for cordite stains.
Not sure I'm completely happy with the cordite stains yet.
But I am happy with the home-printed decals I made for the 303 Squadron's badge. It is rather big, but I like it.

Phew! End of epic update!
Next time, I hope to show some progress with the Ju88's, as well as some more completed types. Until then, don't forget to raise a glass on September 15, and remember The Few, and all those who gave their lives in the skies of England, 75 years ago.
Tally ho!
——— UPDATE ———
Greetings once again, all!
A quick update today, with some shots of the Germans, rapidly approaching completion.
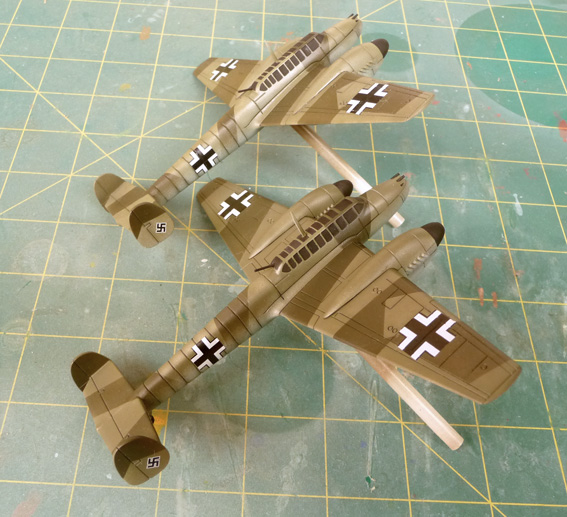
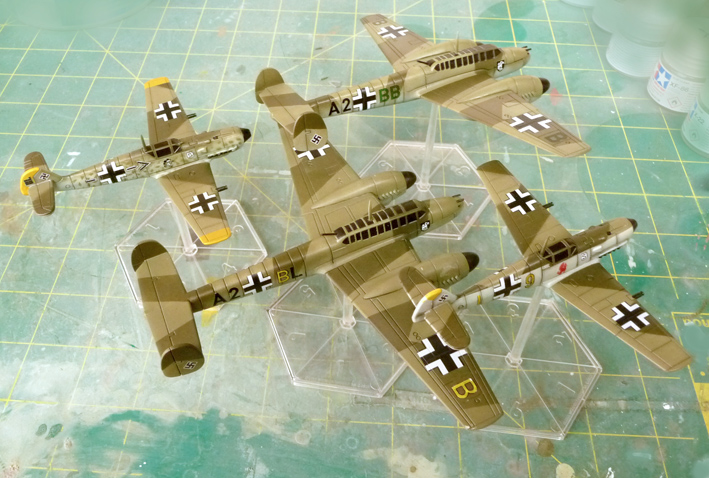
Here's my two Me110's in the colours of ZG2, complete with their white dragon shield below the cockpit...
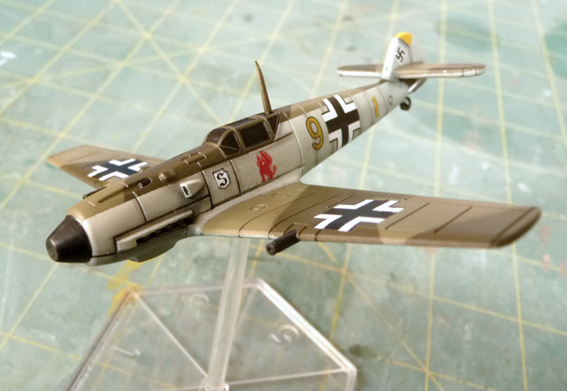
And the first of the 109's are finally at the detailing stage. Just trying to decide if I'm brave enough to risk trying to airbrush on their exhaust stains... :?
I'm rather pleased with the results of Galland's personal 'Mickey Mouse' emblem, created as a home-printed decal, as were the other crests, numbers, etc.
A close-up of 'Yellow 9' shows how nicely the JG26 'Schlageter' emblem came up. This is actually two decals - one placed to provide an outline that was filled with thinned white acrylic, the other placed on top of that, achieving the white background.
And lastly, behold the combined might of the Jagdwaffe! (For now!)
The Ju88's are in the middle of receiving their paint now, so I expect to show them off this weekend. Also, the Spitfires have their fuselage roundels, so I'll finish their decalling, and they should get rolled out of the hangar too.
As I approach the end of this project, I find that things seem to be slowing down. Or has it been so long that I'm just getting older...?!? :lol:
More on the weekend!
——— UPDATE ———
Aaaaaannd, here we are again!
Only a brief update today, folks, as I'm waiting on some lasercut bases and acrylic rods to mount the Ju88's, so they have not had a great deal done with them this weekend.
On the upside, all of the other aircraft are either at the detailing stage (exhaust and cordite stains, chipping, etc,) or finished!
Just to prove it, here's two of the 109's with their detailing done...
In the end, rather than airbrush the stains, I mixed a little of the Mig Pigments with Mr Levelling Thinner, to improve its adhesion, and stippled and smeared it onto the wings and fuselage.
The chipping was again, just Vallejo Steel, applied very thinly with a fine liner.
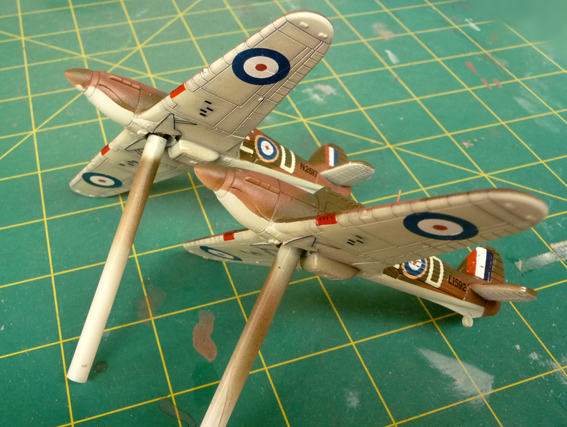
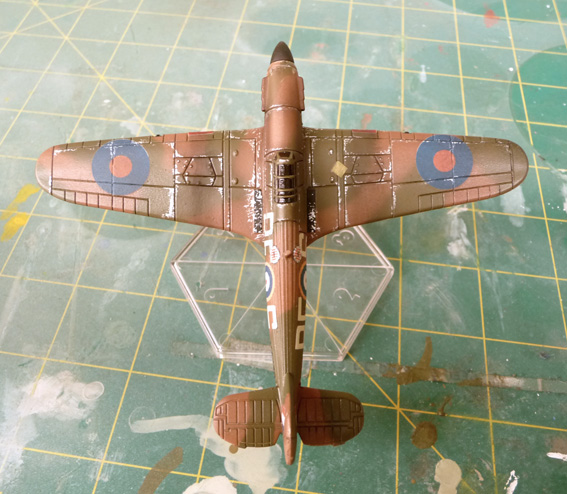
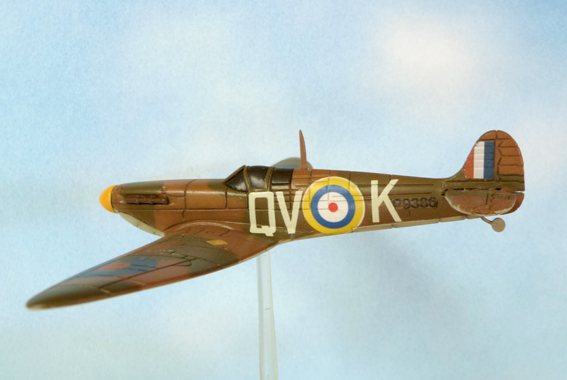
So, that's six aircraft all finished. Meanwhile, here's the Spitfires, with all their decals, including the home-made oversized fuselage roundels:
Some of you may have noticed that I'm shooting the models in front of a purpose-made backdrop now, rather than just on the top of the workbench. Took me all of 10 minutes with a couple of spraycans applied to a sheet of light blue card to make!
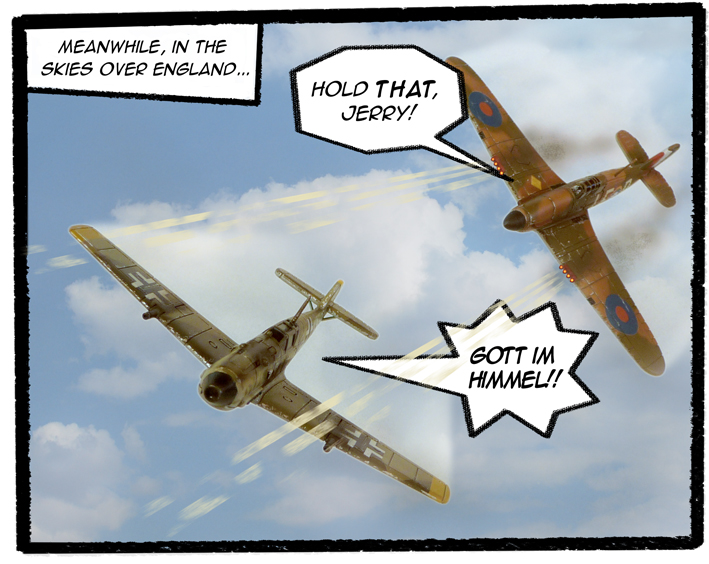
And, with a few minutes spare, and some Photoshop fiddling, I decided to pay homage to those quality literary influences of my youth - Commando comics!
That's all for now, see you all next weekend!
––––––––––––THE LAST UPDATE!–––––––––––––––––––
Hello all!
This will be the last update for this project, because I finally completed this bloody thing!!
Yep, after a swag of 'real life' troubles hit me in the face like a chainmail handbag full of grenades, I thought this would be a stillborn game. But, a little time off work, and some gun-to-my-head incentive got things finished, and here's some shots of the results.
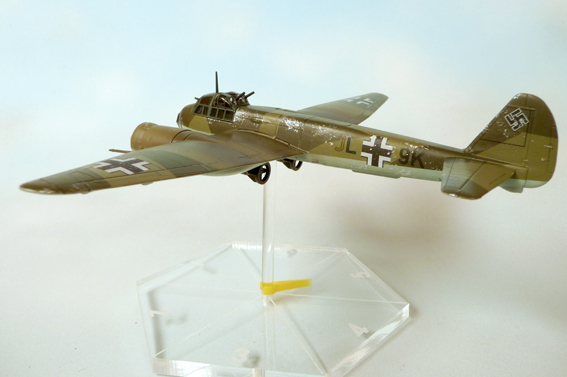
But first, here's some pics of the Ju88's, all painted, decalled and detailed...
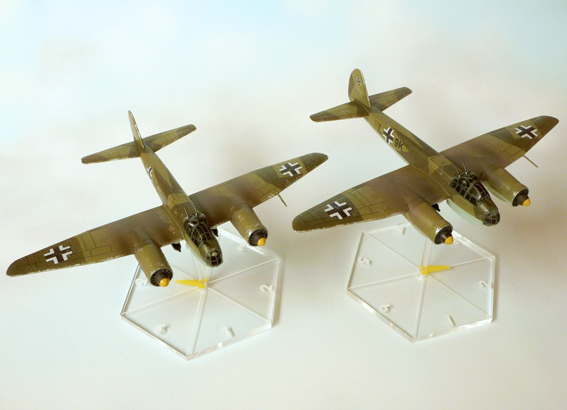
Turned out right nice in the end! After sanding back all the raised panel lines, I drew up new line art in Illustrator, and produced decals on my inkjet printer to simulate the removed lines.
The decals proved to be real pains. They were too large to be 'sat' as single pieces over the wings, and had to be sliced into multiple parts. And, they are way too thick; compared to the laser-printed decals I was producing a while ago, these are like wallpaper.
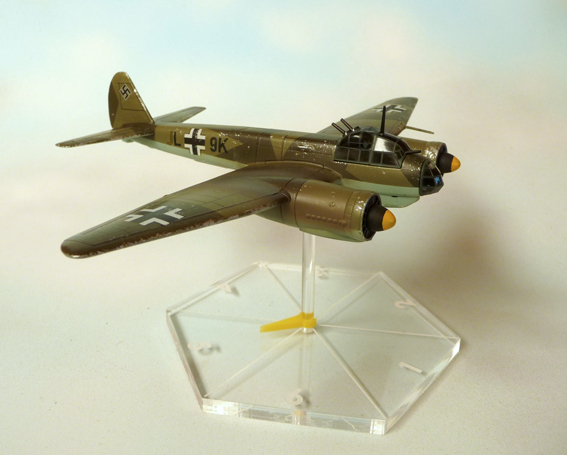
I wasn't impressed, but carried on regardless. After matt varnishing, I lightly sponged on Vallejo Steel to weather the paint, and, to my delight, the aircraft looked way better; the decals seemed to behave themselves with their 'decalliness' broken up by the bare metal.
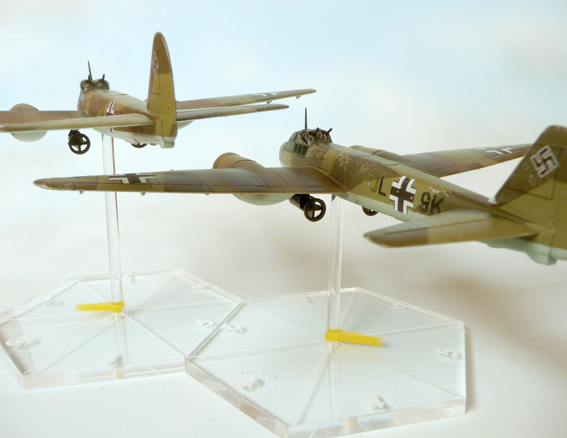
Insides of canopies were painted black to better match the look of the AAAF miniatures, and both aircraft were mounted on 5mm clear acrylic rod, over lasercut 6mm bases.
The bases were cut at my local FabLab - a community based, free-to-use service that enables folk to try out laser cutters and 3D printers, etc. If you're in or near a major city just about anywhere in the so-called developed world, you'll probably find one near you.
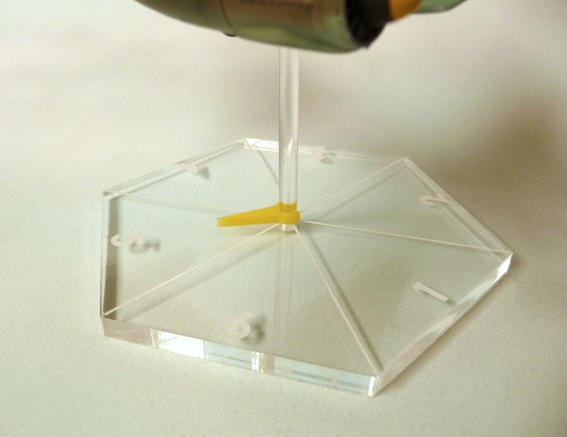
As you can see on the close-up above, I also cut some little dial arrows that clip around the stems of the bases, to indicate the aircraft's altitude. I made these in two sizes, 5mm for the '88's, and 3mm for the AAAF miniatures.
There's still another Junkers waiting to emerge from the paintshop, but with the deadline looming, two would have to do for the game - and as it turned out, one more would have been one too many...
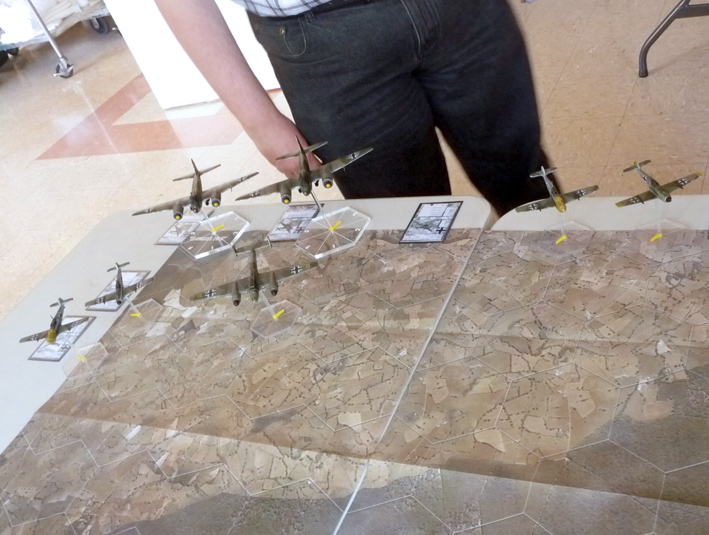
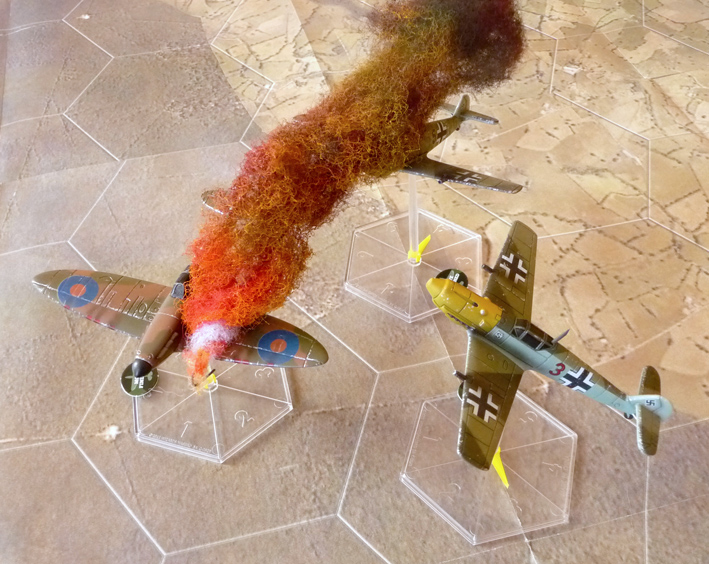
I ran two games today, both using the same scenario - the outnumbered RAF needed to shoot down the two Ju88's for a victory, or one for a draw. If both made it off the table, it was a win for the Luftwaffe.
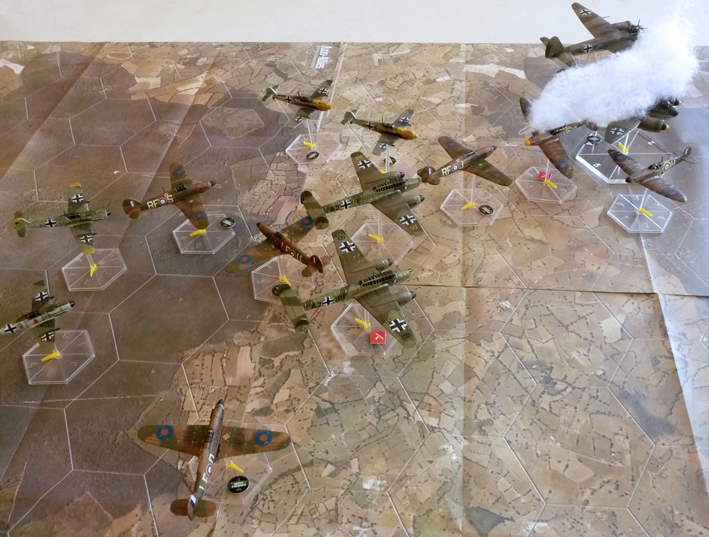
So, four Hurricanes, with two aces, and a pair of Spitfires rose into the clouds to intercept the Junkers, escorted by 2 Me110's and 4 Me109's. The Germans could boast three experten between them.
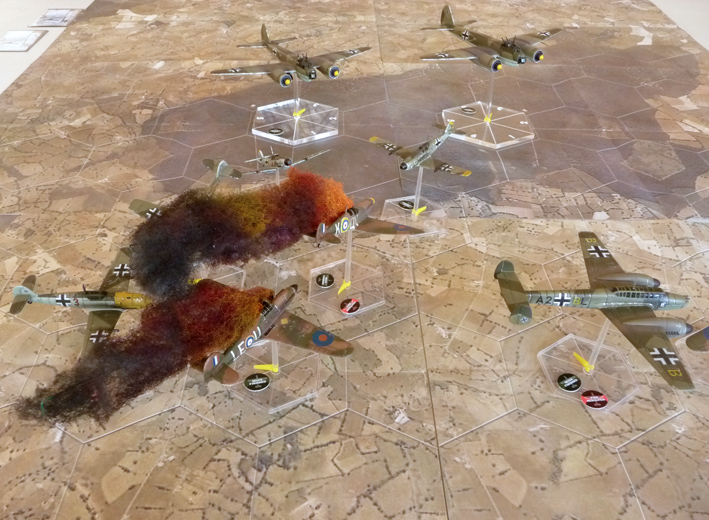
As you can see, 19 Squadron's Spits were quickly into the fray... and even more quickly, out of it!
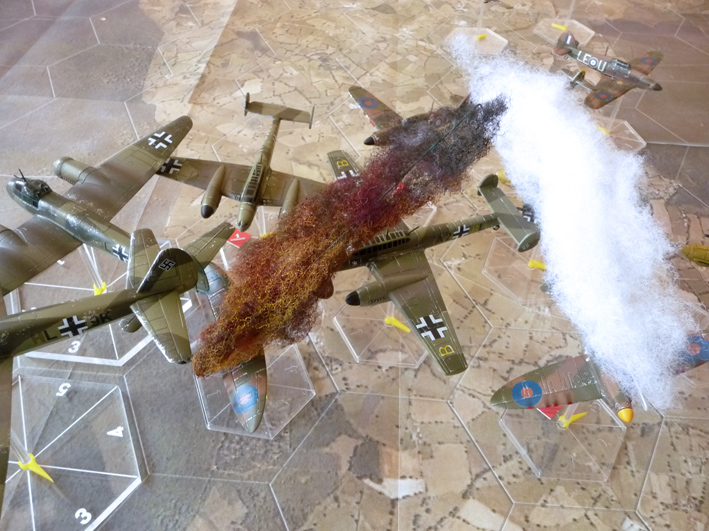
And then, Schopfel, JG26's four-Hurricanes-in-one-go ace, showed his expertise in nailing plucky Englanders...
... shooting down Douglas Bader in the process!
Game One to the Germans, without a single Luftwaffe casualty!
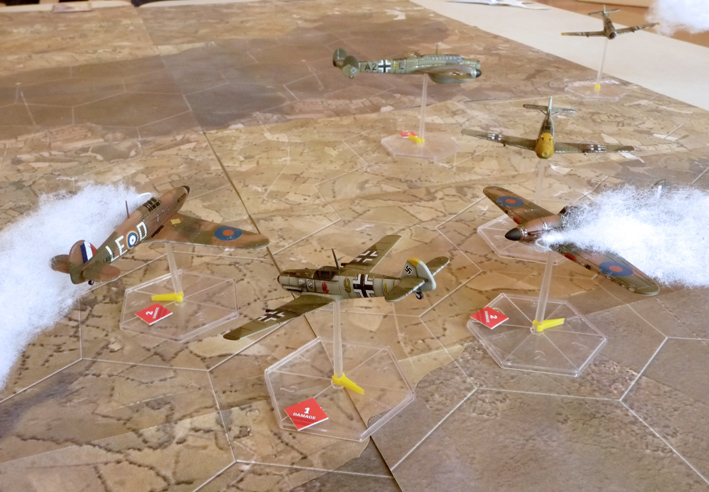
On to game two, and to even things up a little, the 110 ace was left on the bench...
Clearly, this had a massive impact on the game for the RAF...
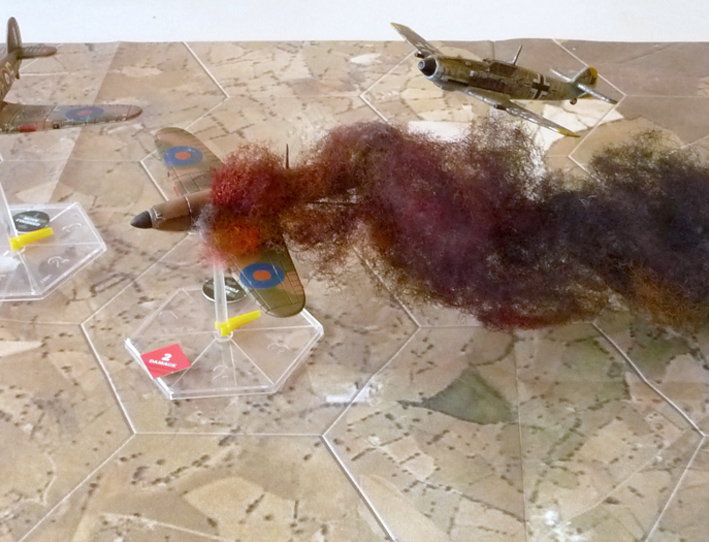
First round of shooting, and 'Sandy' Lane's Spitfire was reduced back to saucepans, along with a 264 Squadron Hurri'.
And it got worse! Bader went down in flames again, this time at the hands of Galland! That might colour their post-war friendship...
Desperately, the surviving 19 Squadron pilot threw himself after the Junkers; would British pluckiness win the day?
Possibly not.
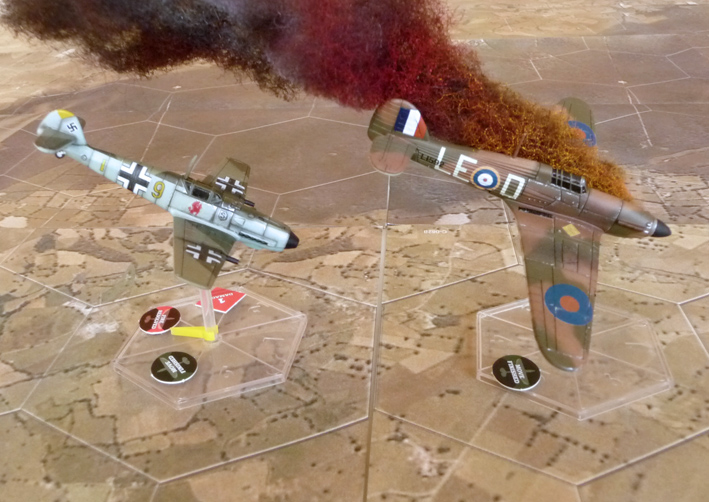
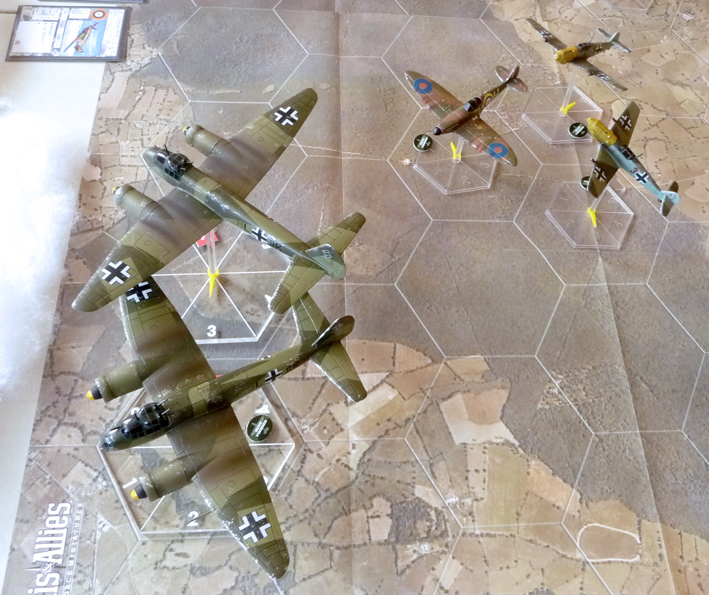
The battle was a foregone conclusion at this point. But just to emphasise the fact, here's the last Hurricane standing shouting defiance (in Polish) at the Nazi aggressors...
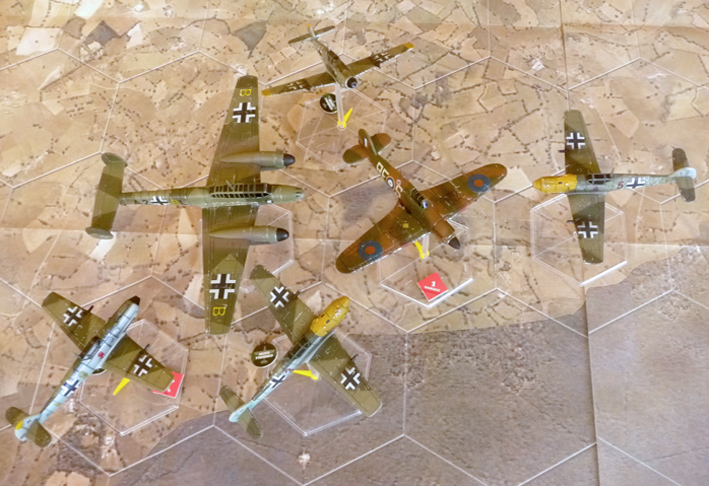
... just before Galland dispatched him in short order. 'Dolfo' actually ended the game with three victories to paint on his tail!
A good time was had by all though, including the RAF players, although there were some astonishing rolls from the German player. But at last we have a 'feel' for the game, and we know what we want to tweak. Also, I made some daft errors in the application of the rules, such as failing to make the Germans move their excess aircraft first when they lost the initiative. Well, I'll remember next time, won't I??
CONCLUSIONS
It's been a difficult time for my family and I over the past few months, and this project has helped enormously to keep me distracted, and therefore, sane. Although I have very much enjoyed the journey, there are some things I'd do differently:
1. Don't paint so many aircraft at once The sheer amount of cleaning, masking, painting and decalling for 14 aircraft in this scale can defeat your enthusiasm.
2. If planning a game, playtest it! Less-cheerful RAF types might have turned the table over after that first turn in the second game.
3. Keep home-made decals simple. The hassles with the Junkers' decals nearly made me abandon the whole project in a fit of frustration.
So, there you have it. Finished! (For the time being...) Yep, in true gaming tradition, what collection of miniatures is ever really finished...? I've still got another starter box to paint up, and I'm thinking of getting myself a couple of Armaments in Miniature Defiants... and wouldn't a Heinkel 111 look grand...?
Thanks for reading everyone!
- Martin


 )
)