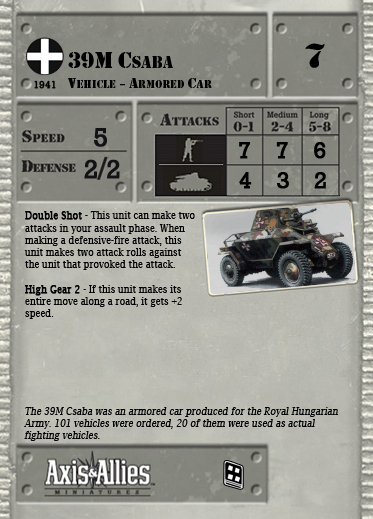
Armor for vehicles is as follows: 5-24 mm 2 defense 25-39mm 3 defense 40-49mm 4 defense 50-79mm 5 defense 80-99mm 6 defense 100-199mm 7 defense 200-250mm 8 defense There is nothing higher than 250mm of armor in this game. 25-39 3 defense
Speeds for vehicles are as follows: 10-29km speed of 2 30-39km speed of 3 40-49km speed of 4 if armored car usually gets high gear 1. 50-90km speed of 5 and usually get high gear two unless heavy which then gets high gear one I'd armored car. Also depends on the strength, quality, and horse power of the engine and reliability of the suspension.
Copied from the old environment from RAEVSI's post:
INFANTRY
Armour
3/3 All Soldier-Artillery 3/3 Low morale Infantry units eg Fortress Defenders etc 3/3 All Cavalry (large target or small?? {5 man?} squads) 3/3 Small specialist squads (1-5 man teams) eg Forward Observers, Sniper, light mortar teams
4/4 Regular Infantry 4/4 + Green= Large units with poor leadership 4/4 + Steely Resolve= Veteran Infantry
5/5 Elite inf (Paratroopers, SS etc) 5/5 Hero
Movement Speed 1 Most infantry Speed 3 Cavalry Speed 0 Most Soldier Artillery
Anti Infantry Attacks from Soldiers
10/5/0 Specialist SMG squads 9/7/0 Elite and well armed 9/6/0 Elite with averagely armed (SNLF Fanatics) 9/5/0 Well Trained primarily armed with SMGs or LMGs 8/6/0 Well Trained and equiped 8/5/0 Well trained but lightly armed squads 7/5/0 Poorly armed and equiped or small {5 strong cavalry?}Partizans, Chinese inf. 6/4/0
ARMOURED FIGHTING VEHICLES
Anti Armour Stats
GENERIC MGs 2/2/2
ITALY
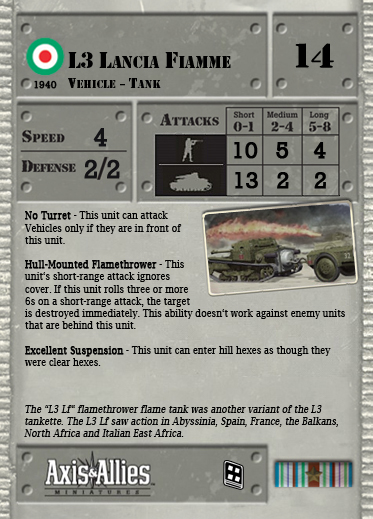
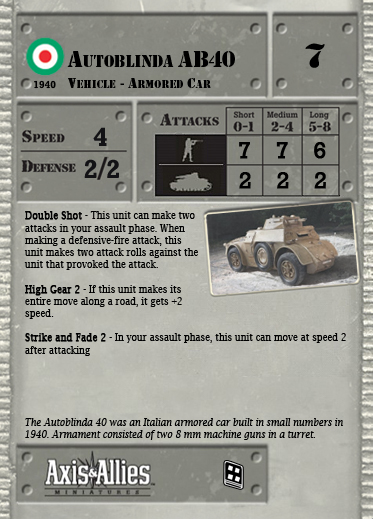
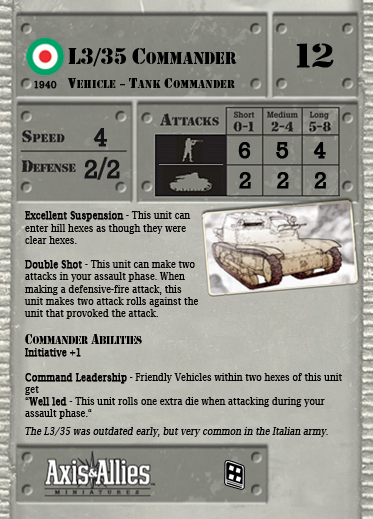
20mm Breda 35 4/3/2 (L6 and AB41) 37/L40 9/7/5 (M11/39) 47/32 m35 10/8/6 (M13/40) tank mount 47/32 m35 10/8/7 (L6/47 TD and ATG) 75/18 m34 12/11/10 (semovante 75/18) 90/53 17/15/12 (semovante 90/53)
JAPAN
AT Rifle 6/5/3 37mm type94 6/4/2 (Te Ke) 1 man turret? 37mm type1 7/6/5 (Ka Mi) 37mm type98 8/7/5 (Ha Go) 47mm type1 9/8/6 (ATG) 47mm type1 10/8/7 (Chi Ha) 57mm type90 5/4/3 (type 89A) 57mm type90 8/6/5 (type 89B with larger turret) 70mm type92 7/6/5 ( low velocity field gun) 75mm type3 and type 1 13/11/9 (Chi Nu and HO Ni) 75mm type 88 14/12/10 ( type 88 AA) 150mm type4 8/7/6 ( HO RO )
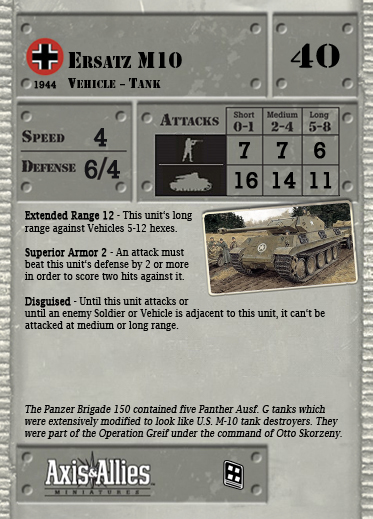
Additional Rockets - Instead of rolling this unit‘s attack against an enemy Soldier or Vehicle, you can declare you are using the additional rockets at -/13/11 against a Soldier and -/6/6 against a Vehicle. This attack gets -1 on each attack die and it ignores cover. The long range of this attack is 5-12 hexes. Make a seperate attack roll against each unit in the target hex. (This includes friendly units.) Aera - Each 6 friendly Soldiers adjacent to this unit roll count as two successes. Agitate - Friendly Soldiers adjacent to this unit get +1 on each attack die against disrupted and damaged units. Barbed Wire Removal - May attempt to remove barbed wire in an adjacent hex. Roll a die. If you roll a two or more the barbed wire is removed. Once this ability is used remove this unit from play. Command Agression - Friendly Vehicles within two hexes of this unit which have the Strike and Fade ability, may change it to "Agression 1 - In your assault phase, this unit can move at speed 1 before attacking." Command Blitzkrieg - Friendly Vehicles within two hexes of this unit get "Blitzkrieg - This unit gets +1 speed in your movement phase." Command Courage - Friendly Vehicles within two hexes of this unit get "Courage - This unit can move while disrupted if they move closer to the nearest enemy unit." Command Defense - Friendly Vehicles within two hexes of this unit get "Take Cover - This unit may not move in the assault phase and gets +1 on cover rolls that turn when in cover." Command SS Agression - Friendly Vehicles within two hexes of this unit get “Agression 1 - In your assault phase, this unit can move at speed 1 before attacking.“ Command Strike and Fade - Friendly Vehicles within two hexes of this unit get “Strike and Fade 1 - In your assault phase, this unit can move at speed 1 after attacking.“ Commander Transport - This unit can carry one non-Vehicle Commander. The commander abilities of the mounted Commander applies to all friendly Soldiers within two hexes of this unit. Dedicated Crew - While this unit has cover and is not adjacent to an enemy Soldier, this unit does not suffer the -1 penalty to their attack dice while disrupted. Disguised - Until this unit attacks or until an enemy Soldier or Vehicle is adjacent to this unit, it can't be attacked at medium or long range. Dozer Blade - This unit ignores Tank Obstacles. This unit destroys each Barbed Wire and Tank Obstacle it crosses. This unit destroys each Barbed Wire and Tank Obstacle in hexes it enters. This unit gets +1/+0 defense against units that have the close assault ability. Eagle-Eyed - This unit has a medium range of 2-6 hexes. Extra Ammo - If this unit is in the same hex as a friendly machine-gun unit, that unit can reroll any 1s from its attack ice roll. (You may only reroll an attack die once with this ability.) Fire in the Hole - For each enemy unit in the hex containing the obstacle roll a die. On a three or more that unit receives a face up disruption counter. HEAT Rounds - Once per game, before you roll this unit‘s attack against a Vehicle, you can declare you are using these rounds. If you score two hits against that Vehicle with this attack, score an additional hit. Hill Advantage - While this unit is in a hill hex, it gets +1/+1 defense. Hold the Line - Friendly Soldiers adjacent to this unit roll 1 extra die when making defensive-fire attacks. Hollow Charge - Once per game, before you roll this unit‘s attack against a Vehicle, you can declare you are using these rounds. If you do, you can make an attack at 12/10/8. Kamikaze - If this unit accomplished its first attack using Close Assault, it is destroyed immediately. Minefield Removal - Two of these units together may attempt to remove a minefield in an adjacent hex. Roll a die for each unit. If you roll a two or more for both units the minefield is cleared. Once this ability is used both units must be removed from play. Mine Flail - This unit ignores Minefields. This unit destroys each Minefield and Barbed Wire Obstacle it crosses. This unit destroys each Minefield and Barbed Wire Obstacle in hexes it enters. Nowhere to Hide - This unit‘s attacks ignore cover. Semper Fi - Once per turn, this unit can reroll a single movement roll. This unit can move while disrupted if it moves closer to the nearest enemy unit. Special Equipment - This unit does not count toward stacking. This unit must occupy the same hex as a non-artillery Soldier with a base speed of 1 in order to have speed 1 and to use it‘s Special Abilities. Sweat Saves Blood - In your movement phase, friendly non-Artillery Soldiers that start their move adjacent to this unit get +1 speed. Yet to Come - Enemy Soldiers can‘t make defensive-fire attacks against this unit.
At the Ducosim convention on the 23rd of January, Toyama and i played a demo game of AAM. Here follows the AAR of that game.
Prologue After the successful encirclement of the German 6th Army in Stalingrad by the Soviet Army,( See the AAR on Operation Uranus aaminis.myfastforum.org/ftopic39513-421.php ) it was decided to plan and execute a relief operation to get the beleagered German forces out of the encircled city.
Hampered by fuel shortages and the promise of Göring to resupply the closed in 6th Army, plans were made to relieve the encircled forces in Stalingrad. Preparations were already so far advanced that only OKH approval was needed. On 22 November 1942 Hitler had decided that Stalingrad was to be kept at all cost, in order to enable the conservation of the oilfields in the Caucasus and the whole Don basin.
When it became clear that the Luftwaffe was unable to sustain the beleagered troops, the 4th panzer armee planned a relief operation. This operation was named UNTERNEHMEN WINTERGEWITTER ( Operation Winter Storm.)
Conditions for the 4th Panzer Armee improved when on 10 December 1942 it started to freeze and German armour was able to maneuver more freely across the plains. Not wanting to lose the initiative, Hoth decided to engage with the available forces, not waiting on the 17th and 23rd Panzer Division to arrive in full strength. It was up to the 6th Panzer Division to enable the break out of the German forces in Stalingrad.
AAR For this scenario we used regular AAM maps ( of the Eastern Front Expansion) 14 and 15 with some additional snowdrifts. The three objectives were placed diagonally across the field, under observation of the Soviet forces. The basic rules were used, and 3D terrain added to give a little spice to the maps. The Germans ( on the Left side) advance to the North (on the right side, where the Red Army started behind the river for deployment) The white hexes are snowdrifts from AAM.
Toyama’s Red Army consisted of the following miniatures
Pendragons 6th Panzer Division’s composition (NOTE: All Pz IV mini’s were used as the same tank)
Having the (also historical) intitiative, the Soviet forces were forced to start deploying, and their armour crossed the bridge in the small village. Using the cover of the treeline in the East, they started a flanking maneuvre to deny access to the NE and central objectives. Luckily the majority of Soviet forces managed to cross the river.The Germans deployed afterwards, having their Panzer IV’s abreast, just outside the range of the Soviet heavy armour. Making excellent use of the extended range of their guns, the German armour was very lucky and managed to destroy both Soviet Heavy tanks ( a KV-1 and a KV-2) The Soviets pressed on with their T-34 and T-70’s towards the center and south objectives, supported by their Cavalry. Having blunted the Soviet counter attack by killing the two heavies, the Germans carefully deployed their infantry forces and spotters on the flanks, in order to start to approach the objectives.
Hindered by the remaining tanks, the German forces took the nearest (SW) objective, feeling the hot breath of the Soviet cavalry and a pesky T-70 in their necks. Holding the line against the Soviets, the German infantry got support by the two Panzer III’s trying to outmaneuver the T-70. Meanwhile, the NE objective was firmly under control of the Soviet Army.
To counter the Soviet threat at the Eastern flank, a Panzer IV managed to drive into the brushes, taking their aim at the T-70 which was inflicting damage to the MG-team, suppressed and having trouble fighting off the Red Army infantry
Finally able to use the support of their artillery, the Germans used their infantry guns to take out the Soviet support weapons, combined with the long-range shots of the Panzers. Slowly taking out the high-value targets, the attrition of the Red Army forces started to mount.
Pressed on by the urge of the Kommisars, aware that the German attack had to be stopped, a desparate attack on the central objective was mounted, the infantry making good use of the cover provided by the snowdrifts, and in close support of the ZIS- guns. With the SW objective firmly under German control, and the NE one under Soviet control, the fight started to focus around the exposed Central objective.
Making effective use of the smoke, a Panzer III managed to occupy it and the other German forces halted the Soviet attack sufficiently to capture also the second objective.
In the mean time, the Soviet guns managed to take out two Panzer IV’s on the Eastern flank, preventing the Germans to successfully capturing the final NE objective, a valiant dash by the second Panzer III resulting in a carnage of mangled steel of wrecked Half-tracks and a burning tank, but the objective still firm under Soviet control
An Axis ( albeit a last ditch) Victory
Epilogue After fierce fighting, the 6th Panzer Division managed to get within 48 km to Stalingrad. Exhausted suffeiring from depleted fuel reserves and fatigue caused by the Soviet stubborn defense knowing they had to hold the line to keep the encirclement in place, the 6th Panzer Division, supported by the 17th and the 23rd panzer divisions did not succeed in relieving the encircled forces. On 23 December 1942 the remaining forces pulled back to regroup and recover, abandoning the 6th Army in Stalingrad, under great pressure of another Soviet counter attack, threatening the German forces in the Caucasus .
The loss of the 6th Army cost the German army precious resources in men and materiel, and this now is regarded the turning point of the war at the Eastern Front.
Unable to contain the Soviet advance, the German army had to retreat the Caucasus, leaving behind the oilfields, a strategic loss for Germany, causing great influence not only for the German army, but also for the Kriegsmarine and the Luftwaffe.
Now the only oilfields available to Germany were the Rumanian oilfieds at Ploesti
The same day as the Enemy at the Gates scenario, Toyama and i played a totally different kind of wargame, to reflect an incident named: The Battle of Brisbane
Prologue.
During WWII, US forces were stationed in Australia for deployment in the Pacific. The influx of so many young soldiers caused unrest amongst the local population. The battle of Brisbane was caused by a minor incident, where an US soldier who had visited the Australian canteen had trouble to show his leave pass to a US MP, upon which his newly found Australian friends started to attack the MP.
Soon after, a group of circa 100 Australian soldiers tried to storm the American PX where the MPs were hiding for the Australians. Unrest spread trough the city, and it is estimated that ca. 2000-5000 soldiers were involved in fights and riots through the city. Although weapons arrived at the scene, stolen from a truck, a number of hand grenades and weapons were confiscated by NCO, preventing a further escalation.
In the end the PX was smashed to pieces and in the brawl a shotgun was fired three times, killing one Australian soldier and wounding 6 others, next to hundreds of soldiers with bruizes, black eyes and other minor injuries.
Riots continued the next evening, resulting in 21 US soldiers wounded.
For this replay we used the AGGRO rule set, designed for 1970’s football hooligan situations. The rule set is developed by Ainsty Castings in the UK and uses two decks of regular playing cards to play the game. Instead of hooligans we used AAM mini’s.
Bottom line is to gain as much as possible Street cred which can be won by outsinging the opponent’s crew, throwing missiles at them or get into a brawl during a game of seven rounds.
Both US and Australian gangs have a similar structure: three groups with in total 1 guv’nor, 5 geezers and 11 lads.
The US gang
The Aussie gang
All terrain: Toyama's Warbases and others
AAR both gangs converge towards each other
Both gangs deployed from their respective sides, advancing towards each other. The American gang deployed in a wide line, spread over town, where the Australians stayed close to each other. Soon the Australians started to chant, singing songs which lyrics would be unsuitable for this forum, to intimidate the Americans. This singing fueled the anger of the US soldiers and soon one group of US soldiers stormed to an Australian group for a brawl. That group was taken on by a second Australian group, unleashing a rain of bricks, bottles and anything else that could be thrown, causing some American soldiers to leave the area.
US group reduced and fled (bottom left)
Soon the entire Australian crew was picking on a single US group and, inspired by their guv'nor were singing, throwing stones and even getting into a brawl with them. Not long after that started, the American group retreated with bloodied noses out of reach of the Aussies who turned their attention on the second US group who effectively fought off one Aussie group.
"Dang Sarge, those yanks have a darn good aim"
Without a flinch the Australians continued to throw missiles and kept singing, supported by their large repertoire of songs of dubious level, pressing the Americans further in a corner and increasing massively their street cred as a result. ( one more reason American Football is for wussies ;D )
An Aussie victory, due to their experience in Rugby and singing in the third half of the match. (no Axis or Allied victory due to the nature of the game)
Epilogue.
As a result for the riots, units were moved from Brisbane, the Australian canteen was closed, and the US Post Exchange was relocated.
Unrest about the presence of soldiers happened also in the UK and after the war in the liberated countries. Often bored, well fed and well-supplied these soldiers were attractive to the young women in their environment. This to the dissent of the local young men who saw their potential wives being swept away by the appearance of the Allied soldiers.