

Post by armchair general on May 24, 2017 12:51:42 GMT
[NOTE: This is part of the continuing project to migrate as many scenarios as possible from the original Forum to the new one before they're gone. Any assistance and/or comments are always welcome!!]

Sherman Tank - 1st Polish Armoured Regiment,
C-squadron of the 1st Polish Armored
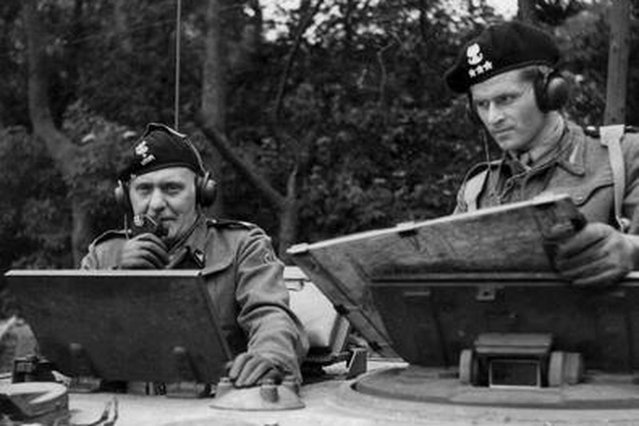
General Maczek (on the left)
[Originally posted by Bean965 on July 29, 2009]
It looks like my Falaise Pocket scenarios are going to get finished in reverse chronological order...
Mazcek on the Mace
The Falaise Pocket, northeast of Chambois, August 20, 1944, 1500 hours
Introduction
In mid-August, the Allies had German forces in Normandy surrounded on three sides and were mounting a vigorous offensive to complete an encirclement of the 7th German Army. On August 18, Major-General Stanislaw Maczek, the seasoned commander of the 1st Polish Armored Division, was ordered to advance to Chambois and link up with US forces, a movement that would close the “Falaise Pocket.”
Maczek had already fought his way through determined resistance by the 2nd SS Panzer Division “Das Reich" on his way to Trun, so when ordered to advance on Chambois, the former Mountain Infantry Officer carefully considered the terrain. He saw the high ridgeline of Hills 262 North and 262 South on his map and knew immediately that it wawould make a good defensive position. He dubbed this pair of hills “the Mace” because he thought the contour lines on the map resembled the outline of this medieval weapon. Polish forces reached these heights on August 19. Cut off from their supply lines, from their Canadian brothers-in-arms to the north, and having not linked up with US forces to the South, the Poles nonetheless spent their first day on the Mace wreaking havoc on German forces fleeing east by shelling their columns on nearby roads from their vantage point on the Mace.
Things began to get hot for Mazcek and the 1st Polish Armored Division on August 20. All day the Poles endured mortar, rocket and artillery fire, as well as attacks from various German units, both unorganized attacks from units simply attempting to escape the Pocket and the planned efforts of the 2nd SS Panzer Corps attacking from the east in an effort to keep an escape route open. The 1st Polish Armored Division fought a vicious day-long battle in the trees and brush of the Mace, fending off no fewer than four organized and determined assaults on their position from several directions. These attacks included a nigh-suicidal attack by the 3rd Paratroop Division from the northwest on the steep western ridge of the Mace and an attack from the east in which Panthers and Shermans fought literally barrel to barrel across the bocage. In this last attack the Germans nearly succeeded in rolling up the Poles' defensive lines.
While Mazcek’s choice of terrain and tactics, as well as the courage, skill and ferocity of his soldiers cannot be doubted, he was also lucky that many of the German attacks on the Mace were uncoordinated and unorganized, coming as they were from forces attempting to escape encirclement. Would the outcome have been different had the Germans fought differently? This scenario offers the opportunity to explore this question through the opportunity for the German player to determine the timing of the attack of the 3rd Paratroop Division in relation to the main German attack from the east.
Map Arrangement:
From right to left: North Africa map F2 with the pond hex in the lower left hand corner, North Africa Map F3 with the water hexes to the left and North Africa map F1 folded in half lengthwise (revealing two swamp ½ hexes on the left edge) and placed such that the left edge of F2 overlaps F1 by two hexes (thereby bisecting the single forest hex).
Several changes are necessary to the terrain on the maps. Firstly, all jungle terrain should be treated as brush. Secondly, the water ½ hexes should be treated as the same terrain as the ½ hexes they adjoin on map F1. The hex sides in with the brown/tan “beach” coloring on map F3 constitute bluff hexes. All hill hexes on maps F2 and F3 are treated as clear terrain. 11 hedge hex sides and 14 road hexes must be added to the map arrangement. Four objective hexes are located in the upper right hand quarter of map F3. Refer to the diagram for placement of this additional terrain and location of objective hexes, downloadable from:
www.mediafire.com/?http://...2d7274adad4a695b0b16e5c9d3b204475
Half hexes are in play in this scenario.
Forces
1st Polish Armored Division:
2nd Armored Regiment, 3rd Squadron
Cromwell x2 44 pts
8th Infantry Battalion
Polish Captain (Proxy: Italian Stalwart Lieutenant) x1 06 pts.
Polish Light Machine Gunner (Proxy: Bren w/ SA “Coordinated Fire” [US M1 Garand]) x1 06 pts
Determined Infantryman x1 04 pts
Polish Mauser x2 06 pts
1st Armored Regiment, 2nd Squadron
Sherman Firefly x1 24 pts
Sherman x2 42 pts
9th Infantry Battalion
Polish Captain (Proxy: Italian Stalwart Lieutenant) x1 06 pts.
Polish Light Machine Gunner (Proxy: Bren w/ SA “Coordinated Fire” [US M1 Garand]) x1 06 pts
Determined Infantryman x1 04 pts
Polish Mauser x2 06 pts
1st Anti-Tank Battalion w/ attached elements of the 9th Infantry Battalion
Entrenched Anti-Tank Gun x2 14 pts.
40 mm Bofors L60 x1 09 pts
Polish Mauser x2 06 pts.
TOTAL x22 183 pts
German:
Elements of the 3rd Paratroop Division
Wehrmacht Veteran Infantryman x5 25 pts
7.5cm LEL G18 x1 07 pts
Elements of the 12 SS Panzer “Hitlerjugend” Division, 12th SS Panzer Regiment with Elements of the 26th SS Panzergrendier Regiment
SS Panther Ausf. G x1 42 pts
Panther Ausf. A x1 37 pts
Panzergrenadier x2 08 pts
Elements of the 2nd SS Panzer “Das Reich” Division
Panzer IVG x2 26 pts
StuG Ausf D x1 15 pts
Panzerjager Bren x1 12 pts
Elements of the 4th SS Panzergrenadier Regiment “Der Fuhrer”
SS Panzergrenadier x1 07 pts
Panzergrenadier x2 08 pts
Sd Kfz 250 x1 06 pts
MG 42 Machinegun Team x1 10 pts
Disciplined Spotter x1 06 pts
sGrW 34 81mm Mortar x1 11 pts
TOTAL x21 220 pts
Set-Up
Polish forces set up first:
2nd Armored Rgt., 3rd Squadron plus 8th Infantry Battalion: anywhere on the upper left hand quarter of map F2
1st Armorer Rgt., plus 9th Infantry Battalion: anywhere on the bottom quarter of map F3
1st Anti-Tank Rgt., plus attached elements of the 9th Infantry Battalion: anywhere on the upper left quarter of map F3
German set-up:
12 SS Panzer “Hitlerjugend” Division, 12th SS Panzer Regiment with elements of the 26th SS Panzergrendier Regiment; 12 SS Panzer “Hitlerjugend” Division; 12th SS Panzer Regiment with elements of the 26th SS Panzergrendier Regiment and 4th SS Panzergrenadier Regiment “Der Fuhrer”: anywhere on the right hand (eastern) edge of map F2
3rd Paratroop Division enters on to any of the first row of hexes on the western edge of the map in the German player’s movement phase on any turn of the German player’s choice.
The German player must go first on turn 1.
Victory Conditions
The game lasts seven turns. At the end of seven turns, victory is determined as follows: Germans occupying 2 or more objective hexes uncontested = Major German Victory. Germans occupying at least 1 objective hex uncontested, PLUS occupying one or more contested objective hexes OR occupying 3 or more contested objective hexes = Minor German Victory. Germans occupying only one uncontested, OR 1-2 contested objective hexes = Minor Polish Victory. Germans occupying no objective hexes = Major Polish Victory.
Balancing the Scenario
Note: This is a difficult scenario for the Germans. Two play tests resulted in one minor German victory and one major Polish victory.
In the Allies’ favor:
Substitute one Sherman VC Firefly for one Cromwell
and/or
Substitute one or two Determined Infantrymen for Polish Mausers
In favor of the Axis:
Substitute an SS Panther Ausf. G for the Panther Ausf. D.
and/or
Remove one Entrenched Anti-tank Gun from the Polish forces.
Final Notes:
The 1st Polish Armored Division was instrumental in closing the Falaise Pocket on the Mace and in Chambois. Closing the pocket was a considerable military achievement, even though German forces were still able to escape the pocket after 20th August, notably across a ford on the River Dives at Moissy. Military historians have argued whether the incomplete closure of the Pocket was a botched opportunity to crush the entire German army in Normandy; whatever one’s opinion, the Allies execution of the Falaise Pocket handed the Germans a sharp defeat in Normandy.
Source material: Battle Zone Normandy Series: Road to Falaise, by Stephen Hart, and Battle Zone Normandy Series: Falaise Pocket, by Paul Latawski.
Play testing thanks go to Geoteach.
Sherman Tank - 1st Polish Armoured Regiment,
C-squadron of the 1st Polish Armored
General Maczek (on the left)
[Originally posted by Bean965 on July 29, 2009]
It looks like my Falaise Pocket scenarios are going to get finished in reverse chronological order...
Mazcek on the Mace
The Falaise Pocket, northeast of Chambois, August 20, 1944, 1500 hours
Introduction
In mid-August, the Allies had German forces in Normandy surrounded on three sides and were mounting a vigorous offensive to complete an encirclement of the 7th German Army. On August 18, Major-General Stanislaw Maczek, the seasoned commander of the 1st Polish Armored Division, was ordered to advance to Chambois and link up with US forces, a movement that would close the “Falaise Pocket.”
Maczek had already fought his way through determined resistance by the 2nd SS Panzer Division “Das Reich" on his way to Trun, so when ordered to advance on Chambois, the former Mountain Infantry Officer carefully considered the terrain. He saw the high ridgeline of Hills 262 North and 262 South on his map and knew immediately that it wawould make a good defensive position. He dubbed this pair of hills “the Mace” because he thought the contour lines on the map resembled the outline of this medieval weapon. Polish forces reached these heights on August 19. Cut off from their supply lines, from their Canadian brothers-in-arms to the north, and having not linked up with US forces to the South, the Poles nonetheless spent their first day on the Mace wreaking havoc on German forces fleeing east by shelling their columns on nearby roads from their vantage point on the Mace.
Things began to get hot for Mazcek and the 1st Polish Armored Division on August 20. All day the Poles endured mortar, rocket and artillery fire, as well as attacks from various German units, both unorganized attacks from units simply attempting to escape the Pocket and the planned efforts of the 2nd SS Panzer Corps attacking from the east in an effort to keep an escape route open. The 1st Polish Armored Division fought a vicious day-long battle in the trees and brush of the Mace, fending off no fewer than four organized and determined assaults on their position from several directions. These attacks included a nigh-suicidal attack by the 3rd Paratroop Division from the northwest on the steep western ridge of the Mace and an attack from the east in which Panthers and Shermans fought literally barrel to barrel across the bocage. In this last attack the Germans nearly succeeded in rolling up the Poles' defensive lines.
While Mazcek’s choice of terrain and tactics, as well as the courage, skill and ferocity of his soldiers cannot be doubted, he was also lucky that many of the German attacks on the Mace were uncoordinated and unorganized, coming as they were from forces attempting to escape encirclement. Would the outcome have been different had the Germans fought differently? This scenario offers the opportunity to explore this question through the opportunity for the German player to determine the timing of the attack of the 3rd Paratroop Division in relation to the main German attack from the east.
Map Arrangement:
From right to left: North Africa map F2 with the pond hex in the lower left hand corner, North Africa Map F3 with the water hexes to the left and North Africa map F1 folded in half lengthwise (revealing two swamp ½ hexes on the left edge) and placed such that the left edge of F2 overlaps F1 by two hexes (thereby bisecting the single forest hex).
Several changes are necessary to the terrain on the maps. Firstly, all jungle terrain should be treated as brush. Secondly, the water ½ hexes should be treated as the same terrain as the ½ hexes they adjoin on map F1. The hex sides in with the brown/tan “beach” coloring on map F3 constitute bluff hexes. All hill hexes on maps F2 and F3 are treated as clear terrain. 11 hedge hex sides and 14 road hexes must be added to the map arrangement. Four objective hexes are located in the upper right hand quarter of map F3. Refer to the diagram for placement of this additional terrain and location of objective hexes, downloadable from:
www.mediafire.com/?http://...2d7274adad4a695b0b16e5c9d3b204475
Half hexes are in play in this scenario.
Forces
1st Polish Armored Division:
2nd Armored Regiment, 3rd Squadron
Cromwell x2 44 pts
8th Infantry Battalion
Polish Captain (Proxy: Italian Stalwart Lieutenant) x1 06 pts.
Polish Light Machine Gunner (Proxy: Bren w/ SA “Coordinated Fire” [US M1 Garand]) x1 06 pts
Determined Infantryman x1 04 pts
Polish Mauser x2 06 pts
1st Armored Regiment, 2nd Squadron
Sherman Firefly x1 24 pts
Sherman x2 42 pts
9th Infantry Battalion
Polish Captain (Proxy: Italian Stalwart Lieutenant) x1 06 pts.
Polish Light Machine Gunner (Proxy: Bren w/ SA “Coordinated Fire” [US M1 Garand]) x1 06 pts
Determined Infantryman x1 04 pts
Polish Mauser x2 06 pts
1st Anti-Tank Battalion w/ attached elements of the 9th Infantry Battalion
Entrenched Anti-Tank Gun x2 14 pts.
40 mm Bofors L60 x1 09 pts
Polish Mauser x2 06 pts.
TOTAL x22 183 pts
German:
Elements of the 3rd Paratroop Division
Wehrmacht Veteran Infantryman x5 25 pts
7.5cm LEL G18 x1 07 pts
Elements of the 12 SS Panzer “Hitlerjugend” Division, 12th SS Panzer Regiment with Elements of the 26th SS Panzergrendier Regiment
SS Panther Ausf. G x1 42 pts
Panther Ausf. A x1 37 pts
Panzergrenadier x2 08 pts
Elements of the 2nd SS Panzer “Das Reich” Division
Panzer IVG x2 26 pts
StuG Ausf D x1 15 pts
Panzerjager Bren x1 12 pts
Elements of the 4th SS Panzergrenadier Regiment “Der Fuhrer”
SS Panzergrenadier x1 07 pts
Panzergrenadier x2 08 pts
Sd Kfz 250 x1 06 pts
MG 42 Machinegun Team x1 10 pts
Disciplined Spotter x1 06 pts
sGrW 34 81mm Mortar x1 11 pts
TOTAL x21 220 pts
Set-Up
Polish forces set up first:
2nd Armored Rgt., 3rd Squadron plus 8th Infantry Battalion: anywhere on the upper left hand quarter of map F2
1st Armorer Rgt., plus 9th Infantry Battalion: anywhere on the bottom quarter of map F3
1st Anti-Tank Rgt., plus attached elements of the 9th Infantry Battalion: anywhere on the upper left quarter of map F3
German set-up:
12 SS Panzer “Hitlerjugend” Division, 12th SS Panzer Regiment with elements of the 26th SS Panzergrendier Regiment; 12 SS Panzer “Hitlerjugend” Division; 12th SS Panzer Regiment with elements of the 26th SS Panzergrendier Regiment and 4th SS Panzergrenadier Regiment “Der Fuhrer”: anywhere on the right hand (eastern) edge of map F2
3rd Paratroop Division enters on to any of the first row of hexes on the western edge of the map in the German player’s movement phase on any turn of the German player’s choice.
The German player must go first on turn 1.
Victory Conditions
The game lasts seven turns. At the end of seven turns, victory is determined as follows: Germans occupying 2 or more objective hexes uncontested = Major German Victory. Germans occupying at least 1 objective hex uncontested, PLUS occupying one or more contested objective hexes OR occupying 3 or more contested objective hexes = Minor German Victory. Germans occupying only one uncontested, OR 1-2 contested objective hexes = Minor Polish Victory. Germans occupying no objective hexes = Major Polish Victory.
Balancing the Scenario
Note: This is a difficult scenario for the Germans. Two play tests resulted in one minor German victory and one major Polish victory.
In the Allies’ favor:
Substitute one Sherman VC Firefly for one Cromwell
and/or
Substitute one or two Determined Infantrymen for Polish Mausers
In favor of the Axis:
Substitute an SS Panther Ausf. G for the Panther Ausf. D.
and/or
Remove one Entrenched Anti-tank Gun from the Polish forces.
Final Notes:
The 1st Polish Armored Division was instrumental in closing the Falaise Pocket on the Mace and in Chambois. Closing the pocket was a considerable military achievement, even though German forces were still able to escape the pocket after 20th August, notably across a ford on the River Dives at Moissy. Military historians have argued whether the incomplete closure of the Pocket was a botched opportunity to crush the entire German army in Normandy; whatever one’s opinion, the Allies execution of the Falaise Pocket handed the Germans a sharp defeat in Normandy.
Source material: Battle Zone Normandy Series: Road to Falaise, by Stephen Hart, and Battle Zone Normandy Series: Falaise Pocket, by Paul Latawski.
Play testing thanks go to Geoteach.